

In the realm of digital design, crafting eye-catching icons is both an art and a science. If you want to add a touch of creativity to your design portfolio or enhance your graphic design skills, creat
In the realm of digital design, crafting eye-catching icons is both an art and a science. If you want to add a touch of creativity to your design portfolio or enhance your graphic design skills, creating a super shiny pencil icon might be the perfect project for you.
The Pencil is one of the most commonly used visual metaphors to express creativity. This tutorial instructs you how to create a super shiny pencil icon. Our next step will be to examine gradients, selection tools, and basic transform operations. Come on, let's have some fun.
 Creating a super shiny pencil or pen icon might seem like a complex feat, but with the right guidance, you can dive into the world of digital design and craft your own. Here is the step-by-step guide look for:

 Icons have evolved from being mere decorations to powerful communicative tools. As an enthusiast looking to enhance your design prowess, focusing on creating a super shiny pencil icon can be an enlightening endeavor. The following are some benefits of creating pencil icons.
How to Create a Super Shiny Pencil Icon: Follow the Steps
Creating a super shiny pencil or pen icon might seem like a complex feat, but with the right guidance, you can dive into the world of digital design and craft your own. Here is the step-by-step guide look for:
Step 1: Setting up the Canvas
Begin by opening Adobe Photoshop and creating a new document. Set the canvas size to 950x600 pixels, with a resolution of 300 PPI and a white background. This blank canvas is where we'll craft our stunning pencil icon.
Step 2: Creating the Pencil Body
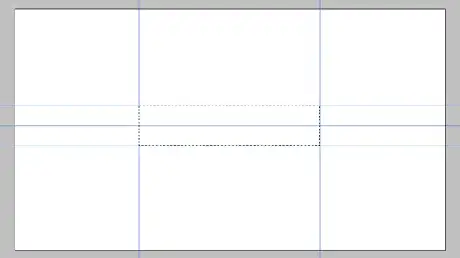
Now, it's time to create the main body of our pencil. To do this, use the rectangular selection tool to draw a 400x100-pixel rectangle. To ensure precise alignment, set up guides by dragging them from the ruler (if not visible, enable them through 'View' > 'Rulers'). After that, apply a "Steel Bar" gradient to a new layer named "Body."
Step 3: Enhancing Reflectivity
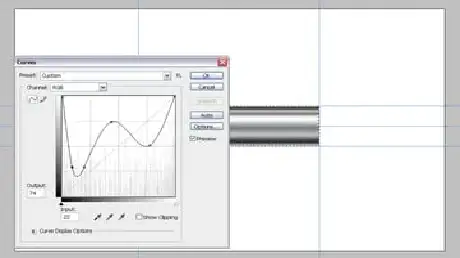
To enhance the reflectivity of our pencil, adjust the curves of the "Body" layer. This step will give the icon a more polished and three-dimensional appearance.Step 4: Adding Color and Opacity
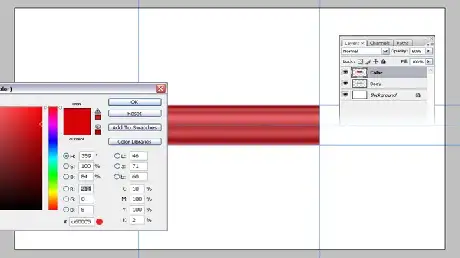
Create a new " Color " layer and set its opacity to 60%. Fill this layer with the color #d60005. This step adds a vibrant touch to our pencil icon.
Step 5: Creating the Metal Part
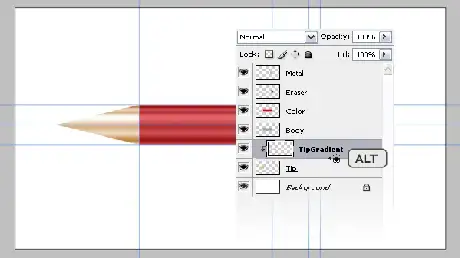
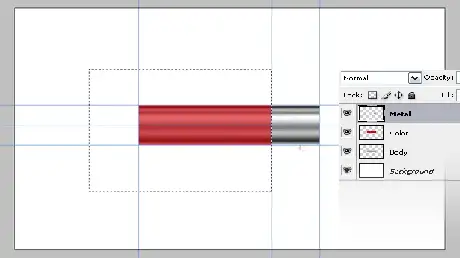
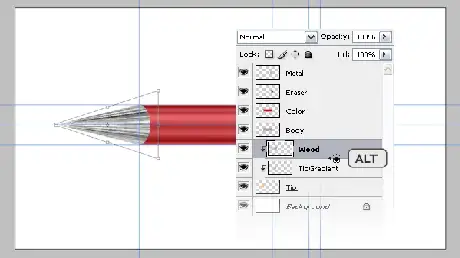
Create a duplicate of the "Body" layer and rename it "Metal." Apply perspective to this layer to make it look like the metallic part of a pencil. This change will add depth to our icon.
Step 6: Adding Texture and Details
Now, it's time to carve out and create bumps on the "Metal" part. Duplicate, merge, and style bump layers to make the texture appear more realistic.Step 7: Adding Shadows and Eraser
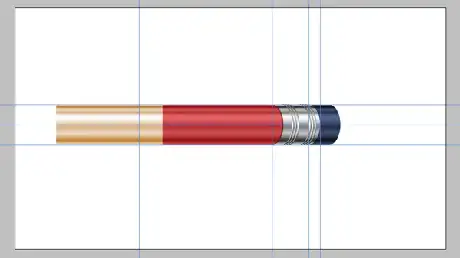
Create "Eraser" and "Shadow" layers to add shadowing and depth to the icon. These layers will make the pencil look as if it's casting a shadow on itself.
Step 8: Adding the Pencil Tip
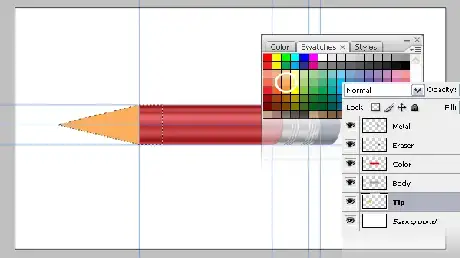
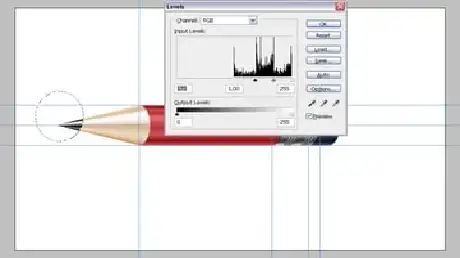
Create a new layer called "Tip" and apply a gradient to it. This will mimic the tip of the pencil. Apply perspective to the "Tip" layer to match the rest of the icon and carve out an elliptical area.
Step 9: Adding the Wood Texture
Create a "Wood" texture layer and apply perspective to match the angle of the pencil. Darken the tip and adjust the contrast to make it look like wood.Step 10: Merging Layers
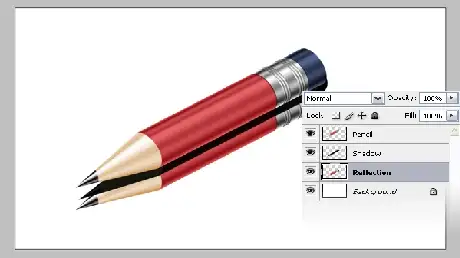
Merge all the layers into a single "Pencil" layer. Duplicate this layer for the "Reflection" and "Shadow" layers.Step 11: Adding a Slanted Appearance
Rotate the selection to give the pencil icon a slanted appearance, making it look more dynamic.
Step 12: Adding Depth with Gaussian Blur
Apply Gaussian Blur to the "Reflection" and "Shadow" layers to add depth and realism to the icon.Step 13: Creating a Gradient Mask
Create a gradient mask for the "Reflection" layer to control the intensity of the reflection effect.Step 14: Final Touches
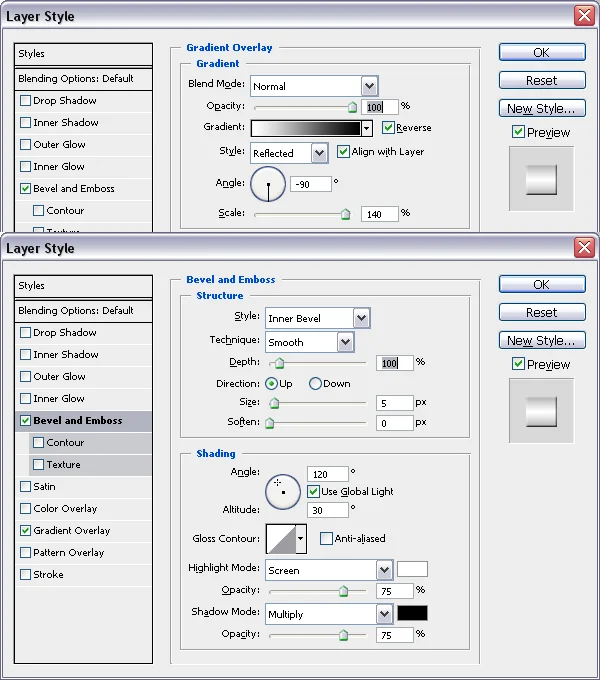
Apply Gradient Overlay to the "Pencil" layer to enhance its overall appearance. At this stage, feel free to customize and experiment with the icon to match your project's style and requirements.Step 15: Saving and Exporting
Finally, save and export your masterpiece to use it in your design project. Adobe Photoshop offers various export options to suit your needs.Why You Should Practice Creating a Super Shiny Pencil Icon?
Icons have evolved from being mere decorations to powerful communicative tools. As an enthusiast looking to enhance your design prowess, focusing on creating a super shiny pencil icon can be an enlightening endeavor. The following are some benefits of creating pencil icons.
-
Enhancing Skills Through Example
-
Device for Innovation
-
A Month of Dedication, Lifelong Skills
-
Fostering a Designer's Best Friend
-
A Print of Perfection
-
Text, Photos, and Beyond
-
A Year of Progress
-
Connecting Concepts, Crafting Content
-
Elevating Experience
-
Embrace the Date
-
A Care for Detail and Service
-
Mastering Accessibility
-
Level Up, Sell More
-
A Handcrafted Mindset
-
Time and Location Transcended
-
Track Your Progress
-
In Addition to Designing
-
A Place in Design's Tapestry
-
Terms of Artistry
-
The English of Visuals
-
Search No More
-
Accessing the Design Sanctuary
-
Welcoming Home Creativity
