


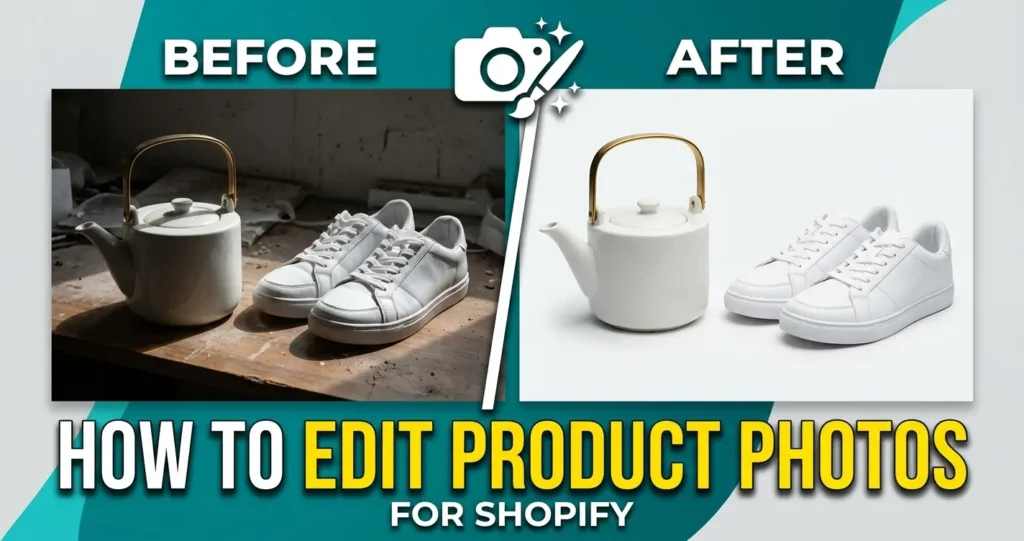
You set up your Shopify store. You uploaded your products. And then you looked at your photos.
Maybe the background was cluttered. The lighting was off. Or the product looked small and lost inside the frame.
Here’s the honest truth: a bad product photo will cost you sales — no matter how good the product actually is.
Research from the Baymard Institute shows that product images are the most-examined element on any product page. In the USA, UK, and Canada, where online shopping is routine and competition is fierce, shoppers make split-second visual judgments. Your photo either earns their attention or loses it.
The good news? You don’t need a professional studio to fix this. You just need the right process.
This guide walks you through exactly how to edit product photos for Shopify — from Shopify’s technical requirements all the way to professional finishing techniques. Whether you’re editing in-house or outsourcing, this is your complete reference.
Why Product Photo Editing Matters More Than You Think
Before we get into the how, let’s be honest about the stakes.
A 2023 Shopify study found that stores with high-quality, consistent product images saw conversion rates 9–40% higher than those with unedited or mismatched photos.
Think about what that means for a store doing $5,000/month. Better photos could be worth an extra $450–$2,000 every single month — without changing your product, your price, or your ad spend.
And it’s not just conversions. Product photos affect:
- Return rates — unclear images lead to mismatched expectations
- Brand trust — inconsistent or amateurish photos suggest low quality
- SEO — optimized image file names and alt text help your products rank in Google Shopping
- Social sharing — clean images perform better on Instagram, Pinterest, and TikTok
The edit is not just cosmetic. It’s commercial.
Shopify’s Official Product Image Requirements (2026)
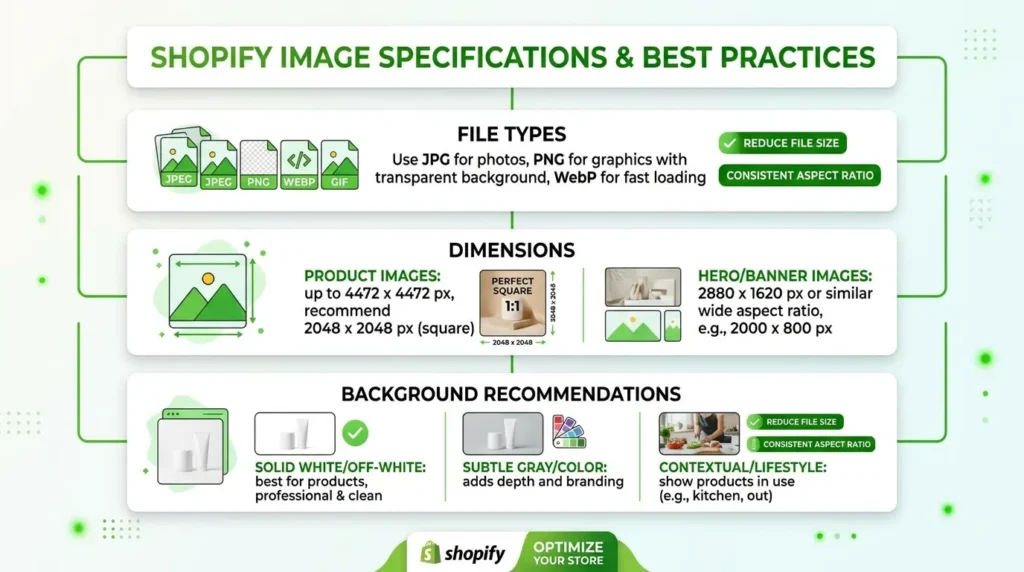
Before you edit a single photo, know the technical rules. Shopify has specific requirements — and breaking them creates real problems.
| Requirement | Shopify Specification |
|---|---|
| Recommended resolution | 2048 × 2048 px (square) |
| Minimum resolution | 800 × 800 px |
| Maximum file size | 20 MB |
| Accepted file formats | JPEG, PNG, GIF, WebP |
| Background | White preferred (RGB 255/255/255) |
| Product area | Product should fill 85–90% of the frame |
| Zoom feature | Requires 800 px or higher on shortest side |
Key points to remember:
- Square format (1:1 ratio) is strongly recommended. It looks better in product grids and mobile views.
- White backgrounds make your store look clean and professional. They also match how products appear on Google Shopping.
- JPEG works for most products. PNG is better when you need a transparent background.
- Shopify automatically compresses images over 20MB — but this reduces quality. Always compress manually first.
What Tools Can You Use to Edit Product Photos?
You have three main options. Each suits a different budget and skill level.
Option 1: Adobe Photoshop (Professional Standard)
Photoshop is the industry standard for a reason. It handles everything — background removal, color correction, shadow creation, retouching — with precision that automated tools simply can’t match.
Best for: Jewelry, fashion, complex products with fine edges (hair, fur, glass).
Cost: ~$22/month (USA/UK/Canada pricing as of 2026)
Skill level: Intermediate to advanced
Option 2: AI Background Removal Tools (Fast, but Limited)
Tools like Remove.bg, Canva, and Adobe Express use AI to cut out backgrounds automatically.
They work reasonably well for simple, solid-colored products on clean surfaces. But they frequently fail on:
- Transparent products (glassware, bottles)
- Products with fine edges (lace, jewellery chains)
- Products where colors blend with the background
- Anything requiring professional consistency across 100+ images
Best for: Quick single-image edits for simple products
Cost: Free to ~$13/month
Skill level: Beginner
Option 3: Professional Outsourcing (Best Results at Scale)
For Shopify stores with 50+ products — or any store where image quality is a real competitive differentiator — outsourcing to a professional image editing service is the most practical and cost-effective choice.
You get Photoshop-quality editing, consistent results across your entire catalog, and turnaround times that are faster than doing it yourself.
We’ll come back to this later in the guide.
Step-by-Step: How to Edit Product Photos for Shopify
Here’s the full editing workflow — from raw photo to Shopify-ready image.

Step 1: Start With the Best Raw Photo You Can Get
Editing can improve a photo. It cannot fix a fundamentally broken one.
Before you even open an editing tool, make sure your source image has:
- Good lighting — natural light near a window, or a simple lightbox setup
- High resolution — shoot at full camera resolution (at least 12MP)
- Stable framing — use a tripod or flat surface to prevent blur
- Clean, contrasting background — light gray or white makes background removal much easier and cheaper
- Product correctly positioned — centered, upright, and filling most of the frame
The better your raw image, the less editing time (and cost) it takes.
Step 2: Crop and Frame Your Product Correctly
Shopify’s grid layout looks best when all your product images share the same dimensions and framing style.
Follow this standard:
- Crop to square (1:1) for most product categories
- Leave 5–10% padding around the product on all sides
- Center the product both horizontally and vertically
- Keep consistent framing across all images in the same collection
Inconsistent framing is one of the most common mistakes new Shopify sellers make. If one product fills 80% of the frame and another fills 50%, your store grid looks amateur. Consistency is everything.
Step 3: Remove the Background
This is the most important edit for most Shopify products.
A pure white background does three things:
- Puts all visual focus on the product
- Meets Shopify and Google Shopping standards
- Makes your store look clean and professional
How to do it in Photoshop:
- Open your image in Photoshop
- Duplicate the background layer (Ctrl/Cmd + J)
- Use the Object Selection Tool to select your product
- Refine the selection with Select and Mask — especially around edges
- Add a Layer Mask to hide the background
- Add a new white fill layer beneath
- Export as JPEG (for white background) or PNG (for transparent)
For products with fine edges — jewellery, fur-trimmed clothing, lace fabrics — the manual Pen Tool gives cleaner results. This is where professional clipping path services genuinely outperform any automated approach.
💡 Pro Tip: Always keep a transparent PNG version of your product. It gives you flexibility for future marketing, social media, and ad creatives — without needing to re-edit.
Step 4: Color Correct Your Images
Even with good lighting, cameras don’t always capture colors accurately. A navy blue product can photograph as purple. A warm-white product can look yellow.
Color correction steps:
- Adjust White Balance — neutralize any color cast (too warm or too cool)
- Set Levels/Curves — increase contrast without blowing out highlights
- Boost Saturation slightly — make colors look vibrant but true-to-life
- Check against physical product — hold your screen next to the real item
One critical rule: never make colors look better than they actually are. Inaccurate color leads to returns. And in the UK and Canada, where consumer return expectations are high, that directly impacts your margins.
Step 5: Clean Up and Retouch
Now remove anything that doesn’t belong in the image.
Common retouching tasks:
- Dust, lint, or fingerprints on the product
- Small scratches or manufacturing imperfections on packaging
- Stray hairs or threads on clothing
- Reflections on shiny surfaces (watches, glasses, metalware)
- Minor blemishes on food or beauty products
In Photoshop, the Spot Healing Brush and Clone Stamp handle most of this. Work at 100% zoom to catch everything.
For jewelry specifically — rings, necklaces, earrings — this step is critical. Tiny scratches and dull surfaces that barely show in real life become very visible at high resolution. Professional jewellery retouching can restore sparkle and sharpness that a camera alone can’t capture.
Step 6: Add Shadows (Optional but Powerful)
Flat-looking product photos with no shadow feel fake. A natural drop shadow or reflection shadow grounds the product visually and makes it feel real.
Types of product shadows:
| Shadow Type | Best For | Effect |
|---|---|---|
| Drop shadow | Most products | Subtle depth, looks grounded |
| Natural shadow | Lifestyle/organic products | Authentic, slightly angled |
| Reflection shadow | Electronics, footwear | Mirror-like reflection beneath product |
| Cast shadow | Furniture, large items | Directional light simulation |
A well-placed shadow makes the product look like it’s sitting in a real space — not floating on a white canvas. This is especially effective for USA and UK audiences accustomed to premium brand photography.
Professional shadow creation gives you full control over angle, intensity, and blur — which is difficult to replicate manually without experience.
Step 7: Export Correctly for Shopify
The final step is often rushed — and that’s a mistake.
Export settings for Shopify:
- Format: JPEG for white-background images. PNG for transparent-background images.
- Dimensions: 2048 × 2048 px (square) is ideal. Never go below 800 × 800 px.
- File size: Aim for 100–500 KB. Use tools like Squoosh or TinyPNG to compress without visible quality loss.
- Color mode: RGB (not CMYK — Shopify displays RGB)
- File naming: Use descriptive names:
blue-cotton-tshirt-front.jpgnotIMG_4521.jpg
💡 Pro Tip: Shopify has a built-in image optimizer, but it’s not aggressive. Always manually compress your images before uploading. Smaller files = faster page loads = better SEO rankings and better user experience on mobile.
Editing Different Product Types: Special Considerations
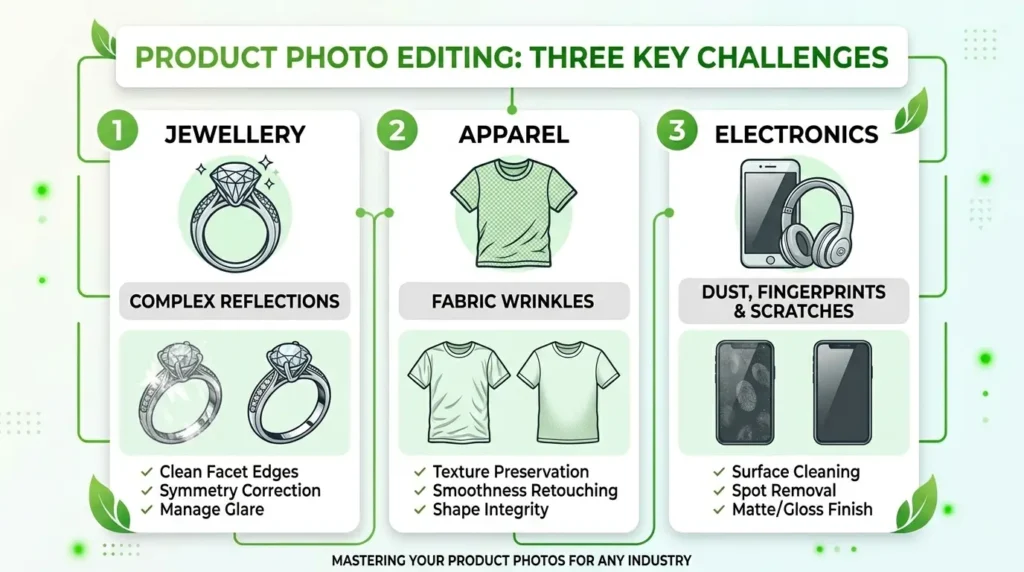
Not every product is the same. Here’s what to know by category:
Apparel and Clothing
The biggest challenge with clothing is showing how it actually fits and drapes. Flat-lay photography is popular, but mannequin shots convert better because they show shape.
The ghost mannequin technique — removing the model or mannequin from the image while keeping the clothing shape intact — is widely used by UK and US fashion retailers. It creates a 3D effect without a visible mannequin, which looks clean and professional.
Ghost mannequin editing requires combining multiple shots (front, back, inside collar) in post-production. It’s time-intensive but delivers results that flat-lay simply can’t match.
Jewelry and Accessories
Jewellery photography is the hardest category to edit well. Rings and necklaces have tiny reflective surfaces, fine chains, and gemstones that need to catch light correctly.
The editing checklist for jewelry:
- Remove all fingerprints and surface marks
- Enhance gem sparkle with selective highlights
- Use image masking for fine chain links — the Pen Tool alone won’t handle these cleanly
- Maintain metal color accuracy (gold should look gold, not yellow)
Electronics and Tech Products
Electronics often have reflective surfaces that create unwanted glare. They also have logos, ports, and fine text details that must remain sharp and legible.
Editing priorities:
- Remove reflections without losing the natural sheen of the product
- Keep screen displays clearly visible
- Use a subtle drop shadow to prevent floating appearance
- Match background brightness to the product’s tone (dark products often look better on off-white rather than pure white)
Transparent/Glass Products
This is where AI tools fail almost completely. Glass, perfume bottles, and clear packaging require manual masking to preserve the see-through quality while removing the original background.
Background removal for transparent products is genuinely one of the most skilled areas of product image editing. The technique preserves the glass texture while cleanly isolating the product on white.
Editing Product Photos for Shopify: In-House vs. Outsourcing
This question comes up constantly, especially as Shopify stores scale in the USA, UK, and Canada.
| Factor | In-House Editing | Professional Outsourcing |
|---|---|---|
| Cost per image | $2–$15 (your time) | $0.25–$1.50 |
| Quality ceiling | Limited by your skill | Photoshop-expert level |
| Consistency | Varies | Standardized across catalog |
| Turnaround | Hours to days | 6–24 hours |
| Scale | Limited | 100–10,000+ images/day |
| Best for | <20 simple images | Any serious eCommerce operation |
For stores with fewer than 20 simple products and a limited budget, learning the basics in Canva or Photoshop is a reasonable starting point.
For any store that’s growing — or any category where image quality directly affects purchase decisions (fashion, jewellery, beauty, home goods) — professional editing is the smarter investment.
A complete eCommerce photo editing solution typically covers background removal, clipping, color correction, retouching, and shadow creation in a single workflow — saving significant time and producing consistent results that in-house editing rarely matches.
Common Shopify Product Photo Mistakes (And How to Avoid Them)
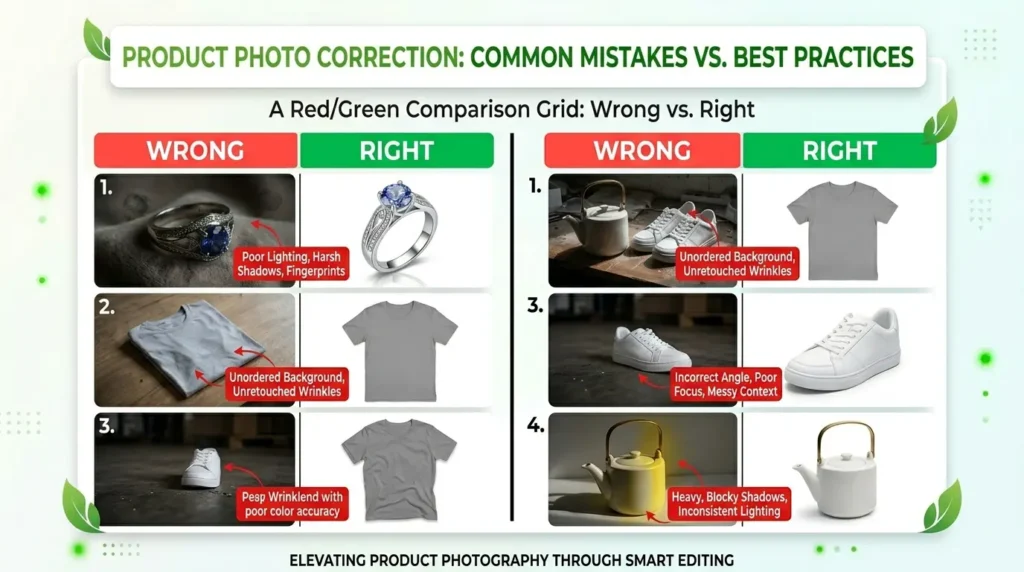
These are the errors that show up again and again on Shopify stores across the USA, UK, and Canada:
❌ Mistake 1: Using photos straight from your phone Raw phone photos have inconsistent white balance, often incorrect aspect ratios, and files too small to allow zoom. Always edit before uploading.
❌ Mistake 2: Mixing image styles Some white background, some lifestyle, some flat-lay — all on the same product page. This creates a disjointed experience. Pick one primary style and stick with it.
❌ Mistake 3: Uploading uncompressed large files A 6MB JPEG might look identical to a 200KB version to the human eye — but it loads much slower. Page speed directly affects both conversion rate and Google ranking.
❌ Mistake 4: Wrong aspect ratio Shopify displays product grids best with square images. Portrait or landscape images display inconsistently and look amateur in mobile views.
❌ Mistake 5: No zoom-friendly resolution If a customer can’t zoom in on your product, you’ve removed a key trust-building moment. Always upload at 2048 × 2048 px minimum.
❌ Mistake 6: Inaccurate colors Over-saturating reds, over-brightening whites — these edits make products look unrealistic. When the product arrives and looks different, returns follow.
How Many Product Images Does a Shopify Listing Need?
Shopify allows up to 250 images per product. But how many should you actually use?
The answer depends on the product — but here’s a general guide:
| Product Type | Recommended Images |
|---|---|
| Simple product (single color, small) | 3–5 |
| Apparel (multiple angles + detail) | 5–8 |
| Jewelry | 4–6 (including macro/close-up) |
| Furniture or large items | 6–10 |
| Products with color variants | 3–4 per variant |
The first image (your thumbnail) is the most important. It’s what appears in collection grids, Google Shopping, and social sharing previews. Get this one perfect before worrying about the rest.
Tips for Faster Product Photo Editing
Speed matters, especially if you’re managing a large catalog.
Build a Photoshop action set. Record your most common editing sequence (crop, white balance, levels, export) as a Photoshop Action. Then batch-process 50 images in minutes.
Create a template document. Set up a 2048 × 2048 canvas with your standard guides, background layer, and export settings saved. Drag each new product in, make the edits, export. Consistent every time.
Edit in batches by product type. Don’t mix clothing edits with jewelry edits in the same session. Each category has different settings. Group them together.
Use Lightroom for bulk color correction. Lightroom’s sync feature lets you apply the same color correction settings to 100 images in one click. Photoshop for detailed work, Lightroom for bulk adjustments.
Know when to outsource. If your hourly rate is $50 and it takes you 20 minutes to edit one image, you’re spending $17 per image on your own time. Most professional services charge under $1 per image. The math usually favors outsourcing.
The Role of Multi-Path Editing in Shopify Color Variants
One underused technique for Shopify sellers is multi clipping path editing.
If you sell a product in multiple colors — say, a handbag in red, black, and tan — you don’t need separate photoshoots for each variant.
With multi-path editing, each color zone of the product is isolated on its own path. Individual areas can then be recolored digitally — accurately and consistently — without another photography session.
This saves significant time and cost on photoshoots. It also guarantees color consistency between your product images and your product variants, which reduces buyer confusion and returns.
For Shopify stores with large variant catalogs, this is one of the highest-ROI editing techniques available.
Shopify Product Image SEO: Don’t Skip This
Editing the image itself is only half the job. How you add it to Shopify determines whether it helps your SEO.
Follow these steps every time you upload:
- Rename the file before uploading Use descriptive, keyword-rich names:
red-leather-wallet-front-view.jpg, notDSC00312.jpg - Write meaningful alt text in Shopify Go to Products → [Your product] → scroll to the image → click “Edit alt text” Write something like: “Red leather bifold wallet — front view” This is read by both Google and screen readers.
- Use WebP format where possible Shopify now supports WebP, which is smaller than JPEG at the same quality. Faster load = better ranking.
- Don’t stuff keywords in alt text Write for humans. Describe what’s actually in the image.
- Check your Page Speed score After uploading, run your product page through Google PageSpeed Insights. If images are flagged, compress further.
When to Consider Professional Photo Editing Services
There’s a point in every Shopify store’s growth where doing your own photo editing stops making sense.
That point is usually when:
- You have more than 50 products to photograph and edit
- You’re launching a new collection with tight deadlines
- Your current images are inconsistent and affecting conversions
- You’re expanding into a competitive category (fashion, jewelry, beauty)
- You’re running paid ads and need images that convert
Professional photo retouching services handle everything from basic background removal to complex composite editing. For Shopify sellers in the USA, UK, and Canada, where competition is intense and buyer expectations are high, this is often the smartest way to scale.
The cost is low. The turnaround is fast. And the quality difference — compared to self-edited images — is usually visible immediately.
Frequently Asked Questions
What size should product images be for Shopify? Shopify recommends 2048 × 2048 pixels in a 1:1 square format. The minimum for the zoom feature to work is 800 × 800 pixels. Keep file sizes under 500KB after compression.
Can I use Canva to edit Shopify product photos? Yes, for basic tasks like cropping, adjusting brightness, and adding text overlays. However, Canva is limited for background removal on complex products and doesn’t match Photoshop quality for precision editing.
Do Shopify product photos need to be on a white background? Shopify doesn’t strictly require white backgrounds, but it strongly recommends them. White backgrounds look professional, align with Google Shopping standards, and create visual consistency across your store.
How many product photos should I have per listing on Shopify? Aim for at least 3–5 images showing different angles. For apparel, 5–8 is better. Each listing should include a clean main image on white, plus lifestyle or detail shots.
What’s the best free tool to remove backgrounds from product photos? Remove.bg is the most commonly used free tool. It works well for simple products. For complex products — especially jewelry, glass, or apparel with fine edges — manual editing or a professional service produces better results.
How do I make my Shopify product images load faster? Compress images before uploading using Squoosh or TinyPNG. Aim for under 200KB per image without visible quality loss. Use JPEG for white-background photos and WebP where your theme supports it.
Is it worth outsourcing product photo editing for a small Shopify store? Yes, if image quality is holding back your conversions. Most professional services charge under $1 per image. For a store with 50 products, that’s often less than $50 — and the quality improvement typically pays for itself within days.
Final Thoughts
Good product photos aren’t about having expensive equipment. They’re about understanding what buyers need to see — and presenting your product in the clearest, most accurate, most professional way possible.
The process isn’t complicated:
- Start with the best photo you can take
- Crop and frame consistently
- Remove the background cleanly
- Correct color accurately
- Retouch the details
- Add a shadow if needed
- Export at the right size and format
- Optimize for SEO before uploading
Do this consistently across your catalog, and your Shopify store will look and perform noticeably better.
If you’re ready to scale — or if you want professional results without the time investment — a complete image editing service covers every step of this workflow at a fraction of what it costs to do in-house.
The photos are ready when your buyers are.
Related resources:
