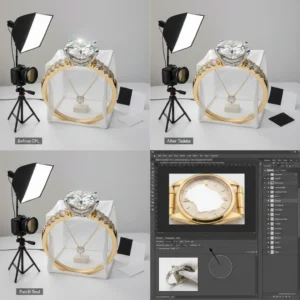
Final Image Preview
Step 1 – Creating a new file
Start by making a new image (File->New) with these dimensions:
- Width: 500 pixels
- Height: 600 pixels
- Resolution: 72 pixels/inch
- Background Contents: White
Step 2 – Create Background
Select a dark gray color. I used #2b2b2b.
Step 3 – Create Shape
To create a path, choose the dark gray background color earlier, and then make the following path with the Pen Tool (P)
Fill the path (Right click on it -> fill path) created above using #0e100f).
Again, use Pen Tool (P) to make a new path.
Fill it with a gold color, I used #c99f63.
Add a little digital drawing reflection using #fccb91 in your pencil sketch Photoshop action.
Step 4 – Add Reflections
Pick up Burn Tool (O) and add some shadows at the top of our pen ink drawing.
You can create a new layer by pressing Ctrl+Shift+N or by going to Adjustment Layer->New->Layer in Adobe Photoshop. Rename the layer to “Black reflection”. You can rename a layer by pressing right-click on it, then selecting the “Layer properties” gradient overlay option, and in the “Name” box, you can enter what name you prefer. From the Tools menu, select Pen Tool (P key) and make a path into your Photoshop CC, Photoshop CS3, or more updated version.
Fill the path with a black color.
Step 5 – Add Highlights
Now, make a selection like in the next picture using Polygonal Lasso Tool (L)
Use the Burn Tool (O) and add a small shadow in the indicated place.
Then, pick up Dodge Tool (O) and add some highlights in the indicated places to obtain a “gold” effect.
Using Pen Tool (P) create a path like in the picture below.
Add a 2-pixel white stroke (Right click on the path-> stroke path) like I did in the next picture.
Duplicate the stroke created above and make it black, then move it a little to the right.
Using Eraser Tool (E) erase the strokes to give a plus of realism.
Using a selection tool make the following selection.
Use Dodge Tool (O) and add some highlights to the selection.
In the indicated place, add a 1px black stroke.
With Pen Tool (P) create a path as I did in the next image.
Right-click on the path -> stroke path and add a 1 px stroke using #edc080 color.
Decrease the opacity or erase using Eraser Tool (E) to look more real.
In the indicated place, add a 2-pixel stroke using a gold color.
Make the next selection using the Polygonal Lasso Tool (L).
Pick up Dodge Tool (O) and make the next settings:
- Master Diameter: 35 pixels
- Range: Shadows
- Exposure: 48% (10B)
Using Dodge Tool (O) with the settings presented above, add some highlights on our pen like I did in the next picture.
Step 6 – Create Middle Part
Put a gold color on your picture for line drawing a shape in your picture.
Add some highlights using Dodge Tool (O) like I did in the next image
Then, using the Burn/Dodge Tool(O), add some shadows/highlights in the indicated places.
Pick up the pen sketch Photoshop action tool (P) and make the next path over the gold part we`ve created in the previous sketch art Photoshop action step
Add a 1 px white stroke (with the simulate pressure option ON)
Repeat the same steps for the bottom part
Step 7 – Create Bottom Part
Now make a shape like I did in the next image using Pen Tool and a gold #c1995c color
With the Rectangular Marquee Tool, make the next selection over the shape we just created
Now, we going to create the gold look, so in the indicated places, add some shadows or highlights using Burn/Dodge Tool (O)
Again, make a path like in the attached picture
Add a 1-2 px white stroke (with the simulated pressure on) to obtain the best gold look
Follow the steps indicated in the picture below
Use the Pen Tool and make the next path at the bottom of our pen
You can use a gold color for this part, but I used a gray one, so I filled the path with #91908b
Use Dodge/Burn Tool (O) and add, like the other steps, some highlights and shadows
Make the next path using Pen Tool (P) to add more reflections
Fill it with the white color
Again make a path
And fill it with white color for a new reflection
Final Result: An Elegant Vehicles Web Template
