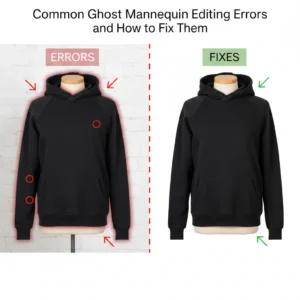


Ghost mannequin editing is key for apparel e-commerce. It shows clothes without a model while keeping the shape visible. But small mistakes can make images look unprofessional. These mistakes can reduce trust, clicks, and sales.
This guide explains 10+ common ghost mannequin editing errors and how to fix them, with practical steps. Follow this to make your product images clear, consistent, and realistic for global audiences.
1. Neck Misalignment
The neck area is often tricky. Misaligned necks make shirts look uneven.
Causes:
- Inner neck shot at a different angle
- Camera height differs between shots.
- Masking is not precise.
Fix:
- Shoot the inner and outer neck from the same angle.
- Align layers before merging.
- Use the warp tool carefully.
Correct neck alignment makes garments look natural.
2. Uneven Shoulder Structure
Shoulders define fit. Uneven shoulders look fake and reduce buyer trust.
Causes:
- The mannequin arms are not symmetric.
- Overusing liquify or transform tools
- Image scaling errors
Fix:
- Use symmetry guides.
- Avoid heavy reshaping.
- Compare left and right sides before export.
Balanced shoulders improve realism.
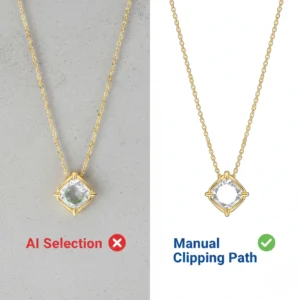
3. Visible Mannequin Edges
Sleeves and armholes often show mannequin edges if masking is sloppy.
Causes:
- Rushed background removal
- Similar garment and mannequin colours
- Poor feathering
Fix:
- Zoom in for masking.
- Use refined edge tools.
- Blend edges softly.
No mannequin edges = clean, professional images.
4. Fabric Distortion
Over-editing can stretch or flatten fabric. Clothes look unnatural.
Causes:
- Excessive liquefaction or warping
- Flattening natural folds
- Ignoring seam lines
Fix:
- Preserve original shape.
- Adjust only problem areas.
- Keep natural folds and drape.
Proper fabric shape helps buyers judge fit.
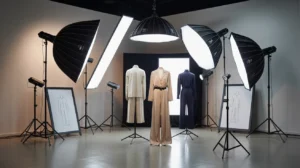
5. Lighting Mismatch
Different lighting between inner and outer shots makes images look fake.
Causes:
- Multiple light sources
- Shadows removed inconsistently
- Separate brightness adjustment
Fix:
- Match exposure levels first.
- Use curves or levels to balance tones.
- Keep natural shadows.
Consistent lighting improves professional appearance.
6. Color Inaccuracy
Wrong color misleads buyers. Returns increase.
Causes:
- Auto-correction without checking
- Different white balance
- Image compression
Fix:
- Calibrate monitors.
- Match colors with real samples.
- Avoid oversaturation.
Accurate color improves trust and reduces returns.
7. Rough or Jagged Edges
Jagged edges show low-quality editing.
Causes:
- Low-resolution images
- Hard-edged masks
- No edge refinement
Fix:
- Use high-resolution photos.
- Feather edges at 200–300% zoom.
- Refine edges carefully.
Smooth edges make garments appear professional.
8. Over-Smoothing
Removing all wrinkles creates fake, plastic-looking clothes.
Causes:
- Too much blur
- Misunderstanding fabric texture
- Focus on perfection.
Fix:
- Keep natural folds.
- Retouch only distracting creases.
- Preserve fabric texture.
Natural folds improve realism.
9. Wrong Proportions
Incorrect sizing misrepresents fit. Buyers may be misled.
Causes:
- Stretching images to fit the template
- Resizing inner parts wrongly
- Ignoring actual measurements
Fix:
- Keep the original aspect ratio.
- Compare with the size chart visually.
- Avoid unnecessary scaling.
Correct proportions reduce returns and complaints.
10. Misaligned Labels or Tags
Labels show brand authenticity. Misaligned labels look sloppy.
Causes:
- Removing the mannequin carelessly
- Rushed editing
- Poor layer organisation
Fix:
- Protect label areas during masking.
- Retouch carefully.
- Keep text clear and readable.
Accurate labels support brand credibility.
11. Background Inconsistency
Background color differs across images, breaking consistency.
Causes:
- Multiple editors, no guideline
- Manual background edits
- Different export settings
Fix:
- Standardise background color.
- Follow clear editing guidelines.
- Use batch export settings.
Consistent background is key for e-commerce listings worldwide.
12. Over-Sharpening
Too much sharpening causes halos and noise.
Causes:
- Global sharpening without control
- Compensating for low-quality images
- Heavy processing
Fix:
- Sharpen selectively.
- Use high-pass techniques lightly.
- Preview at 100% zoom.
Proper sharpness enhances clarity without distortion.
13. Cropping and Framing Errors
Poor framing reduces focus on the garment.
Causes:
- Cropping too close
- Inconsistent image ratios
- Ignoring marketplace guidelines
Fix:
- Centre garments consistently.
- Keep safe margins.
- Follow platform requirements.
Correct framing ensures better usability and indexing.
14. Lack of Depth
Flat images fail to show garment shape.
Causes:
- Shadows removed completely
- Inner parts blended incorrectly
- Overexposure
Fix:
- Add subtle shadows.
- Preserve inner depth.
- Balance highlights.
Depth creates 3D realism for buyers.
15. Skipping Quality Checks
Final checks are often skipped. Mistakes slip through.
Causes:
- Not reviewing full-size images
- Missing consistency checks
- Rushing uploads
Fix:
- Use a quality checklist.
- Review on multiple screens.
- Compare against brand standards.
Quality control ensures professional images at scale.
16. Best Practices to Avoid Errors
Avoiding errors is better than fixing them later.
Key Practices:
- Shoot all images with the same camera settings.
- Train editors with clear instructions.
- Keep layered, non-destructive files.
- Document common errors and fixes.
Following these steps ensures efficient and high-quality editing.
Final Thoughts
Ghost mannequin editing requires precision. Errors can reduce trust and sales. By understanding common ghost mannequin editing errors and how to fix them, brands can create professional, realistic, and consistent product images.
Focus on alignment, lighting, texture, colour, and edges. Keep edits natural. Ensure images reflect real products. This approach boosts credibility, improves global e-commerce performance, and increases buyer confidence.
High-quality ghost mannequin images are not perfect—they are accurate, clear, and trustworthy.