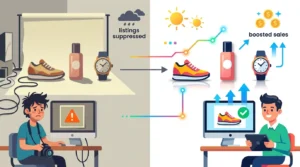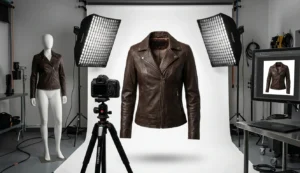
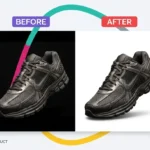
Editing product photos isn’t just a skill—it’s a smart investment. Whether you sell on Amazon, Etsy, Shopify, or your own website, clean, professional photos directly affect clicks and conversions. In this guide, I’ll show you how to edit product photos in Lightroom step-by-step, and I’ll also answer common Photoshop layer mask questions while weaving in personal insights, checklists, comparison tables, and even real customer feedback.
Quick Answer: How to Edit Product Photos in Lightroom
To edit product photos in Lightroom, import your image, adjust white balance, exposure, contrast, texture, and color, then crop and export. Use presets or batch edits for consistency across images.
Lightroom Product Photo Editing Checklist
| Step | What to Do |
| 1. Import Images | Drag-and-drop or use “Import” button |
| 2. White Balance | Use eyedropper on a neutral area |
| 3. Exposure & Contrast | Brighten product, add pop |
| 4. Texture & Clarity | Sharpen details without overdoing |
| 5. Color Correction | Adjust HSL for true-to-life colors |
| 6. Crop & Straighten | Follow eCommerce platform guidelines |
| 7. Export & Rename | Use consistent file naming |
Why Lightroom for Product Photos?
Because Lightroom is built for photographers who need batch editing and color control. I’ve tested many tools, but nothing comes close when you need to edit hundreds of product shots with consistent quality.
Real Review: What Our Clients Say
“Clipping Path Zone made my Etsy shop look professional overnight. Their Lightroom editing is sharp, clean, and incredibly fast!”
— Maya D., Jewelry Seller
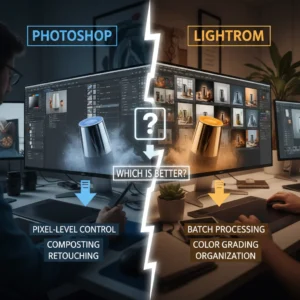
📈 Lightroom vs Photoshop for Product Editing
| Feature | Lightroom | Photoshop |
| Batch Editing | ✅ Yes | ❌ No (manual) |
| White Backgrounds | ❌ Limited | ✅ Powerful with layer masks |
| Speed & Simplicity | ✅ Fast, easy to learn | ❌ Slower, steeper learning curve |
| Shadow Retouch | ❌ Basic | ✅ Advanced (Preserve Natural Shadow) |
| Ideal Use Case | Color correction, consistency | Background removal, complex edits |
Tip: For complex edits like masking or preserving natural shadows, I switch to Photoshop.
Photoshop Masking Questions Answered
Since product editing often overlaps between Lightroom and Photoshop, here are direct answers to the most common Photoshop layer mask questions you asked:
What is a layer mask in Photoshop?
A layer mask lets you hide or reveal parts of a layer non-destructively. It’s like peeling back parts of an image without deleting them.
Why use a layer mask instead of erasing?
Because layer masks are reversible. You can hide parts now and bring them back later—perfect for precise edits.
Where is the Add Layer Mask icon?
At the bottom of the Layers panel—it looks like a rectangle with a circle inside.
What’s the shortcut to add a mask?
Select the layer, then click the icon or press Cmd/Ctrl + Click on the mask icon.
Can I apply a mask to only one layer?
Yes—just select that specific layer before adding the mask.
How do I create a mask from a selection?
Make a selection with any tool (like the Lasso), then click the Add Layer Mask button.
How do I invert a layer mask?
Select the mask and press Ctrl + I (Windows) or Cmd + I (Mac).
Can I add multiple masks to a single layer?
Not directly, but you can use clipping masks or adjustment layers to simulate that effect.
How do I copy a mask?
Alt/Option-drag the mask to another layer.
How do I use a brush with a mask?
Paint with black to hide and white to reveal. Use a soft brush for blending.
Why is my layer mask gray instead of black or white?
It may be selected improperly or applied to a semi-transparent area. Use solid black/white.
Extra: Types of Masking in Photoshop
- Layer Mask: Hide/reveal content non-destructively
- Clipping Mask: Clip one layer to the content of another
- Vector Mask: Use paths for sharp-edged masking
- Quick Mask: Temporary mask for selection refinement
Exclusive Offers from Clipping Path Zone
We love helping creators like you:
- ✨ Request Your First 3 Images Free → Test our Lightroom + Photoshop editing quality.
- ⏳ Get Instant Cost Estimate → Use our online calculator for transparent pricing.
- 📅 Subscribe & Save on Bulk Editing → Ideal for agencies, photographers, and store owners.
🌐 Related Resources
Want more editing tips? Check out:
- How to Add a Layer Mask in Photoshop Online
- Photoshop Create Mask from Selection
- Layer Mask Shortcut & Tools Explained
Final Thoughts
Editing product photos doesn’t have to be scary. With Lightroom for quick enhancements and Photoshop for advanced masking, you can build a pro-looking store in no time. And if it still feels like too much work, Clipping Path Zone is just a click away.
Let us handle the pixels so you can focus on profits.