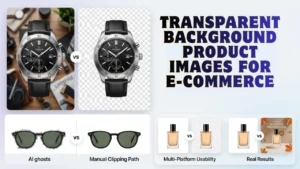
Professional & High-Converting Results
Studies show that up to 90% of online shoppers say high-quality product images heavily influence their purchase decisions. High-end brands like Rolex, Apple, and Chanel love black backgrounds. These dark backdrops create a premium feel. They make jewelry and electronics look elite.
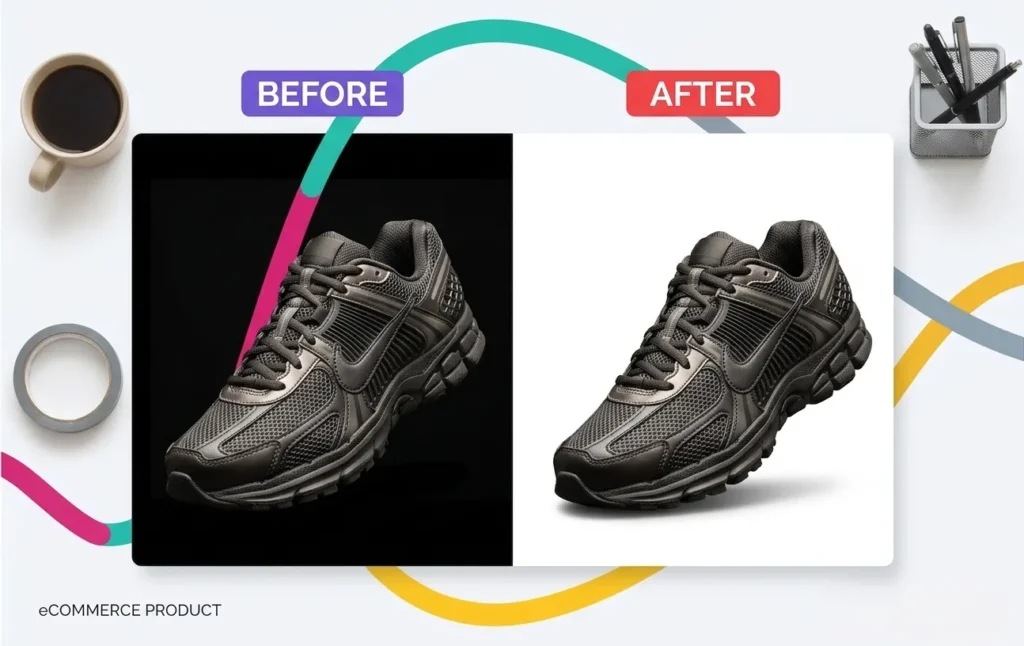
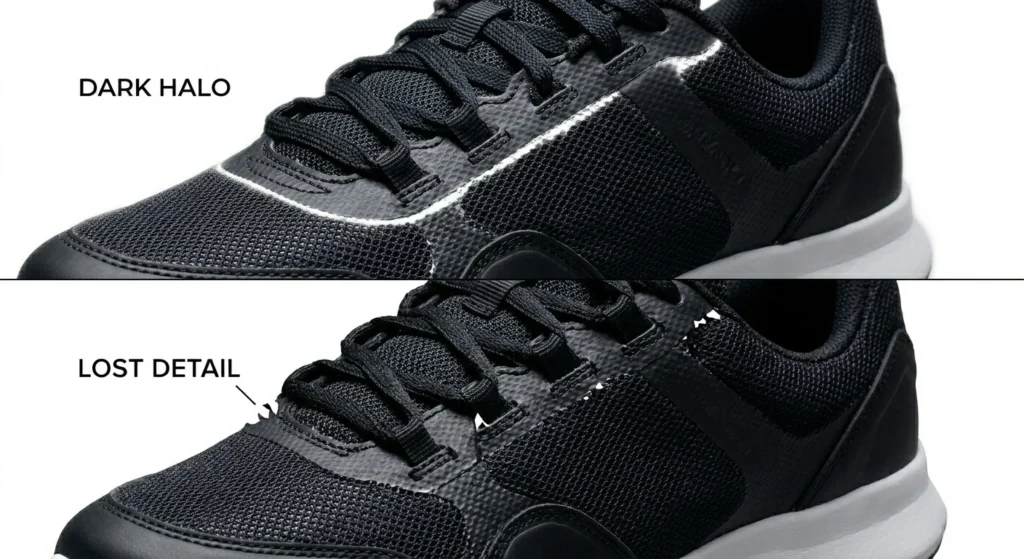
But there is a major catch. When you move those products to Amazon or Shopify, that black background must go. Removing a black background from product images is much harder than removing a white one. If you fail, your product looks like a cheap sticker. You lose natural shadows. You get ugly, dark halos.
Quick Answer: How to remove the black background from product images?
To remove a black background, use Photoshop’s Select Subject tool followed by Select and Mask. Apply Shift Edge (-10% to -20%) and a 0.5px Feather to eliminate dark halos. For professional eCommerce standards, manually refine the edges and preserve natural shadows to avoid a “flat” look.
In this comprehensive 2026 guide, you will learn the exact steps to remove the black background Photoshop style. We will cover AI tools, manual precision, and professional secrets to keep your conversion rates high.
Why Black Backgrounds Are Popular in Product Photography
Black is the color of luxury. It creates a high-contrast environment. This makes glass, gold, and polished steel shine.
- Visual Depth: It creates a “void” that forces the eye onto the product.
- Premium Branding: Brands like Beats often use dark themes to convey a modern feel.
- A/B Testing: Many sellers find that dark images stop the scroll on social media.
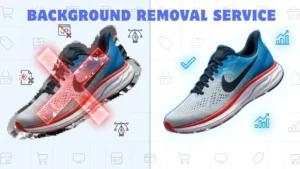
However, for multi-channel selling, consistency is key. Moving these images to a Background Removal Service ($0.25/image) for a white background transition is the gold standard for growth.
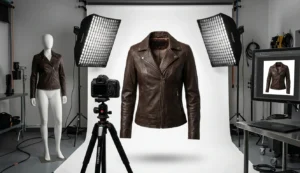
Best Practices for Shooting Product Photos on a Black Background
Easier removal starts with the camera. If you shoot correctly, the editing takes half the time.
- Light the Edges: Use rim lighting to separate the product from the background. This prevents “edge bleed.”
- Shoot in RAW: RAW files hold more detail in the shadows. This is vital for black background removal for e-commerce.
- Use a Matte Backdrop: Avoid glossy black floors unless you want heavy reflections.
- Keep Distance: Place the product at least 3 feet away from the background. This reduces light spill.
Common Challenges in Black Background Removal for eCommerce
Why does a simple “magic wand” click fail on black backgrounds?
- Shadow Merging: The product’s natural shadow is the same color as the floor. They melt together.
- Edge Contamination: Black light reflects onto the product. This leaves a dark “fringe.”
- Detail Loss: Fine items like cables or fur are hard for AI to see against black.
- The “Sticker Effect”: Without proper edge softening, the product looks fake on white.
Impact on Sales: A “muddy” edge reduces buyer trust. Clean images can boost conversions by 20-40%.
Comparison: Removing Black vs. White Backgrounds
| Feature | White Background Removal | Black Background Removal |
| Main Challenge | Light wrap (edges look washed out) | Shadow merging & dark halos |
| Edge Detail | Easier to define | Harder; edges “bleed” into black |
| Visibility | Easy to see dark products | Difficult to see dark parts/cables |
| Shadows | Usually easier to preserve | Very difficult to separate |

Preparation Steps: Setting Up for Success
Don’t rush. A few seconds of setup saves hours of fixing.
- Unlock & Duplicate: Never edit the original. Press Ctrl + J (Win) or Cmd + J (Mac).
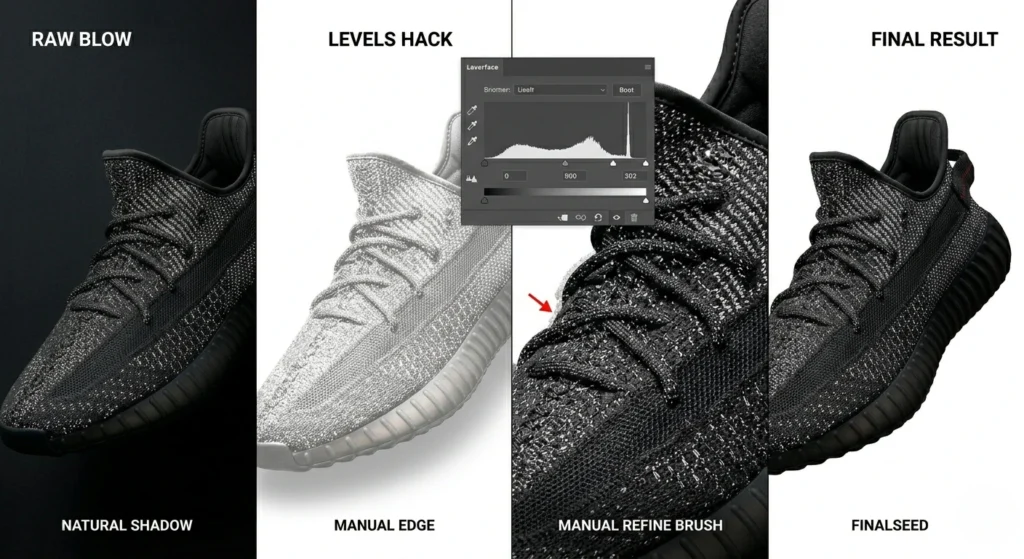
- The Levels Hack: Add a Levels adjustment layer. Drag the middle slider to the left to brighten the image. This “visualizes” the dark edges so you can see where to cut.
- Workspace Setup: Use the “Photography” workspace. Ensure your monitor brightness is at 80% to see dark artifacts.
4 Proven Methods to Remove Black Background in Photoshop
Method 1: AI-Powered Remove Background (The 2026 Fast Way)
Photoshop’s 2026 AI is powerful but often leaves dark fringes on black backdrops.
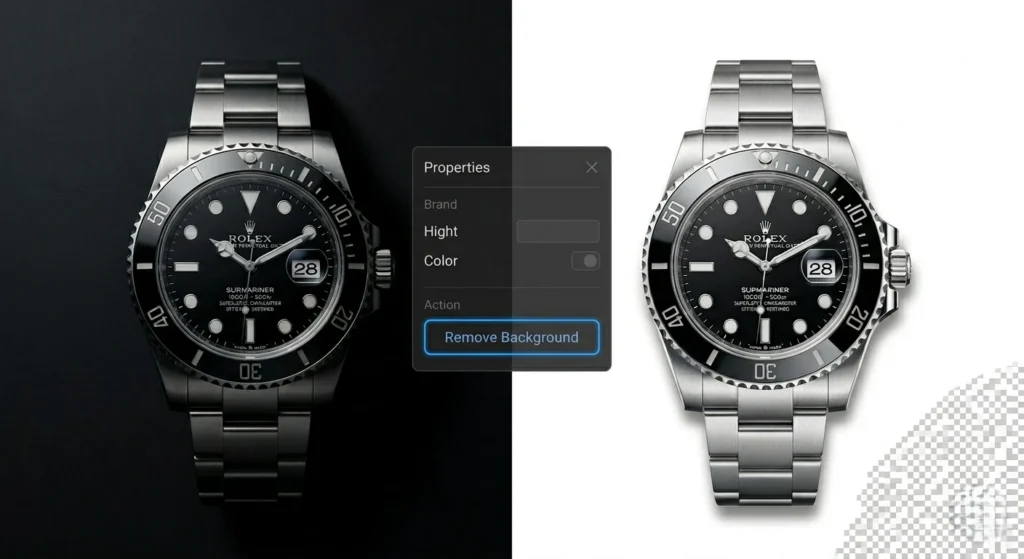
- When to use: For simple shapes or quick social media drafts.
- Steps: Open Properties Panel > Click Remove Background.
- The Fix: Always refine in Select and Mask. Set View Mode to “On White” to spot pixel accuracy issues.
Method 2: Select Subject + Manual Refinement (The Pro Standard)
This is the most reliable way for Image Masking Services.

- When to use: For standard eCommerce products with clear edges.
- Selection: Go to Select > Subject. Add a Layer Mask.
- Exact Values: In Select and Mask, set Shift Edge to -15% and Feather to 0.5px. This eats away the dark halo.
- Shortcut: Use Shift + R to toggle the Refine Edge brush for hair or fur.
Method 3: The “Blend If” Technique (Best for High Contrast)
Use this for metallic watches or bright sneakers on deep black.
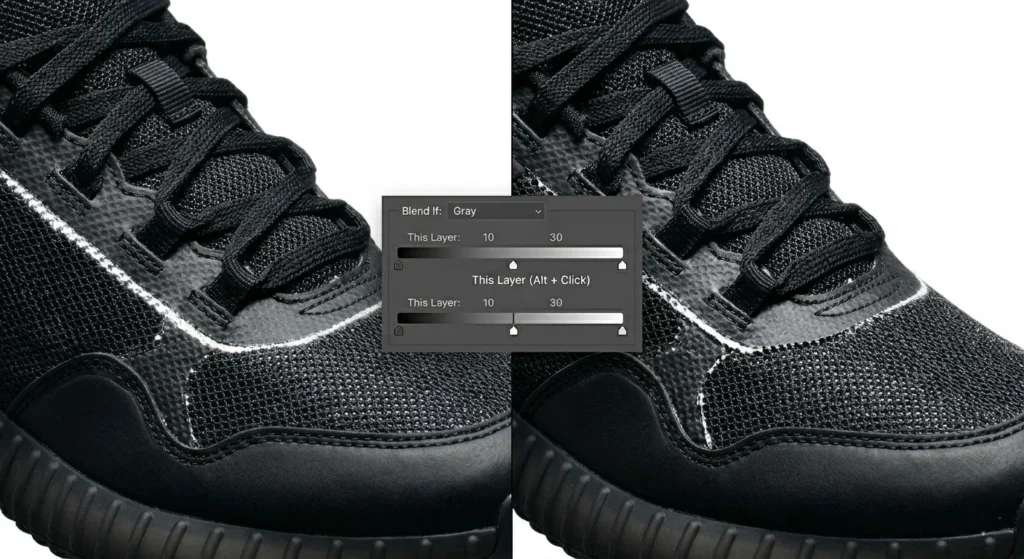
- When to use: When the product is bright, and the background is pure, deep black.
- Steps: Double-click the layer to open Layer Styles.
- The Secret: In the Blend If section, drag the black slider of “This Layer” to the right.
- Pro Tip: Hold Alt while dragging to split the slider. This creates a smooth transition.
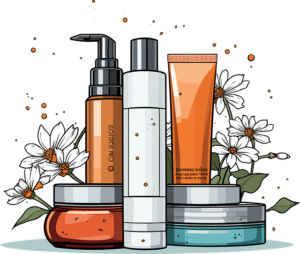
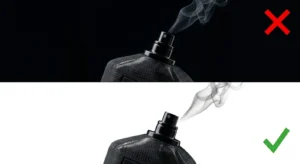
Method 4: Channel Masking (For Glass & Translucent Items)
Standard tools can’t “see” through glass. Channel masking can.
- When to use: For perfume bottles, wine glasses, or translucent fabrics.
- Steps: Go to the Channels Tab. Duplicate the channel with the most contrast (usually Blue).
- Contrast Boost: Press Ctrl + L. Make the background pitch black and the product pure white.
- Load Selection: Ctrl + Click the channel thumbnail, then apply it as a mask.
AI vs. Photoshop vs. Professional Services
| Method | Quality | Speed | Best For |
| AI Tools | Low (Jagged edges) | Instant | Social media drafts |
| Photoshop (DIY) | Medium to High | 15-30 mins/image | Small catalogs |
| Professional Services | Pixel Perfect | Fast (Bulk) | High-growth eCommerce |
Advanced Refinement Techniques
Once the background is gone, you must polish the edges for pixel accuracy.
- Alpha Channel: Use alpha channels for complex transparency, like smoke or fine hair.
- Decontaminate Colors: Inside the Select and Mask menu, check this box. It removes the leftover black color from the edge pixels. Keep the slider at 25% or lower.
- Manual Mask Painting: Select a soft brush. Set Opacity to 20%. Gently paint over the mask to blend any harsh cuts.
Product-Specific Tips for Perfect Results
| Product Category | The “Do” | The “Don’t” |
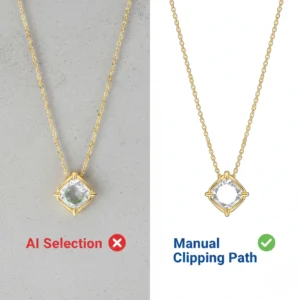
| Jewelry | Keep the “sparkle” highlights. | Don’t use AI only; it blurs the gems. |
| Electronics | Manually trace dark cables. | Don’t let cables disappear into the white. |
| Glass/Perfume | Use the screen blend mode. | Don’t make the glass look like solid plastic. |
| Apparel | Use Image Masking for fabric. | Don’t leave a jagged edge on soft cotton. |
Creating & Preserving Natural Shadows After Removal
A product without a shadow looks like it’s floating. It looks “fake.”
- Multiply Blend: If you kept the original shadow, place it on a separate layer. Set the mode to Multiply.
- Contact Shadow: Use the Drop Shadow tool. Set Distance to 0 and Spread to 10.
- Manual Brush: Use a soft brush (0% hardness) at 10% opacity. Paint a thin line under the product base.
- Pro Option: Use our Shadow Creation Service ($0.19/image) for realistic ground shadows at scale.
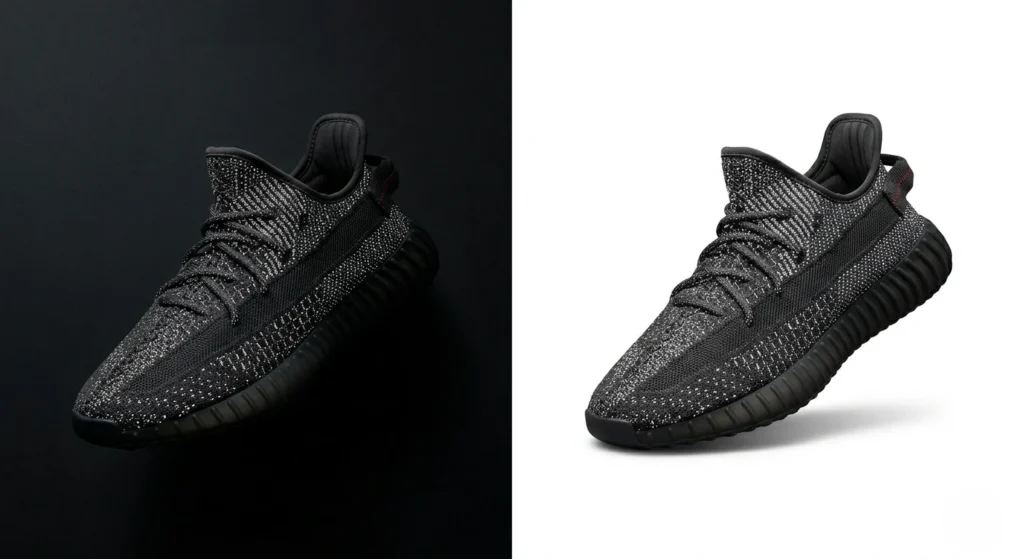
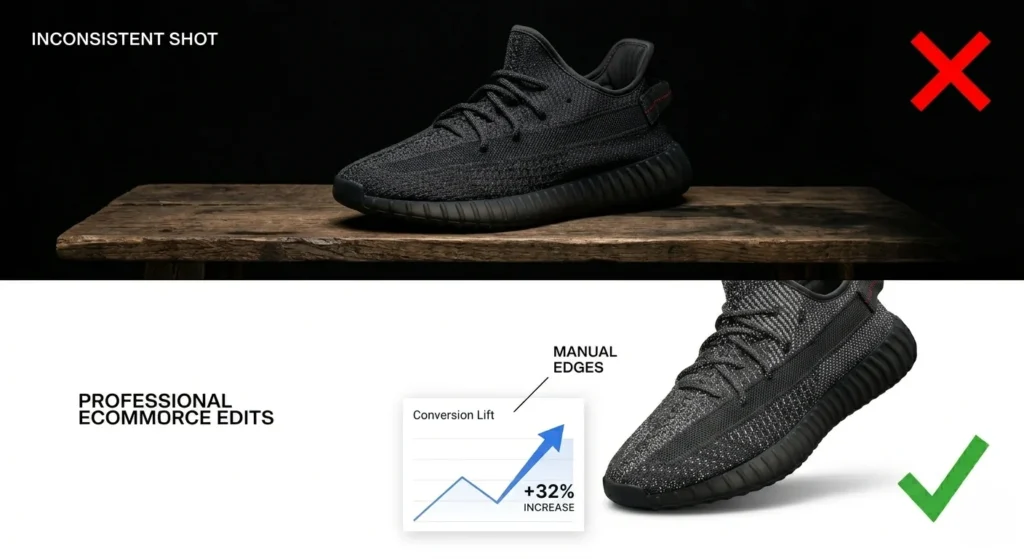
Real Case Study: Candle Brand Transformation
Client: High-end soy candle brand.
Problem: Photos were shot on dark wood/black backgrounds. Shopify sales were stagnant.
Solution: Used professional background isolation to move products to a clean #FFFFFF white background.
Result: The brand saw a 32% increase in conversion rates within 30 days. Clean images build trust.
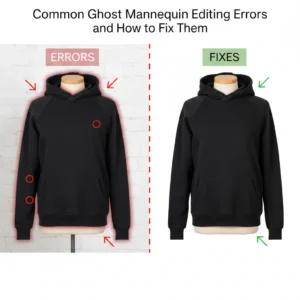
8 Common Problems & Professional Fixes
- Dark Halos: * Step 1: Open Select and Mask.
- Step 2: Set Shift Edge to -20%.
- Step 3: Use a soft brush sampled from the product color to fix the fringe.
- Lost Details: AI cut off a wire? Use the Pen Tool for a sharp, manual clipping path.
- Sticker Look: Increase the Feather by 0.3px to soften the transition.
- Translucency Issues: Change the layer blend mode to Linear Light at low opacity.
- Inconsistent Batches: Save your steps as a Photoshop Action. This is the best batch editing workflow.
- Export Problems: Amazon requires pure white (#FFFFFF). Use the Levels white eyedropper to click the background.
- Muddy Look: This happens when Decontaminate Colors is too high.
- Flat Appearance: Add a subtle Inner Glow (Black color, 5% opacity) to create roundness.
When Should You Hire a Professional?
DIY is great for 5 images. Hire a pro if you have:
- 50+ images that need a fast turnaround.
- Complex products like jewelry, glass, or fur.
- Tight deadlines for a new product launch.
- E-commerce product photography standards to meet (Amazon/Shopify).
DIY vs. Professional Outsourcing – What’s Best?
| Feature | DIY (In-House) | Outsourcing (Clipping Path Zone) |
| Cost | High (in labor hours) | From $0.25/image |
| Consistency | Hard to maintain | 100% Manual & Uniform |
| Volume | Max 20-30 images/day | 4,000+ images/day |
| Support | None | 24/7 Expert Support |
| Risk Reversal | None | Unlimited Revisions |
⚡ Get 5 Images Edited FREE (24 Hours Delivery)
Trusted by 1,000+ eCommerce Brands Worldwide.
Export & SEO Best Practices for eCommerce
A great image is useless if it’s too slow to load.
- File Formats: Use a transparent background PNG for overlays. Use WebP or AVIF for the fastest Shopify speeds.
- Platform Specs: Amazon needs pure white (RGB 255, 255, 255). Recommended size is 2000px+ with the product filling 85% of the frame.
- Image SEO: Rename your file to remove-black-background-product-images-watch. webp.
- Alt Text: Use: “clean professional jewelry cutout on white background for eCommerce.”
- Compression: Keep file sizes under 200KB for fast mobile loading.
FAQ
How do I remove the black background quickly in Photoshop?
The fastest way is to use the Contextual Task Bar > “Remove Background.” However, you must always refine the edges in Select and Mask to remove dark fringes.
Should I keep subtle shadows or remove them for Amazon?
Amazon requires a pure white background. You should remove the original background but add a subtle shadow to ensure the product doesn’t look like it is floating.
Why is my cutout jagged?
Jagged edges happen when you don’t use enough Feathering. A small amount (0.5px to 1.0px) smooths the pixels and makes the cutout look natural.
What is the difference between Clipping Path and Image Masking?
Clipping Path Service uses vector lines for hard-edged products like shoes. Image Masking Services are for complex edges like hair or fur where the background “bleeds” through the strands.
Conclusion
Perfectly removing black background from product images is the difference between a “sale” and a “click-away.” While AI is a great start, professional eCommerce Solutions require manual refinement for pixel accuracy.
Clean edges, natural shadows, and sharp details build a premium brand. Stop wasting hours on tedious editing. Let our expert team at Clipping Path Zone handle your bulk orders.
Ready for 10/10 product photos?