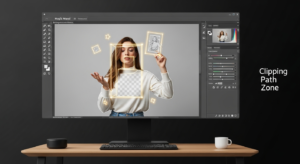

If you’re wondering how to make clipping path in Photoshop, you’re in the right place! I’ve been through the learning curve, and I want to share exactly how this works, why it matters, and how you can get perfect results every time just like the pros at Clipping Path Zone do.
Let’s break it down step by step and answer your burning questions. I’ll also include handy tables and real customer reviews, so you know why this method beats other editing tricks.
What Is a Clipping Path in Photoshop?
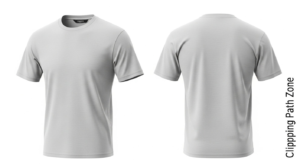
Simply put, a clipping path is a closed vector path used to cut out an object from its background. Think of it like drawing a clean, precise outline around a product so you can isolate it without any messy edges.
A clipping path is a tool in Photoshop that lets you remove or change the background of an image by defining a precise path around the subject.
What Is the Purpose of Using a Clipping Path?
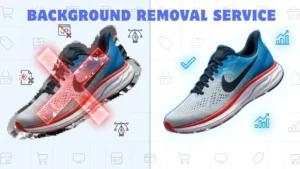
The main goal? To separate the subject cleanly for easy background removal or replacement. This is essential for eCommerce product images, catalogs, advertising, and anywhere you want the focus solely on the product.
Clipping paths help you isolate objects to improve image quality and background control.
Why Do Professionals Use the Clipping Path Technique?
Professionals swear by clipping paths because:
- It creates pixel-perfect cutouts without jagged edges.
- It preserves image quality and detail.
- It allows easy editing and background swapping.
At Clipping Path Zone, we always recommend clipping paths for detailed, sharp results — especially for products with smooth edges or complex shapes.
Why Is a Clipping Path Better Than Background Eraser or Magic Wand?
| Feature | Clipping Path | Background Eraser | Magic Wand |
| Precision | Very high (manual path) | Medium (depends on edge) | Low (depends on color range) |
| Edge Quality | Clean, smooth | Rough, may leave halos | Jagged edges possible |
| Control | Full manual control | Partial | Minimal |
| Best For | Complex shapes, products | Simple backgrounds | Simple contrasting colors |
| Requires Skill | Yes | Low | Low |
Short answer:
Clipping paths give you cleaner and more controlled cutouts than automatic tools like Background Eraser or Magic Wand.
Who Needs Clipping Path Services the Most?
If you’re an eCommerce seller, photographer, graphic designer, or ad agency, clipping paths are your best friend.
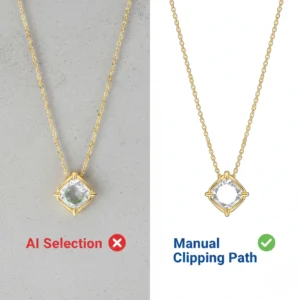
Jewelry Clipping Path is one of the most challenging yet rewarding parts of product photo editing. From my own work, I’ve seen how small details like thin chains, shiny gemstones, and tiny reflections can make or break the final image. A regular background removal tool usually struggles with this level of detail, which is why a manual path is the go-to choice. If you want to see how professionals handle it, check out this Jewelry Clipping Path guide. It explains why precision is everything in jewelry editing and how clean cutouts can help online sellers boost trust and sales.
Short answer:
Anyone who needs high-quality product images with clean backgrounds, like online stores or photographers.
Who Uses Clipping Paths in eCommerce Product Images?
Almost every successful eCommerce business uses clipping paths to present products professionally. It boosts buyer confidence and improves conversion rates.
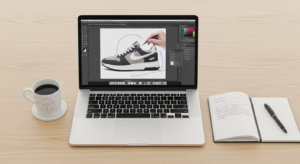
Which Tool in Photoshop Is Used for Creating Clipping Paths?
The Pen Tool is the golden standard for clipping paths. It lets you create smooth, editable vector paths with total control.
Shortcut: Press P to activate the Pen Tool in Photoshop.
Which Photoshop Version Is Best for Clipping Path Work?
Photoshop CC versions (Photoshop 2021 and newer) offer the best tools and stability for clipping paths. Older versions like CS5 or CS6 still work but may lack some features.
Where Can I Use Images with Clipping Paths Applied?
Clipped images are perfect for:
- eCommerce listings (Amazon, Shopify)
- Catalogs and brochures
- Websites and social media ads
- Graphic designs and composites
Where Do Professionals Apply Clipping Paths in Real Projects?
In advertising, product photography, fashion shoots, and anywhere clean product isolation is needed. For example, removing distracting backgrounds or preparing images for print or online catalogs.
When Should I Use a Clipping Path vs Masking?
| Use Case | Clipping Path | Masking |
| Hard-edged objects | Ideal (products, logos) | Less ideal |
| Complex, soft edges | Difficult to clip precisely | Best for hair, fur, shadows |
| Editing flexibility | High but manual | High and non-destructive |
| Skill required | Higher | Moderate |
Short answer:
Use clipping paths for hard edges; use masking for soft edges or transparent parts.
When Is a Clipping Path Necessary for Product Photos?
Whenever your product has a clear, sharp outline, especially if you want to replace or remove the background perfectly.
How Does a Clipping Path Differ From Image Masking?
A clipping path is a vector outline, while masking uses pixel-based transparency to hide parts of an image. Masking is better for complex edges, clipping paths for sharp edges.
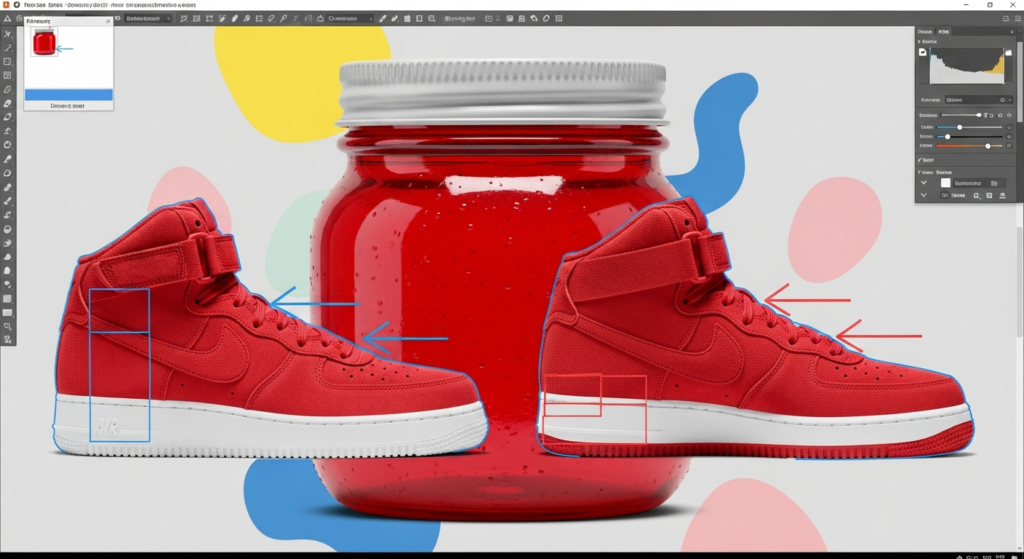
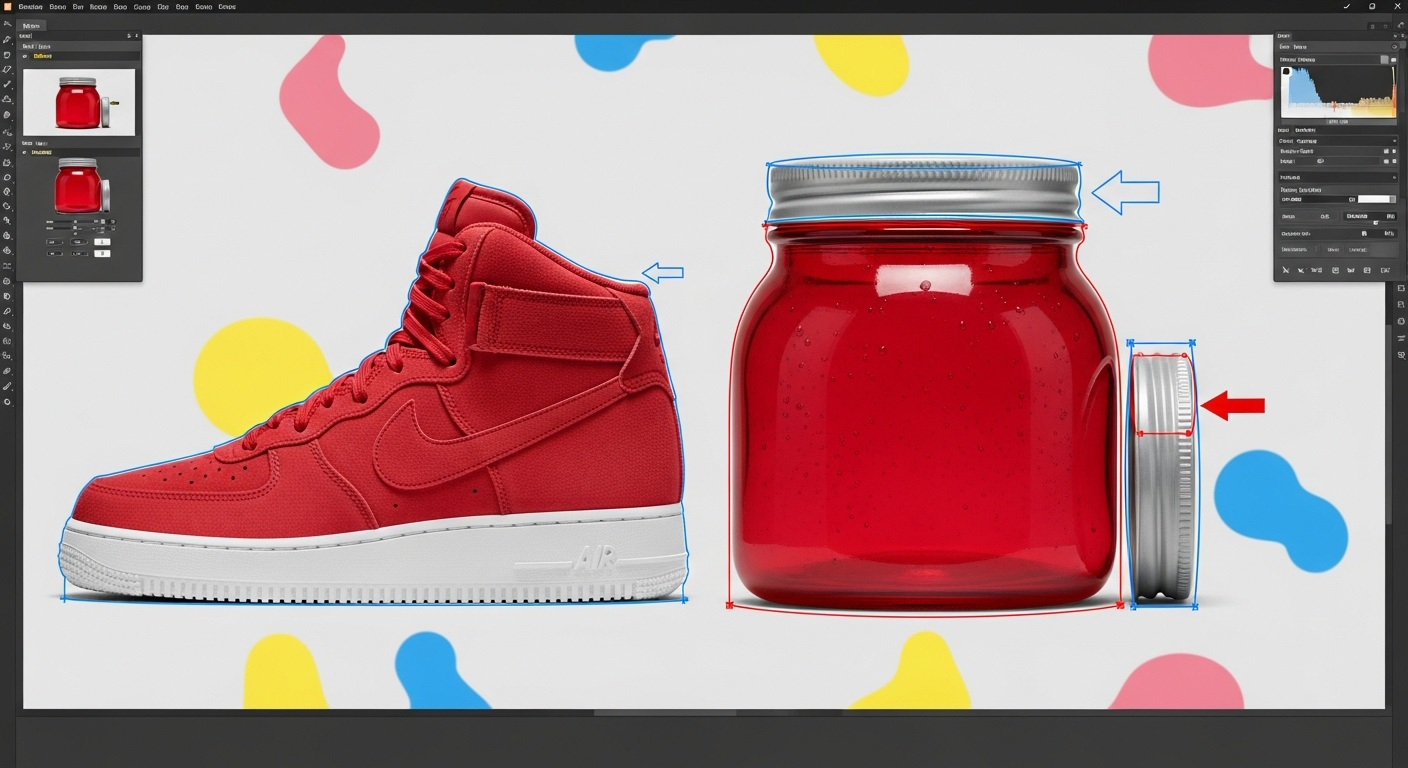
How Do Professionals Clip Out Complex Product Images?
They use the Pen Tool to manually create paths around the product, sometimes combining multiple paths or adding layers of masking for tricky areas.
How Accurate Is the Pen Tool for Making Clipping Paths?
The Pen Tool is extremely accurate if you have the skill. It’s why it’s preferred by professionals and top services like Clipping Path Zone.
Why Not Use AI Tools Instead of Manual Clipping Paths?
AI tools can be fast but often miss fine details and produce rough edges. Manual clipping paths take longer but deliver unmatched quality.
What Are the Challenges of Doing Clipping Paths Manually?
It’s time-consuming, requires steady hands and skill, and can be tedious for complex images. But the results are worth it.
Which Is Better: Hiring a Clipping Path Service or Doing It Myself?
If you want professional, pixel-perfect results fast, hiring a service like Clipping Path Zone is the way to go. It saves time and guarantees quality.
Whose Workflow Benefits Most from Using Clipping Paths?
Photographers, eCommerce businesses, graphic designers, and ad agencies benefit most because it streamlines editing and improves final image quality.
How Much Time Does It Take to Create a Perfect Clipping Path?
Depending on complexity, 5 to 30 minutes per image is normal. Bulk jobs require automation or outsourcing.
How Do You Apply a Clipping Path?
- Open your image in Photoshop.
- Select the Pen Tool (P).
- Carefully draw a path around the subject.
- Close the path.
- Right-click and choose Make Selection or save the path.
- Use the selection to mask or cut out the object.
How to Enable Clipping in Photoshop?
Clipping paths aren’t “enabled” but created by using the Pen Tool to define paths and saving them correctly under the Paths panel.
How Do I Create a Path in Photoshop?
Use the Pen Tool to click and create anchor points around the object, then close the path by clicking the starting point.
What Is the Clipping Path Service in Photoshop?
It’s the process of creating and saving clipping paths to isolate objects in Photoshop, usually done for background removal or image editing.
How to Make a Clipping Path in Photoshop?
Follow the steps above to create a path with the Pen Tool, close it, save it, and convert it into a selection or mask.
What Is the Clipping Path Technique?
The technique involves tracing the object manually using the Pen Tool to create a precise path for cutting out the subject.
Why Isn’t My Clipping Mask Working in Photoshop?
This is usually because you need to place the mask correctly, or your layers aren’t arranged properly. Make sure the mask is linked to the right layer.
How to Clip an Image in Photoshop?
Draw a path around it, save it, then apply it as a selection or mask.
How to Apply Path in Photoshop?
Save the path in the Paths panel, then choose Make Selection or use it for vector masks.
How Do You Create a Path From a Selection in Photoshop?
Use the menu Window > Paths > Make Work Path from an existing selection.
How Do I Put an Object on a Path?
Use the Type on a Path Tool or use the path as a vector mask for the object layer.
How to Use a Clipping Path?
You use it to isolate your subject from the background for easy editing.
What Is a Clipping Service?
A professional editing service that creates clipping paths for images. Like what we offer at Clipping Path Zone!
What Is the Clip Path Section?
The section in Photoshop’s Paths panel where your saved paths live.
How to Create a Path in Adobe?
Use the Pen Tool in Adobe Photoshop or Illustrator.
How to Create a Cut File in Photoshop?
Use the Pen Tool to make a clipping path, save it, then export as needed.
Comparison Table: DIY vs Professional Clipping Path Services
| Feature | DIY Clipping Path | Clipping Path Zone Service |
| Skill Required | High | None (experts do it for you) |
| Time per Image | 5-30 minutes | Few minutes ( |
bulk processing) |
| Quality | Depends on skill | Pixel-perfect, consistent |
| Cost | Free (Photoshop license needed) | Affordable ($0.25/image starting) |
| Turnaround | Slow | Fast (hours to 24 hours) |
| Support | None | Customer service available |
Real Reviews from Clipping Path Zone Customers
“I was worried about clipping complex product edges, but Clipping Path Zone delivered perfect cutouts fast. The quality is amazing and pricing is great!” – Sarah L., eCommerce seller
“Their service saved me hours of work and improved my product photos drastically. Highly recommend for anyone selling online.” – James T., Photographer
Ready to Get Perfect Clipping Paths Fast?
Get a free quote now at Clipping Path Zone! We guarantee pixel-perfect results, fast turnaround, and affordable prices starting at just $0.25 per image.
Related Links for You
If you want, I can also help prepare a quick video tutorial script or detailed step-by-step screenshots for your site — just say the word! Would you like me to?
Which is the best AI tool for photo editing?
There isn’t a single “best” AI tool for everyone, but some stand out for breadth, power and reliability. For example, according to an overview by Adobe Photoshop and Luminar Neo get frequent mention: Photoshop offers advanced AI-powered tools and is the industry leader; Luminar Neo is lauded for being “truly powered by AI” throughout its editing workflow. Zapier+1 Another tool, Imagen AI, markets itself to professionals by learning editing style and applying it automatically across large photo sets (which is helpful if you’re doing high volume). Imagen So if pressed, I’d say: for full-control pro editing Photoshop remains top, for automated workflows Luminar Neo or Imagen might win.