
If you have ever tried to photograph clothes and felt frustrated with shadows, dull colors, or flat images, you are not alone. I have been there too. When I started shooting apparel for small stores and online shops, my biggest challenge was lighting. Good light can make fabric look alive. Bad light can make even the best outfit look boring.
In this guide, I want to show you three simple lighting setups that always work for me. These setups help create clean, bright, and professional images without stress. You can use them for clothing photography setups, studio lighting for fashion, and even when building your own eCommerce lighting guide.
I will speak from real experience. I want it to feel like we’re in the studio together, figuring this out step by step. Think of lighting like seasoning in cooking. A little change can make a big difference in the final taste.
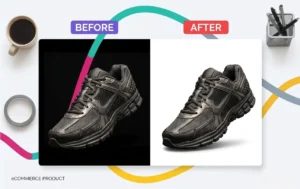
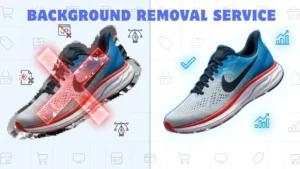
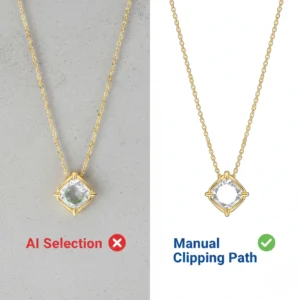
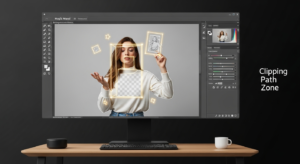
Before we begin, let me share a brand that helps me a lot — Clipping Path Zone. They handle editing for most of my fashion shoots. Their team offers background removal, ghost mannequin editing, color correction, and shadow creation. Their work saves me hours and makes my photos look ready for online stores.
Now, let’s get into it.
Introduction to Apparel Lighting Basics
Before you place your first light, pause and understand one thing: light decides how people see your clothes. Good apparel photography lighting helps viewers see texture, shape, and true color. If the lighting looks clean, people trust the product more. When people trust the product, they buy it.
I learned this the hard way when I shot my first clothing collection in a small room with one window. The images looked dull. The colors looked off. Once I fixed my lighting, everything changed.
Why Apparel Photography Lighting Matters
Why does lighting matter so much in clothing photography? Simple. Clothes need to look real and honest. People cannot touch the fabric online, so the photo must speak for the product.
Here is what good lighting does:
- Shows color as it is
- Brings out textures
- Makes fabrics look clean
- Reduces confusion for buyers
- Improves your brand image
When light is wrong, colors shift, wrinkles look harsh, and shadows become distracting.
Gear You Need for Simple Clothing Photography Setups
You don’t need expensive tools to start. I often use the simplest gear when teaching beginners. Here is what you need:
- Two softboxes or umbrella lights
- One reflector
- Light stands
- Backdrop (white or neutral)
- Your camera or phone tripod
If you have only one light, no problem. You can follow the first setup easily.
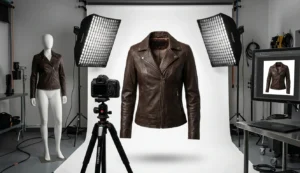
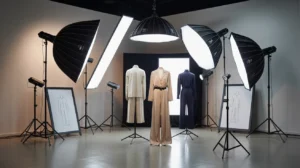
Lighting Setup #1: Softbox Front Light (Beginner-Friendly)
This is the simplest setup I use for new photographers. One softbox placed right in front of the clothing item gives clean and even light. It works great for flat lays, hanging clothes, or ghost mannequin shots.
How to set it up:
- Place the softbox about 3–4 feet in front of the clothing.
- Raise the light slightly above the height of the item.
- Tilt it down at a gentle angle.
- Use a reflector at the bottom if shadows appear.
This setup works because front light smooths everything. It is the “safe mode” of apparel photography lighting.
This front light makes your image look clean and even — great for flat lays, hanging shots, or ghost mannequin photography.
How to Position Your Softbox for Best Results
The softbox should not be too close or too far. Too close makes the light too soft and removes all shape. Too far makes harsh shadows.
Here is the sweet spot:
- 3–5 feet distance
- 15–30 degree downward tilt
- Center alignment with the clothing
Think of the softbox like the sun during sunset. It’s bright but soft and pleasant.
Lighting Setup #2: Two-Light Side Setup (Balanced and Clean)
This is my go-to setup for professional apparel shoots. Two lights on each side create a bright and balanced look, perfect for online stores.
How to set up:
- Place one softbox on each side of the clothing.
- Angle both lights toward the item at about 45 degrees.
- Make sure both lights are at the same height.
- Adjust power equally for a balanced look.
This setup reduces shadows while keeping the texture visible.
Tips to Control Shadows in a Two-Light Setup
Even with two lights, shadows may show up. Here is how to fix that:
- Use a white reflector in front.
- Move the lights closer to the item.
- Reduce the angle if shadows are too long.
- Increase the fill light on the darker side.
Small changes create big results.
Lighting Setup #3: Backlight Glow Setup (For Texture & Shape)
This setup adds life to fabrics. I use it when shooting jackets, dresses, and textured clothes.
How to set up:
- Place your main light in front of the clothing.
- Add a second light behind the clothing.
- Aim the backlight at the backdrop or toward the edges.
This creates a soft glow around the item and makes textures stand out.
Why Backlighting Works Well for Apparel
Backlighting adds depth. It separates the clothing from the background. If you want the fabric to “pop,” backlight is your best friend.
It also helps:
- Show soft folds
- Highlight lace or thin fabric
- Make dark clothing stand out
Some people avoid backlight because they think it’s hard. Trust me—it becomes easy with practice.
Using Reflectors for Extra Fill
Reflectors are cheap but powerful. They bounce light back onto the clothing. I use white or silver reflectors depending on the fabric.
Use white reflectors for:
- Soft shadows
- Bright clothes
- Natural-looking light
Use silver reflectors for:
- Dark clothes
- Shiny fabric
- Strong highlights
Reflectors are like mirrors for light.
Light Modifiers That Make a Big Difference
Changing how light behaves can change everything. Here are small tools that help:
- Diffusers to soften harsh flashes
- Grids to control spill
- Umbrellas for wide light
- Softboxes for smooth, soft light
If I could choose only one tool, I’d pick a softbox every time.
Common Lighting Mistakes and How to Fix Them
I see these mistakes often:
Mistake 1: Light too low
Fix: Raise the light above the clothing.
Mistake 2: Colors look off
Fix: Use daylight-balanced bulbs.
Mistake 3: Harsh shadows
Fix: Use a reflector or add a second light.
Mistake 4: Fabric looks flat
Fix: Add side light or backlight.
Small tweaks fix most issues.
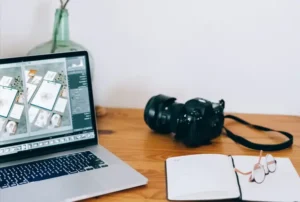
What Camera Settings Work Best for Apparel Photos
Here is a simple, reliable setup:
- ISO: 100–200
- Aperture: f/5.6 to f/8
- Shutter: 1/125 or faster
- White balance: Daylight or custom
These settings give clean and sharp images. They also work with studio lighting.
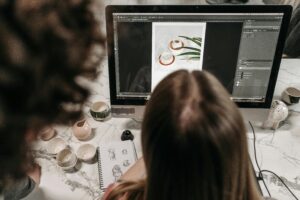
Editing Tips to Enhance Your Final Images
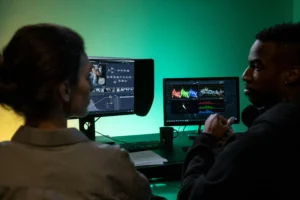
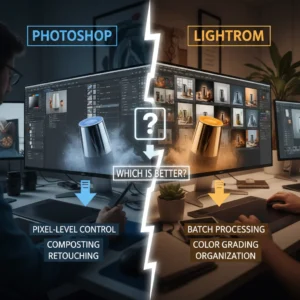
Once the shoot is done, it’s time to enhance your photos. I use Adobe Photoshop or Lightroom for basic edits.
Here is what I do:
- Brighten highlights
- Add contrast
- Fix wrinkles
- Improve color
- Clean background
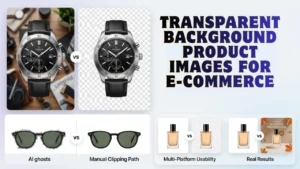
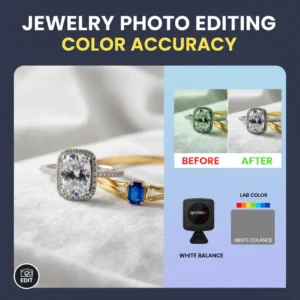
And for professional results, I often send files to Clipping Path Zone. Their team cleans the background, fixes colors, adds natural shadows, and gives the images a polished, store-ready look.
When I want a professional finish, I send my photos to Clipping Path Zone’s image editing team. They clean backgrounds, correct colors, and add natural shadows fast.
Their services make a huge difference, especially when shooting large batches of clothing.
Why Many Photographers Use Clipping Path Zone
Clipping Path Zone is trusted because:
- They offer background removal
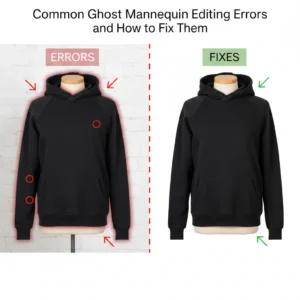
- They do ghost mannequin editing
- They correct color and exposure
- They add natural shadows
- They deliver images fast
Their work saves me hours of editing. It also helps my clients get clean images ready for online stores.
Conclusion
Apparel photography lighting does not have to be hard. With the right lighting setups, your clothing photos will look clean, bright, and professional. Start simple, practice often, and don’t be afraid to experiment.
If you need editing help, Clipping Path Zone can make your images look amazing and ready for eCommerce.
Remember the three setups:
- Front softbox light
- Two-light side setup
- Backlight glow setup
These three have helped me countless times, and they will help you too.
If your photos need editing help, brands like Clipping Path Zone make the final touches easy and professional.
FAQs
1. What is the best lighting setup for beginners in apparel photography?
A single softbox in front of the clothing works great. It creates soft and even light.
2. Do I need expensive gear for clothing photography?
No. A basic softbox kit, reflector, and tripod are enough to start.
3. Why do my clothing photos look flat?
The light is probably too direct. Add side or backlighting to bring out texture.
4. What is the ideal background for apparel photos?
White, gray, or light neutral backgrounds work best.
5. Can Clipping Path Zone help with editing?
Yes. They offer background removal, color correction, ghost mannequin effects, and natural shadow editing.