


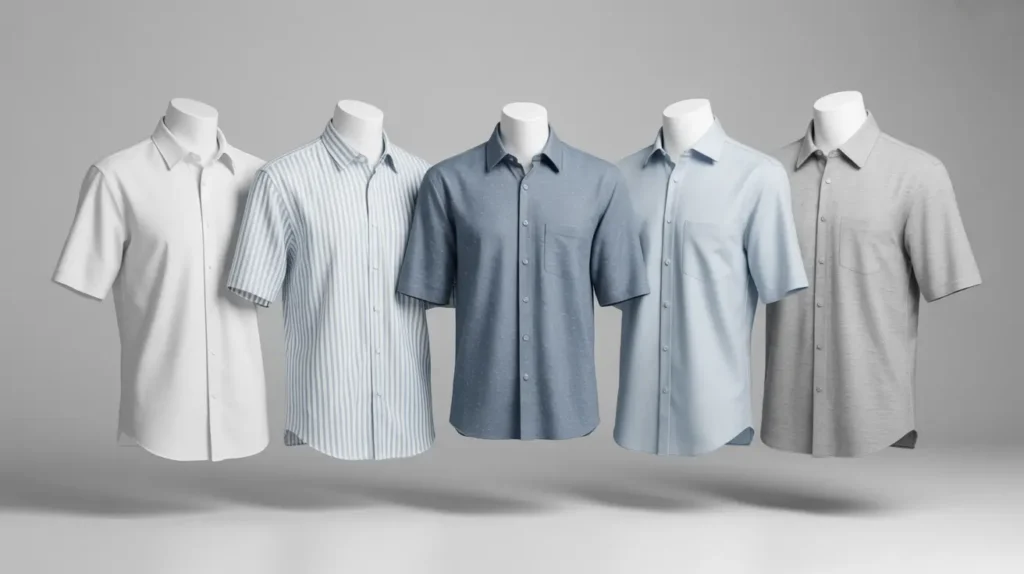
Imagine your clothing products floating in mid-air—no model, no mannequin, just the garment in full 3D effect. That’s exactly what invisible ghost mannequin photography delivers: crisp, clean apparel shots that make your items pop online and drive sales. I’ve spent years in product and fashion photography so I’ll walk you through everything: from camera setup to Photoshop editing, cost breakdowns, AI tools, and smart studio tips. Let’s dive in and make your apparel shine.
What Is Invisible Ghost Mannequin Photography?
In simple terms, invisible ghost mannequin photography (also called ghost mannequin photography) is a product photography technique where apparel is shot on a mannequin—then during editing the mannequin is removed “using professional background removal tools”.and the inside of the garment or additional views are stitched in so the clothing appears “worn” by an invisible figure. (Graphic Aid)
The effect? A clean, distraction-free image where your customer sees the garment’s shape, fit and drape—without a model or mannequin interfering. It gives a 3D visual feel and is ideal for ecommerce, catalogs, lookbooks, and apparel sites. (BigCommerce)
Think of it like this: if flat-lay is a shirt laid on the ground, ghost mannequin is that shirt still on a body—but invisible. That way your brand’s garment keeps its shape and presence.
How Much Does Ghost Mannequin Photography Cost?
One of the first questions many brands ask: How much does ghost mannequin photography cost? Here’s what the current market shows:
- Some studios charge from US $15 per garment for full front-and-back invisible mannequin shots (especially bulk orders in overseas studios). (Pryme Imagery)
- Typical pricing in the U.S. or UK: around US $25-30 per image for one garment front view. Some packages for multiple angles or full set cost US $55 or more per garment. (360Refinery)
- Some pricing models include basic editing, steaming/pressing, background removal. For example, a UK studio lists rates from £18 per garment for invisible mannequin service. (Ghost invisible mannequin photography)
- If you outsource just the editing (after you shoot the product yourself), companies offer very low rates—starting at US $0.89 per image for simple ghost mannequin edits. (Path Edits)
So the cost depends a lot on: number of garments, number of angles/views (front/back/inside), complexity of the garment (hoodies vs simple tshirts), quality of editing, turnaround time, and region.
Key takeaway: Plan for perhaps US $20-30 per image for good quality, with bulk or overseas offers reaching lower per-unit prices.
Tip: Always ask for what’s included (steaming, styling, number of views, editing quality, background, neck-joint stitching).
Ghost Mannequin vs Flat Lay: What’s the Difference?
Many brands use flat lay clothing laid on flat surface and shot from above because it’s simple and cheap but how does that compare to ghost mannequin?
Ghost Mannequin
- Garment is on a form (mannequin) or model and then the body is edited out.
- Shows the shape of the garment—how it drapes, how it fits.
- Gives a 3D illusion, better for apparel that has structure (jackets, shirts, dresses). (Graphic Aid)
- Requires more setup and post-production editing.
Flat Lay
- Garment laid flat (on floor/table) and shot from above.
- Easier, cheaper—great for casual wear, budget shoots.
- But doesn’t show fit or body shape; less dimensional. (ClothingPhotography.com)
When choose what?
- Use ghost mannequin for premium apparel, brands wanting consistent e-commerce look, garments where fit matters.
- Use flat lay for budget items, simple pieces, social media shots or when you want the focus on pattern/design rather than fit.
The difference matters because customers online can’t try on the clothes—they rely on imagery. Ghost mannequin gives more confidence in fit and quality, often translating to better conversion. (BigCommerce)
How to Do Invisible Mannequin Photography: Step-by-Step Guide
Here’s a practical step-by-step guide to achieving the invisible ghost mannequin effect—from prep to final image.
Prep Your Product & Studio
- Steam or iron the garment so it’s wrinkle-free. Many services include this in cost. (See 360 Degrees)
- Choose a mannequin that closely matches the garment size. Fit matters. (Profoto)
- Ensure your background is clean (white or neutral) to make editing/mannequin removal easier.
Shoot Front & Back and Inside Detail
- Place garment on mannequin. Ensure shoulders are level, hemlines straight. Use clips/tape if needed to make it fit tight. (Profoto)
- Take front view and back view (and for more complex garments, inner view: collars, linings, tags).
- Some workflows also include an “inside” shot (without mannequin) so you can stitch the inner portion in the edit. (Path Edits)
Lighting & Camera Setup
- Use even lighting, typically two lights with umbrellas or softboxes, one on each side. Avoid harsh shadows. (BigCommerce)
- Camera at same level as the mid-section of the garment (for tops, chest height; for pants, hip height) so the shape is accurate and natural. (Photoroom)
- Use tripod to ensure consistency across many products.
Post-Production: Removing the Mannequin & Building the Neck Joint
- In software like Adobe Photoshop, you’ll overlay the front shot and the inside/hidden shot (or back shot) to stitch in where the mannequin was. (BigCommerce)
- Create what’s called the “neck joint” (or “internal fill”) — this is the part where the inside of the garment shows where the mannequin would have blocked.
- Clean up any visible mannequin edges, ensure natural shadows and drape remain.
- Export the image on white background (or whatever your website uses) and optimize for web (file size, color profile, consistency).
Quality Check & Upload
- Check that the garment edges are clean, no mannequin pieces visible.
- Ensure the garment looks natural and not overly stiff or artificial.
- Upload to your e-commerce system, name the image properly (e.g., SKU_front.jpg), include alt text like “invisible ghost mannequin photography – brand item”.
Ghost Mannequin Photography Guide: Shooting & Editing Apparel
Inside this section we’ll dive deeper into both shooting and editing—so your apparel truly stands out.
Shooting Apparel
- Choose a mannequin with detachable parts (arms/chest/back) — helps in easier removal later. (Tech Cloud Ltd)
- For structured pieces (jackets, hoodies), zip up, adjust lining and folds so garment retains shape.
- For soft garments (tees, knits), gently stretch or pin so the shape looks “worn” rather than limp.
- Use neutral mannequin (white or matte) that’s non-reflective—so editing is easier. (Photoroom)
- Photograph under consistent lighting. Keep background the same for your entire catalog—consistency matters for brand look.
Editing Apparel
- Open both shots (front on mannequin + inside/back without mannequin) in Photoshop (or similar).
- Use selection/clipping path tools to isolate the garment from the mannequin on the front shot.
- Paste in the inside/back portion to fill the “hole” where the mannequin was.
- Smooth out edges, adjust shadows to ensure depth remains.
- Retouch: clean any dust, lint, tag strings.
- Apply background removal or replace background with standard white or brand color.
- Export in web-ready size (3000px or required by store) and name accordingly.
This workflow helps your garments appear as if they’re “floating” but still maintain realistic shape and volume.
Pro Setup Tips: How to Photograph Clothes for Ghost Mannequin Results
Here are some pro tips to get high quality results:
- Match mannequin size to garment size – If the mannequin is too big or too small, the fit looks off. (Profoto)
- Aim for symmetry – Use a grid overlay or markers on floor for tripod placement and background alignment. (Profoto)
- Use pins, clips and tape to adjust garments so sleeves/hems align perfectly. (Profoto)
- Shoot multiple angles – Front, back, side, inside linings if required. Especially for jackets/hoodies.
- Consistent lighting – Set white balance and keep it same across batches so color remains accurate.
- Label & catalog everything – When you shoot dozens/hundreds of garments, ensure you record SKU, size, color, shot angles. Saves time later.
- Batch your workflow – Shoot all shirts one day, then hoodies the next; keeps your lighting and setup consistent which helps editing batch process.
- Test before full run – Especially for new garments or fabrics—test how the fabric reacts to light, how shadows fall, how editing will work.
Ghost Mannequin Photoshop Tutorial: Remove Mannequin & Build Neck Joint
Let’s walk through a detailed Photoshop (or similar) workflow for the ghost mannequin effect.
Step 1: Open Your Source Shots
- Open the shot of garment on mannequin (front view) and the shot showing the inside/back/hidden parts.
- Make sure they’re aligned (same lighting/background) so compositing is simpler.
Step 2: Create Layer Mask for Mannequin
- On the front view layer: use Pen tool / Magic Wand / Select Subject or follow this clipping path in Photoshop guide to isolate the garment.
- Mask out (hide) the visible mannequin portion so only the garment remains. You’ll see a “hole” where the mannequin was.
Step 3: Paste in the Inside/Back View
- Drag the inside/back view layer in, align it so the collar, neckline or inside portion fills the “hole”.
- Use Free Transform (Ctrl/Cmd + T) to match size/position.
Step 4: Blend & Clean Edges
- Use a soft brush on the layer mask to smooth any harsh transitions.
- Adjust the lighting/shadow on the inside patch so it matches the front shot (brightness, contrast).
- Remove any mannequin shadows or artifacts.
Step 5: Retouch Details
- Remove lint, stray threads, tags. Clean up wrinkles if necessary (but keep natural fabric texture).
- Use Clone Stamp or Healing Brush for minor fixes.
Step 6: Background & Final Checks
- Confirm background consistency (white or brand color). Remove remaining mannequin traces.
- Export High-Res (3000px or required) & Web-Optimized version (72 dpi, sRGB).
- Name the image: e.g., SKU123_front_ghost.jpg and include alt text in your web upload: “Invisible ghost mannequin photography shirt brand”.
This tutorial workflow is very similar to what many editing services offer. (Path Edits)
Invisible Mannequin Effect Tutorial: Front + Back Apparel Editing
Typically for apparel you’ll want both front and back views, and optionally side or detail shots. Here’s how to include those in your editing workflow.
- Shoot the front view on the mannequin and a back view (or inside view).
- In post-production, you might create two separate ghost mannequin images: one for the front, another for the back—or combine into a single composite if your layout allows.
- If combining: you can place the front view alongside the back view in one image (split layout) or build a 360-view rotating asset.
- For complex pieces (jackets with lining, hoods, multiple layers) you might need multiple “inside” shots to stitch in the areas where mannequin removal leaves voids.
- Use consistent lighting and background across all shots so when you edit you don’t get mismatched color/lighting between front/back.
- Always check the neck joint, collar area, shoulders—these are the trickiest because removing mannequin often exposes seams or odd angles.
By following this workflow you ensure your apparel looks visually consistent from all angles, reinforcing consumer confidence.
Studio Setup: Tools, Mannequins & Workflow for Ghost Mannequin
Creating a efficient ghost mannequin studio setup is key—especially if you shoot many garments regularly.
Mannequin
- Use a mannequin with removable sections (arms, chest, legs) to help editing. (Profoto)
- Choose a neutral matte finish (white or light grey) so there are no reflections.
- Ensure the mannequin fits the typical size of your garments so the shape looks natural.
Lighting & Background
- White seamless backdrop or curved “infinity” background helps eliminate shadows.
- Two or more softboxes (one each side) with umbrellas/diffusers to provide even lighting.
- Optional: overhead light to eliminate top shadows.
- Camera on tripod at fixed height & distance to keep consistency across shots.
Camera & Lens
- Use DSLR or mirrorless camera (e.g., 24-70mm lens) set at a focal length that avoids distortion.
- Set aperture around f/8-f/11 for clean depth of field so the whole garment is sharp.
- Use remote or timer to avoid camera shake.
Workflow
- Number garments and keep shot list (SKU, color, angles).
- Steam/press garments before shoot.
- Dress mannequin, adjust garment, clip/tape as needed.
- Shoot front, back (and inside if needed), detail shots.
- Immediately import into editing software and tag accordingly.
- Export final images and upload to your e-commerce platform.
Tools & Apps
- Software: Adobe Photoshop or equivalent.
- Backup hard drives or cloud storage for RAW + exported files.
- Optional: ghost mannequin editing apps or outsourced services for bulk edits.
- Batch naming templates in your ecommerce store for consistent uploads.
10. Best Camera Settings for Ghost Mannequin Product Photography
Getting the right camera settings helps your editing workflow and final image quality.
- ISO: Keep it low (e.g., ISO 100-200) to avoid noise.
- Aperture: Around f/8-f/11 ensures sharpness over entire garment.
- Shutter Speed: Since you’re on a tripod, you can use slower speeds—set accordingly (e.g., 1/125s) just to avoid any motion blur if mannequin or light moves.
- White Balance: Set manual or use custom preset (e.g., 5500K) so all garments match color exactly.
- Focus: Use single point focus on the chest area of the garment; ensure the fabric detail is crisp.
- File Format: RAW for maximum editing flexibility. Then export to high-res JPEG or PNG for web.
- Lens: Use a lens with minimal distortion. Avoid wide-angle unless you’re far enough away.
- Background Separation: Ensure there is enough space between mannequin and background so you get nice edge separation and easy masking in editing.
Using these settings will help you get consistent, high-quality source images which in turn make the ghost mannequin editing much easier and the final results much better.
Ghost Mannequin Editing for Hoodies, Shirts & Jackets – Complete Guide
Different garments have different challenges when applying the ghost mannequin effect.
Shirts & Tops
- Front shot: ensure collar sits naturally, no puckering.
- Inside/back shot: collar and neckline often easiest for stitching the “hole”.
- Clip sleeves if needed so they look full and natural.
Jackets & Hoodies
- These often require more complex inner shots (lining, hood interior).
- When editing, make sure shoulders and arms look symmetrical—use masking/cloning to maintain shape.
- For hoodies, open the hood slightly to show structure so post-edit the “ghost” effect still looks realistic.
Detailed Fabrics
- For patterned fabrics, ensure pattern alignment between front and inside/back shots.
- Use high-resolution shots so texture is visible.
- During editing, maintain shadow and fold detail so the garment still “lives”.
Volume & Depth
- One of the benefits of ghost mannequin is you can give clothes “volume”—they don’t look flat.
- Use shadowing carefully in editing so you don’t lose depth.
- If the inside/back shot lighting differs, adjust curves/levels so the stitch-in portion matches seamlessly.
Final QA
- Zoom in to check for mannequin remnants, ghosted neck seams, inconsistent lighting.
- Ensure export matches your website’s dimension guidelines (e.g., 3000px width) and check file size for speed.
- Each export should include proper naming, alt-text for SEO, and tags if your CMS supports.
By following the above you’ll handle even the trickiest garments smoothly and deliver polished, professional ghost mannequin images.
How to Make a 3D Ghost Mannequin Effect Without a Mannequin
What if you don’t have a good mannequin? You can still achieve the ghost mannequin look—here’s how.
- Use a human model wearing the garment in a static, neutral pose (straight torso, arms at sides). Then shoot extra “inside” or back view without model. (Photoroom)
- Alternatively, use a DIY form-fitting rig: hang the garment on a hanger or dress form and use wire or invisible thread to create shape. Then shoot and edit like ghost mannequin.
- Use apps designed to remove model/mannequin—for example certain mobile ghost mannequin apps offer mask and background removal. (Search for “ghost mannequin app” or “ghost mannequin AI”).
- When editing, you’ll still use the same workflow: front view, inside/hidden view, mask out the form or model, stitch in the hidden part, maintain shadows and shape.
So even without dedicated mannequin hardware you can still deliver the 3D “floating garment” effect—but expect more editing work and potential compromises in fit realism.
Invisible Mannequin Photography Tips for Fashion Brands
For brands wanting to maximize the value of ghost mannequin photography:
- Consistency is key: Use the same background, lighting, mannequin size, image dimensions across all products so your catalog looks unified and professional.
- Batch shoot: Doing many garments in one session saves setup time and ensures consistency.
- Quality matters: Even small wrinkles, shadows or mannequin leftovers degrade the “premium” feel of the image. High quality ghost mannequin images often lead to higher conversion and fewer returns. (See 360 Degrees)
- File optimization: Large images slow down your site—make sure you compress appropriately without losing visual quality.
- Use alt text and SEO naming: E.g., “brand-name invisible ghost mannequin photography sweatshirt” helps search engines and accessibility.
- Mobile friendly: Many shoppers view on mobile—make sure images scale well and still show shape/detail.
- Consider outsourcing editing: If you have large volume, editing in‐house may be expensive/time-consuming—many services offer ghost mannequin edits at low per-unit cost. (Path Edits)
- Track results: Measure conversion rate, return rate for garments with and without ghost mannequin images—this gives you ROI justification.
The Purpose of a Ghost Mannequin Service + AI Ghost Mannequine & Apps
Why use a ghost mannequin service?
- Saves hiring live models (which can be costly and logistically complex). Ghost mannequin allows shape without distraction. (360Refinery)
- Provides a 3D look for garments online, improving customer trust and reducing returns. (BZM Graphics)
- Ensures consistent catalog look—which is important for brand identity.
- Editing-ready workflow: you can ship garments to a service, they shoot + edit, you receive ready-to-use images.
AI Ghost Mannequine / Ghost Mannequin App
- There are apps and AI tools now that streamline the ghost mannequin workflow: smartphone apps where you shoot your garments and the app removes the background/mannequin and applies the effect. (Photoroom)
- These tools are especially helpful for small brands or those with less budget—allowing partial automation of the process.
- But be aware: AI alone may struggle with complex garments, detailed linings or heavy fabrics; manual editing still often yields better results.
- When you search “ghost mannequin app” or “ghost mannequin AI”, you’ll find mobile solutions, but always check sample output quality.
So whether you use an in-house setup, outsource to a dedicated service, or leverage AI tools—there’s a workflow that fits your budget and volume.
Retouching Clothing for Ghost Mannequin Photos: Shadows + Shape
Even after you’ve removed the mannequin, your job isn’t done. Retouching makes the difference between “good” and “great”.
- Shape: Ensure the garment looks “worn” legitimately—not too rigid, not too flat. Use soft shadowing to give volume.
- Shadows: For example, the inside/back patch you stitched in might have slightly different lighting—adjust brightness/contrast, match shadows so it blends seamlessly.
- Texture: Keep the fabric texture intact—especially for premium garments (knits, denim, wool). Too much smoothing loses authenticity.
- Wrinkles & folds: Some garments look better with natural folds; don’t over-iron everything out unless you want a stiff look.
- Edges: Use feathering or slight blur on outer edges so they don’t look cut-out.
- Background consistency: If your white background is slightly off in some images (lighting shifts), standardize it in batch using curves/levels.
- Color accuracy: Use calibrated monitor, ensure colors match real product. Especially important for online apparel.
- Export versions: Create one high-res master (for print/catalog) and one optimized web version (smaller size, faster loading).
By paying attention to these retouching steps, your ghost mannequin images will look polished, professional and high-end.
Conclusion
Invisible ghost mannequin photography is a powerful tool for apparel brands and e-commerce stores. It gives your garments the premium, 3D look customers want—without the cost and distraction of models. Whether you’re doing it yourself, outsourcing to a service, or using AI tools, following the right workflow from studio setup, camera settings, shooting, editing, and retouching—is key to success.
Use this full-depth guide as your roadmap: pick your workflow, budget accordingly, maintain consistency across your catalog, and focus on quality so your product images drive conversions. Your customers will see the difference and your brand will benefit.
FAQs
Q1. How much does ghost mannequin photography cost?
A1. It varies by region, garment type, angles needed and editing complexity. Rough estimates: US $20-30 per image for one front shot; services start around US $15 per item in bulk/offshore. Editing-only services may start at less than US $1 per image for basic ghost mannequin edits. (Pryme Imagery)
Q2. How do I create invisible mannequin photography?
A2. Use a mannequin (or model) to shoot the garment, take an inside/back shot, then edit out the mannequin in software by stitching the inner part (neck-joint) and cleaning up edges, shadows and shape. Follow the step-by-step guide above.
Q3. What is the difference between flat lay and ghost mannequin product photography?
A3. Flat lay places the garment flat on a surface and shoots from above. Ghost mannequin uses a form (mannequin or model) and then removes the body in editing, giving the garment shape, volume and a 3D effect. Ghost mannequin is better for showing how clothing fits and drapes; flat lay is cheaper and simpler.
Q4. How can I achieve ghosting in photography (ghost mannequin effect)?
A4. ‘Ghosting’ means making the mannequin or model invisible. Achieve this by shooting the garment and then using editing software (like Photoshop) to remove the mannequin, stitch in hidden views and preserve realistic shadows and shape. You may also use ghost mannequin apps or AI tools to assist.
Q5. Why should a fashion brand use a ghost mannequin service?
A5. Because it boosts visual appeal, shows garments clearly and consistently, can improve conversion rates, reduce returns (customers see better fit/shape), and often presents a more professional look than simple hanger or flat-lay shots. Outsourcing this service saves time and leverages expert editing—especially valuable when you have many SKUs or limited in-house resources.
