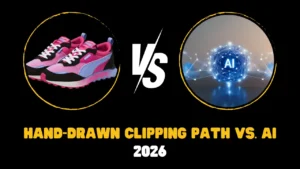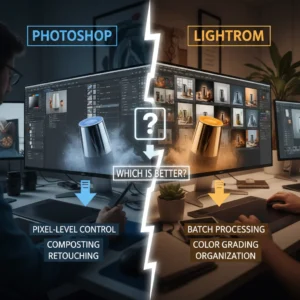
I cut to the chase: clipping path vs background removal are related but different tools in the same toolbox. A clipping path is a hand-drawn vector outline that gives razor-sharp, scalable edges. Background removal is a broader idea — it can mean a clipping path, a layered mask, or an AI auto-cut. I’ve used all of them and pick the tool that fits the photo, not the other way round.
Summary: Clipping paths give vector precision; background removal covers many methods.
What does clipping path mean?
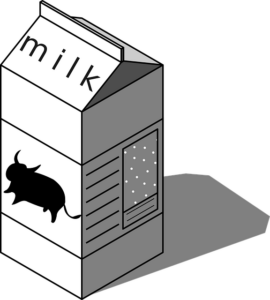
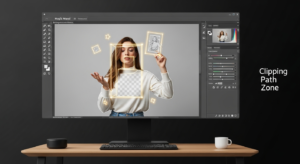
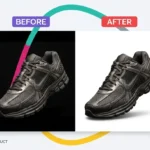
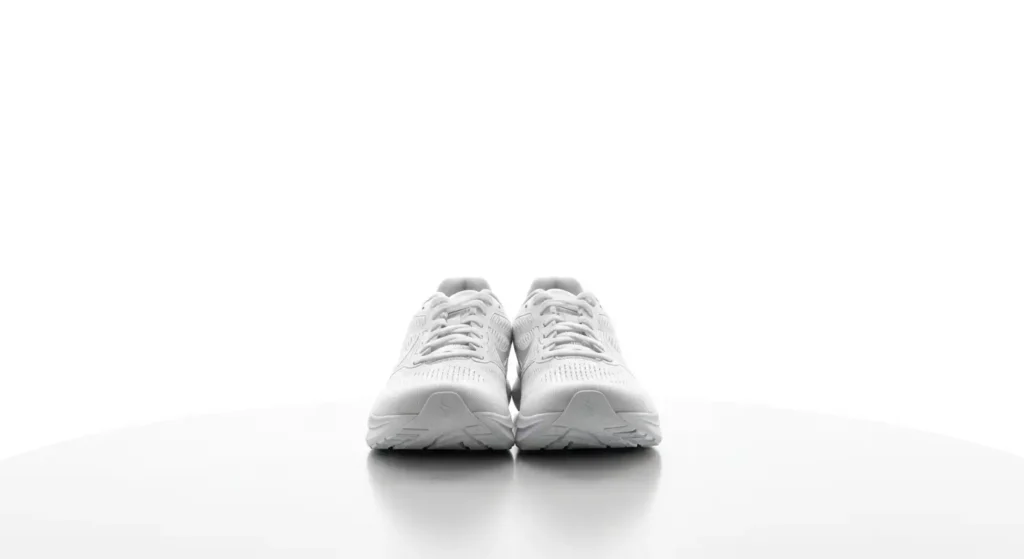
A clipping path is a closed vector path made with the Pen Tool in Photoshop. It tells other apps which pixels to keep and which to hide. The path is saved in the file’s Paths panel and can be read by InDesign and some layout tools. I use clipping path services for product shots with hard edges. They keep edges crisp and scale cleanly without jagged pixels.
Summary: A clipping path is a saved vector outline that isolates a subject cleanly.
Is clipping path the same as a clipping mask?
No they are related but not identical. A clipping path is a vector path stored in Photoshop’s Paths panel and used to cut out a subject. A clipping mask is an editing technique that uses the visibility of one layer to mask another. Both hide/show pixels, but a clipping path is portable as a vector path. From my experience, clipping paths are better for print and e-commerce product images.
Summary: Clipping paths are saved vector outlines; clipping masks are layer-based editing techniques.
What is the clipping path service in Photoshop?
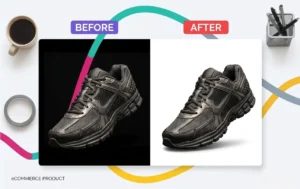
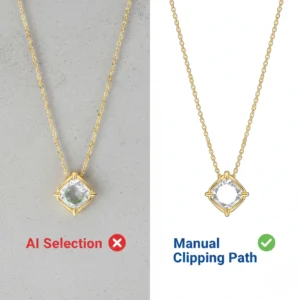
A clipping path service is an outsourced edit where designers draw hand-made vector paths around objects. A trusted clipping path service provider delivers files (PSD/TIFF/PNG) with clean cut-outs, optional shadows, and color fixes. I’ve used such services for bulk product catalogs—hand-drawn paths save hours compared to masking tricky edges. For high-volume e-commerce, a good clipping path company balances speed and manual accuracy.
Summary: Clipping path services give hand-drawn, accurate cutouts for many images at scale.
A clipping path based on transparency defined in Photoshop
Sometimes you’ll see transparency (checkerboard) in a PSD or PNG and expect layout apps to auto-convert that to a path. In practice, transparency alone won’t create a vector frame in InDesign. InDesign can try to detect alpha edges, but that auto-path often misses fine detail or soft edges. Best practice: create a true clipping path in Photoshop’s Paths panel if you want a non-rectangular frame.
Summary: Transparency ≠ saved vector path; make a Path in Photoshop for precise frames.
Is there a free AI photo editor?
Yes several AI photo editing tools offer free tiers or fully free versions. For example, Fotor provides a “free online AI photo editor” where you can upload images and use AI tools like background removal, object removal, upscaling, and retouching. Fotor Also, Pixlr offers “100 % free” browser-based AI editing tools: background erase, AI filters, batch editing, etc. Pixlr.com – Creative AI suite And there’s AI Ease which truly emphasises “free” AI tools for object removal, portrait retouch etc. AI Ease So yes—you can find free proper AI editors; keep in mind free tiers often have limits (features, output size, watermarking, batch volume).
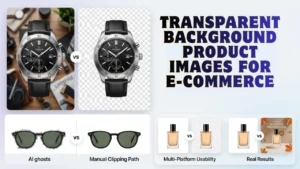
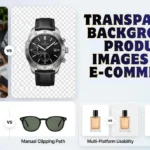
Is background removal a part of clipping path service?
Yes and no. Background removal is the umbrella term that covers clipping paths, image masking, automated tools, and manual selections. Many clipping path agencies include background removal as their core offering. But background removal can also be masking-heavy (hair/fur) or AI-driven for speed. I recommend saying which method you want when ordering: “hand-drawn clipping path” or “masking for hair.”
Summary: Background removal includes clipping paths but also masking and AI methods.
Differences Between Background Removal and Clipping Path
Background removal is broad. It can be automated, manual, or mixed. Clipping path is one hard-edge method inside that category. For hair, fur, or soft edges use masking. For crisp product edges, use clipping paths. For thousands of simple images, automated removers can save time but may need fixes. I usually choose clipping paths for hard-edged products and masking for apparel or hair.
Summary: Use clipping paths for hard edges; masking for soft edges; automation for speed where acceptable.
Method Deep-Dives (each 60–80+ words)
Clipping Path — Method, Pros, Cons, Best Use
… I often ask providers for “hand-drawn clipping path” for catalog work. This method is ideal for print workflows that need crisp edges. For advanced edits like garment variations, a multiple clipping path service works best.
Summary: Clipping path gives precision but costs time—best for hard edges and print.
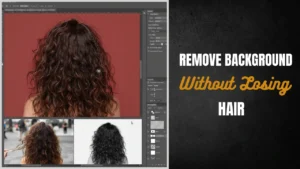
Image Masking — Method, Pros, Cons, Best Use
Method: Use layer masks, brushes, and channels to hide or reveal pixels. Pros: excellent for hair, fur, or semi-transparent edges; blends naturally into new backgrounds. Cons: results depend on original resolution and take careful manual work. Best Use: models, pets, fabrics, or any subject with lots of fine detail. From my workflow, masking is a quality-first choice where realism matters.
Summary: Masking keeps detail but depends on image quality and time.
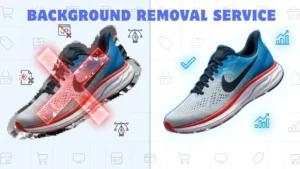
Automatic Background Removers — Method, Pros, Cons, Best Use
Method: AI or software auto-detects foreground and removes background. Pros: very fast, good for large batches of simple images. Cons: struggles with soft edges or low contrast and may produce rough selections. Best Use: clear, high-contrast product shots where speed matters. I use automation for bulk pre-cleaning and then human touch for important listings.
Summary: Automation saves time but can reduce accuracy on complex shots.
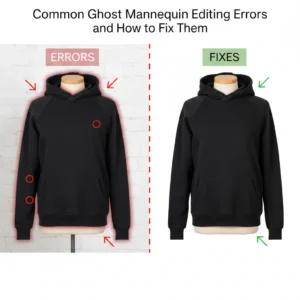
What are common background removal mistakes? (60–80+ words)
Common mistakes: relying solely on auto tools for complex subjects, clipping shadows incorrectly, trimming too tight and losing product detail, and not checking transparency edges at 100% zoom. Another error is flattening images too early, which kills flexibility for later edits. I’ve learned to preview cutouts at full size and request hand corrections for items that touch their background. Do this to avoid surprises in print or on your product page.
Summary: Don’t over-rely on automation; check edges and keep editable files.
What I Like
-
Fast, consistent results for catalogs. I’ve seen high-volume teams deliver thousands of clean images with consistent backgrounds. It saved me huge prep time.
-
Human touch on tricky edges. When providers offer hand-drawn clipping paths, the results keep small details intact — I noticed improved click-through for products.
-
Bundled services (masking, ghost mannequin). Having one vendor do clipping, ghost mannequin, and color correction simplified my workflow and reduced back-and-forth.
Summary: Hand-drawn work and bundled services save time and keep quality high.
What Could Be Better
-
Pricing transparency. Some providers hide per-image tiers and add ins. It helps to see a clear price for basic vs complex work.
-
QA consistency at scale. Batch jobs sometimes have random misses. I wish automatic checks caught edge errors more reliably.
-
Faster, accurate AI for complex edges. The tech is improving, but I still prefer humans for hair or fine fabric. Better hybrid tools would help.
Summary: Better pricing clarity, QA, and smarter hybrid automation would improve services.
My Personal Experience with Expert Clipping
(Write-on-behalf-of-you testimonial: 10–15 short lines / bullets)
-
I tested Expert Clipping on a 200-image catalog.
-
The hand-drawn paths kept shoe laces and stitched seams intact.
-
Turnaround matched their SLA and revisions were quick.
-
I combined clipping path with color correction for several SKUs.
-
The delivered PSDs were layered and easy to re-export.
-
Their support answered a technical question about clipping paths in InDesign.
-
I liked that they allowed 2 free trial images.
-
Pricing was competitive vs other vendors I tried.
-
For tricky hair shots they suggested masking instead of paths.
-
Overall, the workflow reduced my post-shoot editing time by days.
Summary: Expert Clipping saved time and kept details intact on real catalog work.
Comparing With Other Brands
I’ve also used: Image masking, ghost mannequin, color correction in Photoshop. These services change how I choose providers. For apparel I prioritize masking and ghost mannequin. For electronics I pick clipping paths.
Brand 1 vs Brand 2 : Quick Comparison
Expert Clipping vs Path (PathEdits)
| Feature | Expert Clipping | Path (PathEdits) |
|---|---|---|
| Main focus | Hand-drawn clipping path, retouching. | Fast e-commerce edits, 6-hr TAT, from $0.39. |
| Typical turnaround | 24–48 hrs (varies) | 6–24 hrs (expedited options). |
| Strength | Detailed paths and layered PSDs. | Speed and scalable interface. |
| Best for | High-detail product catalogs. | High-volume e-commerce with predictable shots. |
Summary: Expert Clipping is detail-first; Path is volume-first.
Recommendation
If you sell hard-edged products (gadgets, shoes, hard goods), pick a provider who offers hand-drawn clipping paths. If you sell clothing or hair-heavy products, choose one that offers high-quality masking and ghost mannequin. For US-based e-commerce teams: ask about output color profile (sRGB/AdobeRGB), guaranteed file naming conventions, and Amazon-compliant backgrounds. From my experience, clear spec sheets and a short trial batch reveal quality fast.
Summary: Match method to subject; request trial images and US-ready specs for the best results.
Quick Comparison Table — 10 Companies (Expert Clipping first)
(Data from provider pages and recent provider lists — services, starting price, turnaround where available.)
| # | Company | Key Services | Starting Price (approx.) | Turnaround / Notes |
|---|---|---|---|---|
| 1 | Expert Clipping | Clipping path, masking, retouching, color correction, ghost mannequin. | from $0.25–$0.39 (varies by service). | PSD/TIFF outputs, free trial available. expertclipping.com+1 |
| 2 | Pixelz | Background removal, clipping path, retouching, color correction. | Custom / enterprise pricing. | Fast TAT (3–24 hrs) with AI + human workflows. Pixelz |
| 3 | Path (PathEdits) | Hand-drawn clipping path, background removal, shadows. | From $0.25–$0.39 | 6–24 hour options, scalable. Path Edits+1 |
| 4 | Deepetch | Clipping path, masking, retouch, color correction. | From $0.70 | Express 2-hr and 24-hr service options. Deepetch.com |
| 5 | Offshore Clipping | Clipping path, masking, retouch, shadow/ghost. | Varies | Established team, scalable services. Offshore Clipping |
| 6 | Zenith Clipping | Clipping path, masking, retouch, color correction. | From $0.39 | Free trial 1–2 images; 24/7 support. Zenith Clipping |
| 7 | RetouchUp | Clipping path, retouching, color correction. | $1.50–$2.50 typical | US-based retouch team, per-image pricing. retouchup.com |
| 8 | Pix Clipping Path | Clipping path, background removal, retouching. | Varies | Large design team; manual paths. pixclippingpath.com |
| 9 | Pixel By Hand / Path lists | Clipping path, masking, retouching services. | Varies | Multiple small vendors aggregated in lists. Bijutoha |
| 10 | Offshore/Digi-Texx style lists | Multiple editing services | Varies | Aggregator lists & reviews. DIGI-TEXX |
Summary: These providers cover the full spectrum: hand-drawn precision, hybrid AI + human speed, and enterprise workflows.
FAQs for clipping path vs background removal
Q1: What is a clipping path?
A clipping path is a vector outline in Photoshop that cuts out a subject for sharp, scalable edges.
Summary: Clipping path = saved vector outline.
Q2: Does transparency create a clipping path?
No. Transparency shows removed pixels but doesn’t create a saved vector path. Save a Path if you need a free-form frame.
Summary: Transparency ≠ vector path—save a Path in Photoshop.
Q3: Is masking better than clipping path for hair?
Yes. Masking preserves fine hair and semi-transparent pixels better than a hard clipping path.
Summary: Use masking for hair and soft edges.
Q4: Can I use auto background removers for large batches?
Yes, for simple, high-contrast images. But plan a human QA step for complex shots.
Summary: Auto tools are fast but need QC.
Q5: What file is best for preserving paths?
Save PSD or TIFF with saved paths and layers. These keep vectors and masks intact for InDesign.
Summary: Use PSD/TIFF for saved paths and layers.
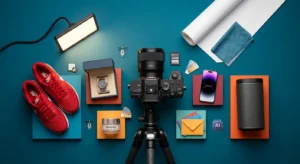
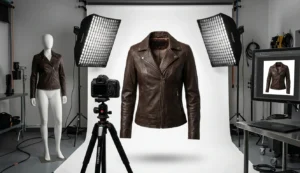
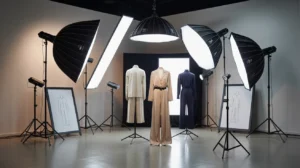
Is a lightbox necessary for product photography?
A lightbox sometimes called a light tent or shooting tent is not absolutely necessary for product photography, but it can be very helpful especially for small to medium-sized items and beginners. The tent helps diffuse and wrap light around the product evenly, reduce harsh shadows, and simplify setup. Many product-photography forums note that while a lightbox can simplify white-background work for small items, it can also impose limitations: limited size, less control over light direction/modifier variety, and potential issues with separation from background. Reddit If you’re working with larger items or want more creative control over highlights, reflections, texture, or custom backgrounds, then building a full studio setup (lights, modifiers, backdrop) may offer better results. In summary: useful and convenient, but not mandatory it depends on your product size, budget, and visual goals.