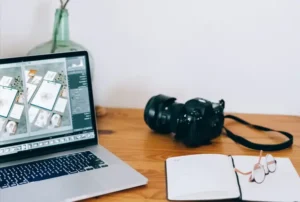

If you’ve ever opened Lightroom to edit product photos and thought, “Where do I even start?” — I get it.
Back when I first edited my first batch of e-commerce shots for a client, I spent an entire night tweaking colors, only to realize the background looked dull.
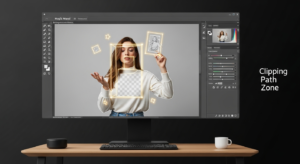
Today, I’ll show you exactly how to edit product photos in Lightroom and, while we’re at it, share how Clipping Path Zone uses InDesign clipping masks to make layouts pop.
Step 1: Import and Organize Your Photos
Short Answer: Import your product images into Lightroom using the “Import” button, then add keywords, ratings, and collections for fast workflow.
This might sound boring, but organizing saves hours later. I always tag by product type, background color, and client name so finding images feels like flipping through a neatly labeled filing cabinet instead of digging through a messy drawer.
Step 2: Correct White Balance
Short Answer: Use the White Balance Selector tool to click on a neutral gray or white area in your image.
For product shots, accurate color is critical. Imagine buying a “forest green” jacket online and receiving something more like neon lime — that’s how returns happen. At Clipping Path Zone, we color-check every shot to match the real product.
Step 3: Adjust Exposure and Contrast
Short Answer: Increase exposure slightly for bright, clean images; adjust contrast to make the product stand out.
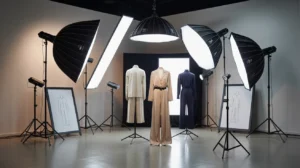
A good product photo should be clear and well-lit. If it’s too dark, it feels uninviting; too bright, and you lose details.
Here’s my quick cheat sheet:
| Adjustment | Recommended Range for E-Commerce |
| Exposure | +0.20 to +0.50 |
| Contrast | +10 to +20 |
| Highlights | -10 to -30 |
| Shadows | +20 to +40 |
Step 4: Sharpen and Reduce Noise
Short Answer: Use Lightroom’s Detail panel — Sharpen around 60–80, Noise Reduction 10–20 for web-friendly images.
Too much sharpening can make products look fake, but too little and they’ll look blurry.
We test our edits at 100% zoom to make sure details like stitching or texture stay clear.
If you need help beyond Lightroom adjustments, our team also offers advanced photo retouching services for commercial use.
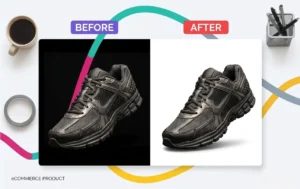
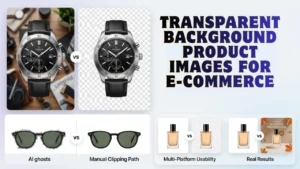
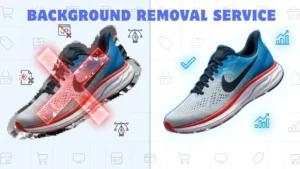
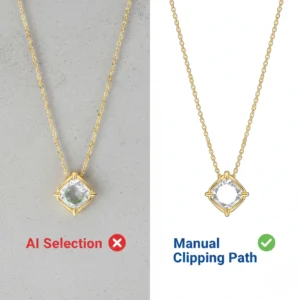
Step 5: Background Cleanup
Short Answer: For stubborn backgrounds, export to Photoshop or use InDesign’s clipping masks for layout integration.
This is where InDesign clipping masks shine — especially if you need the product isolated for catalogs or promotional layouts.
Let’s address the common clipping mask questions you sent, point-by-point.
For more complex background work, our clipping path services offer precision for even the most detailed products.
Clipping Mask in InDesign — Complete Q&A
What is the best way to mask images in InDesign for professional design projects?
The best method is using the “Paste Into” command — it’s fast, precise, and keeps the mask editable.
Which masking technique in InDesign gives the most accurate results?
For sharp, print-ready masks, use a Compound Path before “Paste Into.”
This avoids awkward edges when using multiple shapes.
How does InDesign’s clipping mask compare to Photoshop’s masking tools?
Photoshop masks are pixel-based; InDesign masks are vector-based.
If you want scalable, layout-ready shapes, InDesign wins.
Why do designers prefer using clipping masks in InDesign for layout work?
Because it’s non-destructive and integrates perfectly with text, grids, and print specs.
Quick Comparison Table — Clipping Mask vs Cropping in InDesign
| Feature | Clipping Mask | Cropping |
| Non-destructive | ✅ | ❌ |
| Shape flexibility | ✅ | ❌ |
| Editable after apply | ✅ | ❌ |
| Best for layouts | ✅ | ❌ |
Clipping Path Zone Customer Review
“I sent 50 product shots for background removal and InDesign layout masking — they came back pixel-perfect. The team even fixed a few lighting issues in Lightroom without me asking. Fast, affordable, and professional.”
— Emma R., E-Commerce Store Owner
If you’re looking for a professional clipping path service provider that also understands layout and design workflows — this is it.
- Get Instant Cost Estimate → Try our online calculator to see how affordable pro-level editing can be.
- Request Your First 3 Images Free → Test our Lightroom edits and InDesign masking quality before you commit.
- Subscribe & Save on Bulk Editing → Perfect for ongoing catalog or e-commerce product updates.