

If you’ve ever wrestled with Photoshop paths and wondered, “How do I just merge these so I can stop juggling a million tiny shapes?” — I totally get it. Merging paths is like tidying up your digital workspace, so you can focus on creating instead of fumbling. In Photoshop, merging paths means combining separate outlines or shapes into one smooth, clean path. This makes editing easier, faster, and way less frustrating.
Understanding Paths in Photoshop
So, what exactly are paths? Paths are vector outlines you draw using tools like the Pen Tool. Think of them like invisible wires shaping your design, except they don’t pixelate when you zoom in. I remember the first time I used paths — it felt like magic to have such crisp, clean edges, especially compared to messy selections.
Paths matter because they let you control edges perfectly. Unlike brushes or pixel selections, paths keep things sharp no matter how big or small your design. They’re like the skeleton of your artwork — solid, flexible, and easy to tweak.
Different Types of Paths You Can Create
Photoshop lets you make a few kinds of paths:
- Work Paths: These are temporary outlines you make while working. Imagine jotting down a quick sketch you might toss later.
- Shape Paths: These create filled or stroked vector shapes. Perfect for logos or icons.
- Clipping Paths: Used mostly to cut out backgrounds, especially in product photos. If you’re looking for professional help with this, check out our clipping path services trusted by top brands.
Knowing what kind you have helps you decide how to merge them. For example, merging shape paths creates a new shape, but merging work paths is more about combining outlines.
Why Merge Paths?
Here’s the quick answer: merging paths makes your life simpler and your design cleaner.
When you merge paths, you’re turning many small puzzle pieces into a single, easy-to-handle piece. This helps when you want to:
- Simplify your design for editing.
- Create custom shapes that would be hard to draw in one go.
- Avoid the mess of overlapping or conflicting paths.
It’s like combining a bunch of puzzle pieces into a single piece that fits perfectly where you want it.
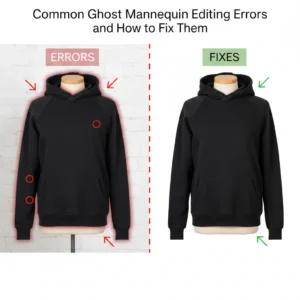
Pro Tip: If you’re editing for eCommerce or catalog products, a professional ghost mannequin service ensures your images stay clean and conversion-ready — especially when working with paths and cutouts.
Preparing Your Paths Before Merging
Before you merge, make sure you’ve selected the right paths. Use the Path Selection Tool — that black arrow icon — to click on each path you want to combine. It’s like gathering all your puzzle pieces before gluing them.
You want to be sure these paths are editable and on the same layer. Trying to merge paths from different layers is like trying to glue two jigsaw puzzles together — it just won’t stick.
Step-by-Step Guide to Merging Paths in Photoshop
Let me walk you through the easiest ways to merge paths — I use these all the time.
Method 1: Using the Combine Shapes Option
If your paths are shape layers, this is your best friend.
At the top of Photoshop, when you select shape layers, you’ll see four buttons: Add, Subtract, Intersect, Exclude. Each one tells Photoshop how to merge shapes:
- Add: Combines shapes into one big shape. (Think stacking Legos on top of each other.)
- Subtract: Cuts the top shape out of the bottom one. (Like carving out a cookie cutter.)
- Intersect: Keeps only where shapes overlap. (The ‘middle ground’.)
- Exclude: Removes overlapping parts. (Imagine two bubbles — this punches a hole where they meet.)
This method is fast and keeps your shapes editable — a huge plus.
Method 2: Using the Pathfinder Panel
Photoshop’s Pathfinder isn’t as robust as Illustrator’s, but it still helps. It offers shape operations when working with vector masks or shape layers. You won’t find a separate Pathfinder panel like in Illustrator, but these options live in the toolbar and layers panel.
Method 3: Using the Pen Tool
If you’re old-school or want more control, the Pen Tool lets you manually connect paths.
Select your path with the Path Selection Tool, then switch to the Pen Tool. Click an endpoint of one path and then click the endpoint of another to join them. This is like carefully sewing two pieces of fabric together.
Editing and Refining Merged Paths
Once your paths are merged, you can finesse them.
Use the Direct Selection Tool (the white arrow) to pick specific points on your path. You can drag anchor points or their handles to smooth curves or fix jagged edges.
I always spend time polishing after merging, because even though the paths combine, sometimes they create awkward bumps. It’s like smoothing out a clay sculpture after joining pieces.
Troubleshooting Common Issues
Ever tried to merge paths and it just… doesn’t work? Here’s why:
- Your paths might be on different layers. Merge layers or copy paths onto one layer.
- Overlapping paths can cause weird holes or shapes. Try rearranging which path is on top or simplify the design.
- Sometimes, rasterized layers block path merging. Make sure you’re working with vector shapes or paths, not pixels.
Practical Tips and Best Practices
Here are some tricks I learned the hard way:
- Name your paths: When your project grows, paths get lost. Naming them keeps things tidy.
- Save your work: Always save paths as Work Paths or export them as vector masks. You’ll thank yourself later.
- Keep layers organized: Group related paths and shapes to avoid confusion.
Also, if you’re working on high-end product photography, don’t miss our jewelry retouching services ideal for perfecting reflections and fixing small flaws after clipping paths are applied.
Conclusion: Mastering Path Merging for Better Designs
Merging paths in Photoshop is one of those small skills that make a huge difference. It saves time, cleans your workspace, and opens creative doors you didn’t expect.
If you practice combining shapes and paths regularly, you’ll find yourself designing with more confidence and less hassle. It’s like learning to chop veggies properly — it speeds up the whole cooking process and improves the final dish.
Want to explore more advanced techniques? Check out our tutorial on how to create multiple paths in Photoshop to push your path-editing skills even further.
FAQs
Q1: Can I merge paths across different layers?
Nope. Photoshop only lets you merge paths on the same layer. Think of each layer as a separate sheet of paper — you can’t glue drawings from two different sheets together without combining them first.
Q2: What’s the difference between merging paths and combining shapes?
Merging paths usually means joining outlines. Combining shapes involves more—like adding or subtracting whole filled shapes. It’s a subtle but useful difference.
Q3: How do I undo a merged path if I make a mistake?
Just hit Ctrl/Cmd + Z immediately. If you’re worried, duplicate your paths before merging so you have a backup.
Q4: Can merged paths be turned into selections?
Absolutely! Right-click on the path in the Paths panel and choose “Make Selection.” Easy as pie.
Q5: Is merging paths destructive?
No, merging paths is generally non-destructive. You can always adjust anchor points later—unless you rasterize the layer, which flattens everything into pixels.