
What’s a Clipping Path and Why It Matters
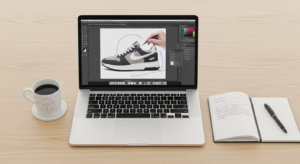
A clipping path in Photoshop is a hand-drawn outline around an object that cuts it out from the background. Think of it like scissors for digital images.
I use it all the time when I want to remove messy backgrounds from product photos or isolate objects cleanly. It’s a lifesaver, especially when working with e-commerce listings or social media visuals that need to pop.
Let’s Start With the Basics
What Exactly Is a Clipping Path?
Imagine tracing around your favorite snack with a marker, and then cutting it out perfectly. That’s what a clipping path does but digitally. It tells Photoshop, “Hey, this is the part I want. Ditch the rest.”
A clipping path is a vector path that “clips” everything outside it. It’s neat, accurate, and doesn’t mess with the image quality.
When Should You Use One?
Use a clipping path when you need pixel-perfect edges—like for product shots, logos, or print-ready files. Magic Wand and Quick Selection tools might work fast, but they often miss fine details. That’s where the Pen Tool wins.
Getting Set Up in Photoshop
Open Your Image Like a Pro
Just open Photoshop, hit File > Open, and pick your image. Easy start.
I usually duplicate the layer (right-click > Duplicate Layer) to keep the original intact—just in case I mess up. Trust me, it happens.
Prep Your Workspace for Success
Go to Window > Paths to pull up the Paths panel. Keep this handy; it’s where your clipping path will live.
Zoom in (I prefer 300%) so you can be super precise. You’ll thank yourself later.

The Step-by-Step Guide to Making a Clipping Path
Step 1: Grab the Pen Tool
Hit P or find the Pen Tool in the left toolbar. Make sure it’s set to “Path” at the top, not “Shape.” This is your tool for tracing.
I used to find the Pen Tool intimidating, but once I practiced a bit, it became second nature—kind of like riding a bike.
Step 2: Plot Your Anchor Points
Click around the object to place anchor points. For straight lines, just click. For curves, click and drag.
The fewer, the smoother.
Step 3: Handle Curves Without Losing Your Mind
Curves used to frustrate me until I figured out a trick: place anchor points before and after the curve, then adjust the handles. It’s like steering a car—you don’t overcorrect.
Use the Alt (or Option on Mac) key to break handle pairs for tighter control.
Step 4: Close the Path and Save It
Loop back to your starting point to close the path. You’ll see a tiny circle next to the pen tip—click it to close.
Now go to the Paths panel, double-click “Work Path,” and save it with a name like “Product Cutout.”
How to Turn Your Path into a Clipping Path
Create the Clipping Path
In the Paths panel menu, choose “Clipping Path.” Pick your path name, and boom—it’s now active.
Photoshop will use that path to hide everything outside it. You won’t see a huge change yet, but it’s now baked into the file.
Check the Path in Your Output File
Save as an EPS or TIFF if you want to keep the path intact. Designers love this because it imports beautifully into InDesign or Illustrator.
Pro Tips From My Experience
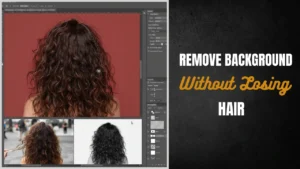
Dealing With Hair and Complex Edges
If the object has hair or fur, the Pen Tool might not be ideal. Try the “Select and Mask” tool for soft edges and then combine it with paths.
Sometimes I combine both: path for the body, mask for the hair. Works like magic.
Common Mistakes I Learned the Hard Way
- Forgetting to close the path. (It won’t work!)
- Using too many points. (It looks jagged.)
- Not zooming in. (You miss small details.)
Take your time—precision pays off.
How to Export Your Work the Right Way
For Web
If it’s for online use, turn your path into a selection (Right-click > Make Selection) and create a layer mask. Then export as PNG.
That’s how I prep stuff for Shopify or Instagram—clean, clear, and crisp.
For Print and Clients
Stick with EPS or TIFF to retain the path. That way, printers and designers can use it directly in layout software.
Always test the file by reopening it or placing it in InDesign to check if the clipping path stuck.
Wrap-Up: My Final Thoughts
Making a clipping path might sound scary at first, but it’s honestly just about practice and patience. Once you get the hang of it, it’s like tracing with a superpower.
It’s one of those skills that seems small but makes a huge difference in your workflow. Whether you’re building a brand or freelancing for clients, clean cutouts are key to making your visuals look pro.
And hey—if I can get good at it, you definitely can too.
FAQs That Might Just Save You Time
01. Is there a faster way to make a clipping path in Photoshop?
The Pen Tool is the most accurate, but for simple shapes, the Magnetic Lasso or Object Selection Tool can help speed things up. Just clean up the path afterward.
02. Can I edit a clipping path later?
Absolutely. Use the Direct Selection Tool (A) to tweak any anchor point or curve.
03. What file types save clipping paths?
EPS and TIFF are your go-to formats. JPEG doesn’t save paths.
04. Why does my path disappear when I reopen the file?M
ake sure you saved the path (not just the work path) and used a format that supports paths.
05. Do I always need a clipping path?
Not always. If the background is already solid or you’re okay with soft edges, a mask might be enough. Use what fits your project best.
Dissimilar: Some images taken from Pinterest.com