


A layer mask in Photoshop is used to control a layer’s transparency. It’s great if you wish to reveal or hide portions of a layer using a mask. But how to add a layer mask in Photoshop? While you can use the Transparency control to adjust the opacity of a layer, using a mask gives you a lot more flexibility in what you show, and what you hide. Better still, you do it all without erasing a single pixel! We’ll show you how to get the most out of this function.
Methods on How to Add a Layer Mask in Photoshop
Adding a layer mask in Photoshop is a fundamental skill that allows you to control the visibility of different parts of a layer. There are two primary methods to add a layer mask in Photoshop, each offering flexibility and precision in editing your images.
Edit Method 1 of 2: Making A Layer Mask
1.1: Select a layer
- Highlight the layer you wish to mask. Make sure the layer is visible, or you will not be able to perform this function.
1.2: Select an area
- Using the Marquee tool (press M to select it), select the area you wish to reveal.
- Note that if you want a soft edge, set the Feather radius as desired, beforedrawing the selection.

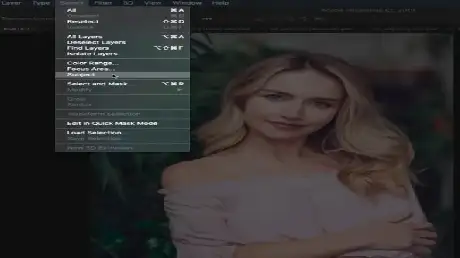
1.3: Create the mask.
- Click the Add Layer Mask button at the bottom of the Layers palette.
- Alternatively, from the Layer menu, choose the new adjustment Layer Mask, then Reveal Selection.
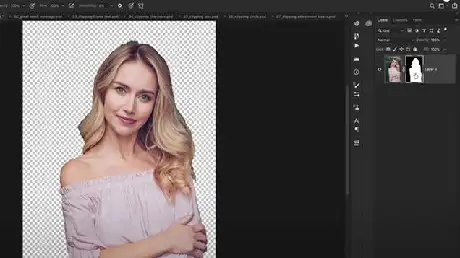
1.4: Admire your work
- After adding the Photoshop layer mask, the image will look like the one given right.
- Notice that the kitten’s face remains revealed in the top layer, while the rest of the image is transparent, allowing the background layer to show through.
Edit Method 2 of 2: Adjusting A Layer Mask
2.1: Fine-tune your layer mask
- Sometimes, you want something a little more than a simple vignette, and do a little Adobe Photoshop CC magic with a layer mask. Here’s how to do it.
2.2: Set up your document’s layers
- In this example, we want a large mountain in the background, not the small one in the original image.
- We place the larger mountain image on the background layer and the person’s image with the small mountain in the layer above it.
2.3: Draw your selection
- This time, instead of using the Marquee and eraser tool, use the Pen tool (Press P to activate) and use the layer mask icon.
- Draw a path around the area you want selected, then adjust using the Direct Selection Tool (A).
2.4: Convert to path
- When you’re satisfied with your selection, right-click on the path and choose Make Selection…”
- Set the selection values as desired.
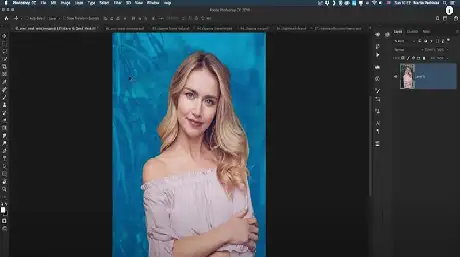
2.5: Click the Layer Mask thumbnail button
- You can also use the menu as described above to apply a layer mask.
- The selected area will remain, and the unselected area will be masked, revealing the layer below it.
2.6: Edit the layer mask
- If you decide that you want more of the top image left in, you can paint the mask to reveal more of the top image.
- Select the Brush tool (B), set the foreground color to white, and paint back in the part you wish to keep.
- In this case, the foreground water was brought back into the image, and the mountain was adjusted to be more visible.
- Conversely, you can paint out the foreground layer by painting with black.
- Black is 100% transparent, and white is 100% opaque. You can also use shades of gray, which will make the quick mask semi-transparent. For example, if you paint the layer mask 50% gray, you will partially reveal the background layer, and partly hide the foreground layer. This is good for reflections or other special effects.


