


It’s like having an “undo” brush you can use whenever you want.
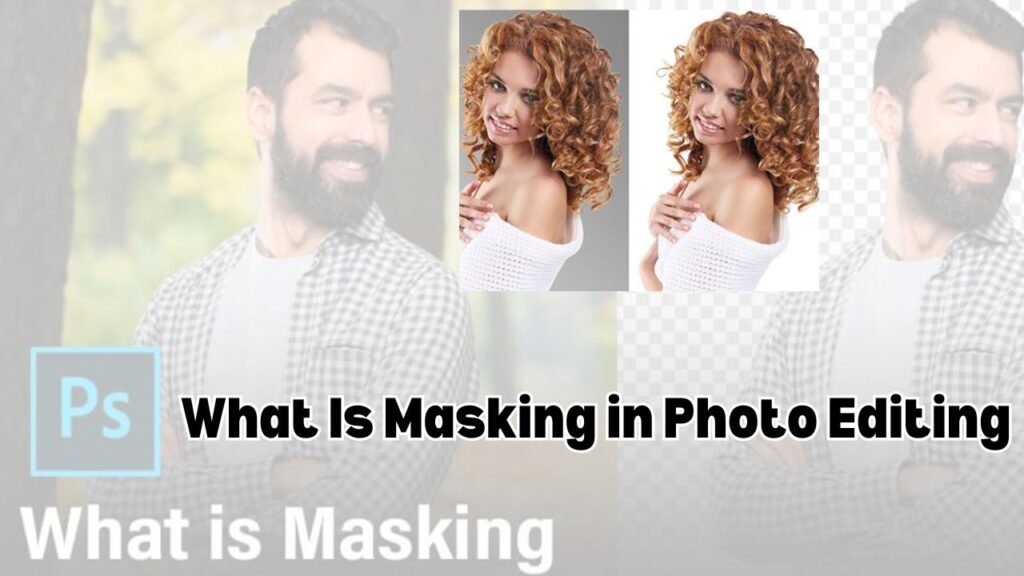
Masking in photo editing means hiding or showing parts of an image without deleting anything. It’s a smart, reversible way to edit only what you want.
Let Me Tell You a Story…
Okay, picture this: I was editing a photo of my little niece playing at the beach. Gorgeous sky, perfect lighting except there was a trash can in the background. Ugh. I didn’t want to erase half the beach trying to fix it. That’s when masking saved the day. Like putting a little invisible sheet over just the part I didn’t want, without touching the rest.
Masking lets you hide what you don’t want in a photo while keeping everything else safe.
So, What Is Masking?
Masking is like a see-through sticker. You can cover part of your image without damaging it. And if you change your mind later? You just peel the sticker off.
It’s a tool that controls what parts of a photo you edit or leave alone.
Types of Masks And When to Use Each One
Let’s break these down real quick. Don’t worry I’ll make it fun.
Layer Masks (My Everyday Hero)
This is the mask I use the most. Say you want to brighten just someone’s face but not the whole pic. You slap on a layer mask, paint black over everything except the face, and boom—done.
Quick tip: Paint black to hide, white to reveal.
Clipping Masks (Think: Cookie Cutters)
Want to fill your name with a sunset photo? Clipping masks let one layer show only inside the shape of another. It’s like filling a stencil with art.
Use clipping masks when you want one layer to show through the shape of another.
Vector Masks (For Sharp Edges)
Perfect for logos or anything with clean lines. These use paths instead of brushes. Less fuzzy, more pro.
Vector masks are best when you need smooth, precise outlines.
Quick Masks (Speedy but Temporary)
Quick masks are great for fast selections. I use them when I’m trying something and not sure if I’ll keep it. It’s like testing clothes in a fitting room—easy to try, no commitment.
Quick masks let you experiment with edits without locking anything in.
Why Masking Is So Powerful
Non-Destructive Editing
This one’s huge. I’ve ruined too many pics by over-editing. Masking lets you fix things without permanently changing the photo. You can always go back.
Masking protects your original photo from damage.
Targeted Tweaks
Ever want to sharpen just someone’s eyes or darken only the background? Masks let you zero in. No more “Oops, I edited the whole thing” moments.
Masks let you edit only what needs fixing—nothing more.
Wild Creativity
I once turned my cat into a space explorer using masks. No joke. You can mix photos, create double exposures, or build surreal art—all thanks to masking.
Masking opens the door to creative photo magic.
How I Learned Masking (And Why It Stuck)
When I first started editing, I felt clumsy. I’d try to erase a background and mess up the whole image. Then someone showed me masking. It was like discovering the “undo” button but smarter. No more fear. Just freedom.
Masking helped me gain confidence by giving me room to experiment.
Where to Find Masking Tools
Photoshop (The Gold Standard)
This is where I first learned the ropes. Photoshop gives you every mask under the sun—layer, vector, clipping, you name it. If you’re serious about editing, it’s worth learning.
Lightroom (Fast and Focused)
Lightroom makes masking simple. Use brushes, gradients, or AI tools to select only what you want to change. Great for beginners and speed lovers.
Mobile Apps (Yes, They Work!)
I love Snap seed for quick mobile edits. Even your phone can handle masking now. It’s perfect for that last-minute tweak before you post.
What You Can Do with Masking (That’ll Blow Your Mind)
Fix One Part Without Touching the Rest
Want to make the sky pop without changing the trees? Mask it. It’s that easy.
Masks let you adjust one area without messing up others.
Swap Backgrounds Like a Ninja
Take a photo in your messy room, then drop in a tropical beach? No one will know if you use a good mask.
Change the Mood, Not the Skin Tones
Warm up the lighting on a couple’s sunset photo but keep their skin looking natural. Done with a mask. It’s like cooking with separate spices.
My Best Masking Tips
Feather Your Edges
Hard edges scream “bad Photoshop.” Soft feathering blends things better. It’s like using concealer instead of a paint roller.
Use feathering for a smooth, natural blend.
Zoom In
Tiny details matter. If you’re masking hair, leaves, or fur, zoom in. It’s slow but so worth it.
💬 Final Thoughts: Masking = Creative Freedom
Once you learn masking, editing feels less scary. You’re not erasing. You’re exploring. You’re creating something without the fear of messing up. That feeling? That’s artistic freedom. And honestly, that’s why I keep coming back to it—photo after photo.

❓FAQs
Q1: Do I need Photoshop to use masking?
Nope! Many apps like Lightroom, Snapseed, and even Canva offer masking features.
Q2: What’s the easiest type of mask to start with?
Start with layer masks. They’re simple and super flexible.
Q3: Can I undo a mask mistake?
Yes! Just paint over the mask in white to bring stuff back.
Q4: Is masking only for pros?
Not at all. Even beginners can learn it in minutes—it’s more about practice than skill.
Q5: What’s the biggest mistake people make with masking?
Using hard edges or forgetting to feather. Always zoom in and take your time.
Some images in this content are taken from Pinterest.com.
Is there AI to automatically edit images?
Definitely. Automation is one of AI’s biggest advantages in photo editing. For example, Imagen’s software highlights that its AI “automates repetitive tasks like culling, color-correction and cropping” so you don’t edit each image one by one. Imagen Also, Autoenhance.ai describes itself as “instant photo editing powered by AI … automatically enhances your photos, ensuring they look professional without the need for time-consuming editing.” Autoenhance.ai That means yes there are tools where you upload, set some style parameters and let AI take over the heavy lifting.


