Combine your photos in Adobe Photoshop CC to create a truly special composite image.
Creating a photo composite out of your own multiple images is a great way of creating striking images that would be very hard, or perhaps even impossible, to create in one individual capture.
Follow our step-by-step Photoshop tutorial and you will be combining your photos in a professional, seamless way in no time.
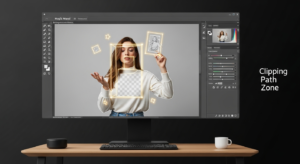
We’re going to take a look at how to cut out a model with the Pen tool and how to place her into the new canvas to generative fill.
It isn’t as simple as just dragging and dropping it in the new canvas. You need to edit the model’s edges so it is seamless, no dodgy hair cutouts can be accepted if you want your composite to be truly seamless, so to achieve this we’ll take a look at the Clone Stamp and Smudge tools.
We’ll also look at re-sizing with the Free Transform tool and adjusting the lighting to ensure that the components match.
Step 1. Set up the Pen tool
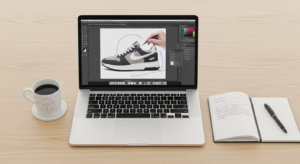
Select the Pen tool from the sidebar, in the top options bar set the tool to Paths. If unfamiliar with the Pen tool then fear not it is a simple tool to master. Zoom into your image.
Step 2. Pen tool – lesson one
Each time you click the mouse with the Pen tool an anchor point will be placed, straight lines are simple just trace the object clicking anchor points along the edge. To create an arched line click and hold the mouse down…
Step 3. Pen tool – lesson two
…with the mouse button held down move the mouse around, see the line arch. When the line is arched enough let go of the mouse and Alt-click onto the last anchor point dropped to finish the point off.
Step 4. Finish the Path
Don’t try to include every stray hair, we will edit this later. Keep the space between anchor points fairly small for greater line control. To finish the path make sure your last anchor point ends on the first one placed.
Step 5. Cut out completely
To save the Path go to the Paths palette and click onto the top right arrow, select Save Path. If the saved path layer mask isn’t already highlighted then click on it, return to the canvas and trace the internal shapes we do not want to copy to the new image.
Step 6. More line alterations needed
Once the path has been finished you can still edit the line shape if needed. Select the Move tool and Cmd/Ctrl-click onto an anchor point, lines will become visible, move these bezier lines to alter the curve.
Step 7. Transfer the model
When satisfied with your Path go to the Paths palette, Alt click on the Path thumbnail to make it an active selection. Click on the Background layer in the Layers palette and with the Move tool selected drag the model into the new composite image canvas.
Step 8. Free Transform to size
Click on the model layer in the new canvas and press Cmd/Ctrl + T to activate Free Transform, holding down Shift to keep perspective drag one of the corner arrows inwards to decrease the model’s size, position to fit the canvas, and hit Enter.
Step 9. Remove any old background traces
Zoom into the model, and lock the layer by pressing the Lock Transparent Pixel button at the top of the Layers palette. Select the Clone Stamp tool, in the top bar, select a small soft-edged brush, with 20% opacity. Alt-click on a background-free area of hair.
Step 10. Cover up then unlock
Paint over the areas where the old background can be seen between flyaway hairs, covering it up with the sampled areas of clean hair. Unlock the layer when done and select the Smudge tool.
Step 11. Pull out stray hairs
In the top bar select a tiny brush of 1 or 2 pixels, 90% Strength. Work around the model’s hair edge pulling out hairs making it look more natural, never exceed a brush size of 3 pixels. Use the Blur tool on the pulled-out hair edges to soften for realism.
Step 12. Colour tweak with Levels
Click on the building layer and click on the create new adjustment layer icon at the base of the Layers palette, pick Levels. Move the middle and right sliders to alter the layers’ colour intensity, and try to match it to the models.
Step 13. Add a Gradient Overlay
Add a new layer under Level One. In the sidebar double-click on the foreground colour, and pick a light blue. Select the Gradient tool, and in the top bar set it to foreground to transparent. Draw up your canvas halfway, set its layer blend mode to Overlay, opacity 50%.
Step 14. Burn out the bottom
Click on the building layer, select the Burn tool, in the top bar set to Midtones, 50% Exposure. Paint over the bottom of the layer darkening it up to match the model. Duplicate the model (drag it over the create new layer icon) and press Cmd/Ctrl + L.
Step 15. More Level tweaks
The Levels dialogue box will appear, in the drop-down menu select yellow, and move the right white slider left to reduce the yellow, evening out the colour balance in the picture. Lastly add another Levels Adjustment layer to the top, even out tones once more matching things up nicely.
Step 16. A little something extra
If your image still needs a bit more va va voom then why not add a composite photography Filter Adjustment layer? Add it to the top of the stack, we have selected the Warming Filter (LBA), set to 50% intensity. It has given us a slightly futuristic feel, matching the building and the models’ dresses in tones. A nice way to merge everything seamlessly.
