


Photographs are not vector images or vector graphics. Only Illustrations that look like photographs can be created in a vector workplace.
So far, we’ve looked at bitmaps and vector graphics individually. Now let’s summarize a bit and repeat this information as we balance some points about these graphic forms.
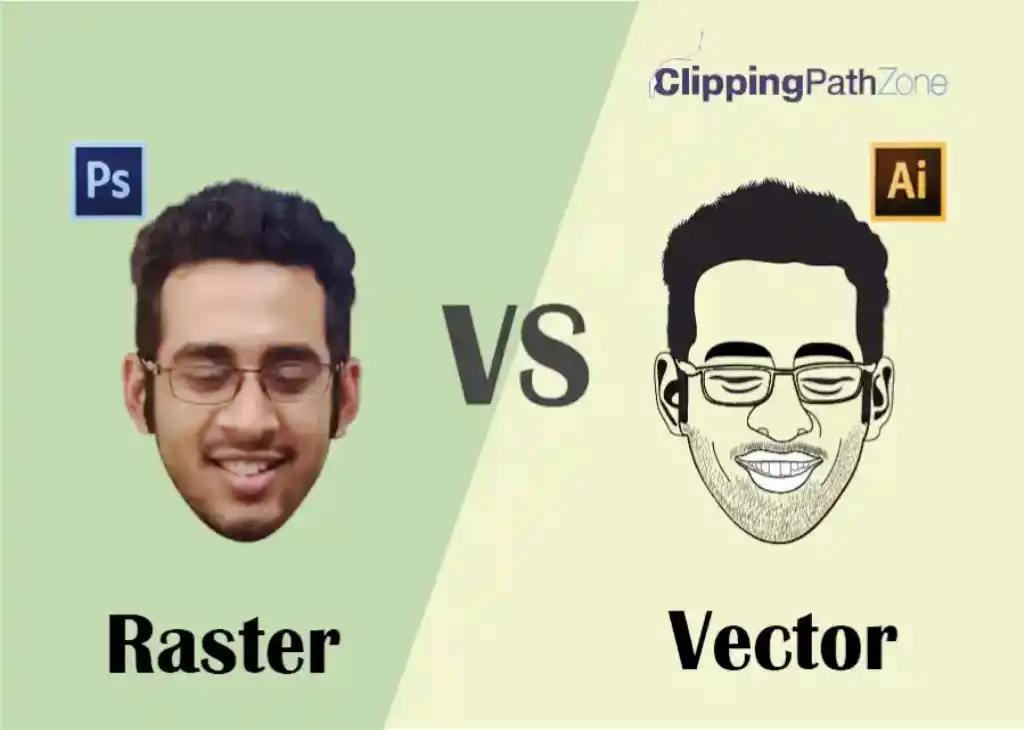
There are two types of digital graphics files: Vector and Raster. To create an image, vector images are made of hundreds of thousands of little lines and curves (called clipping paths). Raster images are made up of pixels.
Understanding the differences between these two formats is crucial for selecting the appropriate one for your specific needs. This comprehensive guide will explore the characteristics, applications, and storage methods of raster and vector images. We will now dive deeper into the content in hope of gaining a better understanding to Explain The Difference Between Raster and Vector Images.
Explain The Difference Between Raster and Vector Images (Part-1)
The content will be divided into two parts. The first part is below.
Do You Know about Raster Images?
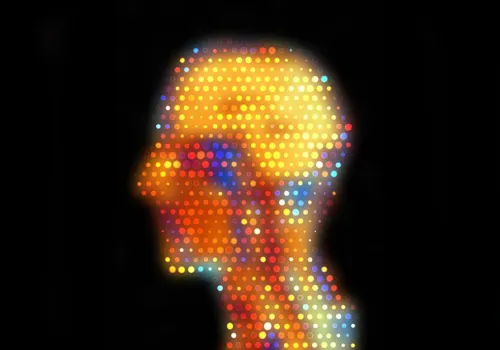
A raster image is an image made up of a grid of little cubes called pixels. Lines and curves are signified by coloring the appropriate pixels. Raster images are created when you scan a picture or diagram, take a photograph with a digital camera, or create an image in a raster-based software program like- Adobe Photoshop. Raster images can be saved as various sorts of files including BMP, CALS, GIF, IMG, JPEG, oCX, PDF, PNG and TIFF.
Basic file types of Raster Images: .jpg (JPEG raster format), .gif (GIF transparent file), .png (Portable Network Graphic Transparent file), .tiff (Tag Interleave File Format).
Adobe Photoshop: .psd
Normally, Photoshop is raster based
Bitmap images are often referred to as raster images since they are composed of numerous minuscule squares, also known as pixels. You can identify a raster or bitmap image by looking at it very strongly. If you zoom in enough, you can see the square outlines of each pixel (especially around edges with dramatic color contrasts).
A raster graphic typically has larger file sizes than its vector counterparts. Higher DPI (dots per inch) and PPI (pixels per inch) settings can contribute to big files because software needs to monitor and be able to render each pixel. Raster graphics File size can become an alarm if storage or server space is limited or files must be transmitted electronically.
How Do You Identify a Raster Image?
A raster image is a digital image comprising a grid of pixels, each with a specific color value. Raster images can display a wide range of colors and details but have a fixed resolution and size. If you try to enlarge or reduce a raster image, it will lose quality and become blurry or pixelated.
One way to identify a raster image is to zoom in and see if the pixels become visible. If you can see the individual squares that make up the image, it is a raster image. Another way to identify a raster image is to check its file format. JPEG, PNG, GIF, BMP, and TIFF are common raster image formats.
Why Is It Called a Raster Image?
The term raster comes from how some old cathode ray tube (CRT) monitors are used to create images on the screen. A CRT monitor had an electron gun that emitted a beam of electrons that scanned across the screen in horizontal lines, from left to right and top to bottom. This process was called a raster scan.
As the electron beam hit the phosphor coating on the screen, it produced a tiny dot of light or a pixel. Different colors and shades could be displayed by varying the intensity and color of the electron beam. Thus, a raster image is an image that is created by scanning a grid of pixels in a raster pattern.
What Are Raster Images Used For?
Raster images are great for storing and displaying photos with great detail and color variation. They can capture an image’s subtle shades and tones and make it look realistic and vibrant. You can find raster images in many fields, such as graphic design, web design, digital art, and photography. Raster images are the standard format for most digital cameras and scanners.
One thing to remember about raster images is that they have a fixed resolution, which means they have a certain number of pixels per inch (ppi). If you try to enlarge a raster image beyond its original size, it will lose quality and become pixelated.
That’s why you should always work with high-resolution raster images to print or display them on large screens. You should also avoid compressing raster images too much, as this can reduce their quality and introduce artifacts.
What Are the Advantages of Raster Images?
Raster images have some advantages over other types of graphics, such as vector images. For example, raster images can create realistic, detailed images with smooth color transitions.
They can also be easily modified using widely available software tools like Photoshop and Paint. Raster images are suitable for applications that require high resolution and quality, such as photography and digital art.
How Are Raster Images Stored?
Raster images are made up of pixels with a specific color and value. There are three possible methods to store raster images: file-based, geodatabase-based, or file-geodatabase-based. Each method has advantages and disadvantages, depending on the image data’s size, format, and purpose.
File-based storage involves saving each image as a separate file in a folder. Geodatabase-based storage involves storing the image data as a single or mosaic dataset within a geodatabase. File-geodatabase-based storage involves managing the image data from a geodatabase but storing the actual files in a folder outside the geodatabase.
Do You Know about Vector Images?
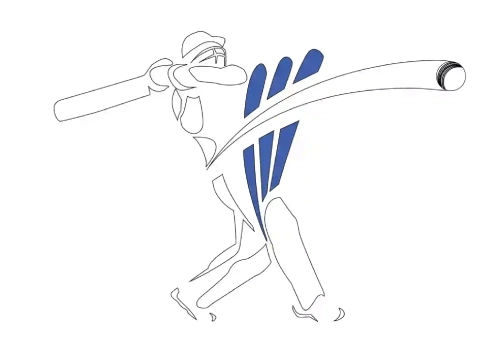
A vector image is an image made up of vectors, mathematically defined entities drawn between coordinates. CAD programs (Computer-Aided Design) and other vector-based software programs such as Adobe Illustrator, make vector images. Vector image file types include DXF, DWG, DGN, HPGL, SVG, EMF, WMF and PDF (which can contain raster images, vector images or both). Vector images are made of thin lines and curves known as a path rooted in mathematical theory.
Basic file types of Vector Image: .drw (vector file), .pif (vector image GDF format), .pct (Macintosh bitmap graphics format), .ps (Adobe PostScript), .eps (Encapsulated PostScript), .svf (Simple Vector Format).
Adobe Illustrator: .ai, .ait, .art
Corel Draw: .cdr, .cdrw, .cdt
Digital Line Graph: .dlg, .do
Open Office: .odg
A vector graphic must be created in computer software, which defines the position, length, and curvature of each line in the intricate wireframe-type image. Any lines and curves in the image can be assigned a color value.
Because of this defined, formulaic approach to drawing, every image can be sized and scaled repeatedly and limitlessly without losing resolution or beginning to look cloudy or pixilated.
How Do You Identify Vector Images?
Vector images differ from raster images, which use pixels to form an image. Vector images are based on mathematical formulas that define paths, shapes, and colors. These formulas can be scaled up or down without affecting the quality of the image. This means that vector images can be resized to any dimension without becoming blurry or pixelated.
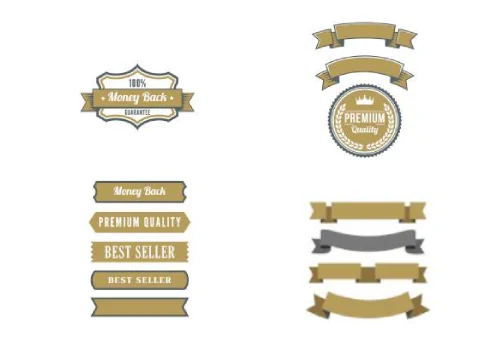
Vector images are ideal for logos, icons, diagrams, and other graphics that must be sharp and clear at any size.
Why Is It Called Vector Images?
Vector images are computer graphics that use mathematical formulas to define shapes and colors. Unlike raster images, vector images do not lose quality when scaling up or down.
Each line and curve in a vector image has a vector describing its direction and magnitude. A vector image file contains instructions that tell the computer how to draw the image on the screen.
What Are Vector Images Used For?
Unlike raster images, which are composed of pixels, vector images can be scaled up or down and remain clear. Vector images are ideal for creating logos, icons, illustrations, and other visual elements that must be crisp and consistent across different media.
Vector images are widely used in advertising and marketing campaigns and in branding materials such as business cards, letterheads, and brochures. Vector images can also improve the user experience and the aesthetic appeal of mobile applications, websites, infographics, and digital presentations.
What Are the Advantages of Vector Images Over Raster Images?
Vector images have several benefits over raster images, which are composed of pixels and can lose quality when scaled or edited. Vector images are based on mathematical formulas that define paths, shapes, and colors. This means that they can be scaled to any size without losing resolution or becoming pixelated.
The quality and file size of vector images is not affected by moving, resizing, rotating, or changing the colors of vector images. Vector images are ideal for logos, icons, typography, and illustrations that require high clarity and precision.
How Are Vector Images Stored?
Vector images are composed of attributes and mathematical commands that define the appearance and location of each object in the image. The computer reads these commands and draws the object accordingly.
Attributes can specify color, shape, stroke width, and position. Vector images can be easily edited, resized, and scaled without affecting the quality because the computer can adjust the commands based on the desired output.
Explain The Difference Between Raster and Vector Images (Part-2) Raster Image Vs Vector Image
Introducing Part 2 of our series titled “Explaining The Difference Between Raster and Vector Images.” In the previous segment, we extensively examined the essential attributes of raster and vector images, emphasizing their respective advantages and limitations.
In this installment, we embark on a more detailed exploration of each image format, aiming to foster a comprehensive of their creative methodologies.
RASTER:
A raster digital image comprises thousands of little dots or pixels. Photo editors like, Adobe Photoshop is raster based and are great for rendering rich, full-color images like photographs. Raster graphic based programs do have some drawbacks, though.
Imagine- a square 1 inch x 1 inch. If this square has been created at 300 dpi, it will have 300 dots/pixels. The computer must keep track of all the zeros and ones that make up those 300 dots/pixels, this can result in large file sizes, which can be memory intensive when editing. The specs of your PC/MAC will determine if this causes you problems or not.
Raster graphics images do not resize well. When you resize a low-resolution raster image the pixels just get larger making the image appear distorted and blurry. One solution is to ensure the image is created at high resolution.
An image at a minimum of 300 dpi will resize quite well and keep fairly good clarity. However, it will only enlarge so much.
VECTOR:
Vector-based programs such as Adobe Illustrator approach image creation differently and do not render images on a pixel-by-pixel basis. Using the same example as above, the 1-inch x 1-inch square would only be made up of 4 dots/pixels, one on each corner.
These vector points allow the computer to play connect the dots, each vector point has information telling the computer how to connect each point with straight or curved lines and what color the inner space should be.
Because the computer only has to keep four points in its memory, it is much easier to edit vector-based images as file sizes are really small. If you resize a vector-based image, it loses little or no detail, the vector picture points spread out and the computer just redraws the image.
Vector images are ideal for logos as they can be resized and adjusted without losing clarity. So, when looking for a logo or graphic designer, ensure the final files produced are vector based.
A vector image will appear smooth at any size or zoom level, making it easy to identify. This is because vector images are made up of mathematical equations, not pixels. As a result, they can be scaled infinitely without losing quality. Text is one of the most common types of vector images. The appearance of a font does not change when its size is increased.
Vector images are more file-size efficient than raster images, which means they take up less space on your computer or website. Vector images are often much smaller than raster images because they are defined by mathematical formulas instead of individual pixels. Vector images are often easily transmitted from one computer to another and over the Internet.
The most common difficulty with using vector images is compatibility. While it is common to save vector images as native files from the program used to create them, like Adobe Illustrator, not everyone you collaborate with may have access to the same program. Nevertheless, there are plenty of widely compatible file formats that can be used to ensure seamless sharing of vector graphics among different users.
Selecting the appropriate file type for images can be daunting due to the numerous options and formats available, making it challenging to determine the most suitable one to use and share with clients.
When working with various file types, it is essential to ensure compatibility. Still, when it comes to graphics and images the type of computer graphic format you use is essential to how the image renders.
Comparison Table of Raster Images vs Vector Images:
| Raster Images | Vector Images | |
| Composition | Made up of pixels or dots | Made up of mathematical equations and points |
| Editing | It can be memory intensive when editing due to large file sizes | Easy to edit as file sizes are small |
| Resize | Does not resize well, leading to distortion and blurriness | Resizes without losing detail or clarity |
| File Size | This can result in large raster file sizes | Vector image file sizes are often smaller |
| Edge Quality | It may appear jagged when zoomed in | Always appear smooth regardless of size or zoom |
| Compatibility | Widely compatible formats are available, but native files may require specific software | Compatibility can be an issue, as native files may require specific software |
| Usage | Ideal for photographs and rich, full-color images | Ideal for logos, illustrations, and typography |
How Do You Create a Raster Pixel Image?
Creating a raster pixel image involves designing or drawing an image using individual pixels as the building blocks. Here are the general steps to create a pixel image:
Step 01: Decide the Size and Resolution
The first thing you need to do is to determine how big you want your raster image to be. Pixels are tiny squares that make up your image, which is measured in size.
Your image’s resolution is measured in pixels per inch (PPI) or per centimeter (PPCM). The higher the resolution, the more detail and quality your image will have.
Step 02: Pick a Raster Pixel Art Software or Tool
Next, you need to choose a software or tool that allows you to create pixel art. Many options are available, ranging from dedicated pixel art software to general graphic design software. Some of the most popular pixel art software are Aseprite, Pixilart, Pro Motion NG, and Pixel Edit.
These software have features and tools specifically designed for raster art creation. You can also use graphic design software like Adobe Photoshop or GIMP, but you may need to adjust some settings and preferences to work with pixels.
Step 03: Enable the Grid
The grid is one of the most important features of any pixel art software or tool. The grid shows each pixel’s boundaries and alignment. The grid helps maintain consistent proportions and shapes in your raster pixel art.
To enable the grid, look for an option in your software or tool that says “show grid” or “pixel grid.” You can also customize the size and color of the grid according to your preference.
Step 04: Choose Your Drawing Tools
Now that you have set up your canvas and grid, you can start drawing your raster pixel image. You will need basic drawing tools like a pencil or brush tool with adjustable pixel sizes to draw your image.
You will also need some additional tools like an eraser, fill bucket, and color picker. These tools will help you to erase mistakes, fill in large areas with color, and select colors from your image or palette.
Step 05: Plan Your Design
Before you start drawing your raster image, planning your design ahead of time is a good idea. You can sketch or outline your design on paper or using a digital mockup. This will help you visualize your image’s composition, color choices, and overall structure.
You can also look for inspiration from other pixel artists or sources.
Step 06: Start Pixelating
Once you have a plan for your design, you can begin filling in individual pixels to create your image. Use your drawing tools to place each pixel on the grid carefully. Pay attention to color choices, shading, and overall aesthetic. You can also zoom in and out of your image to see how it looks at different scales.
Step 07: Use Layers (if available)
If your software or tool supports layers, you can use them to work on different elements of your image separately. Layers are like transparent sheets that stack on top of each other.
You can draw on each layer without affecting the other layers. This way, you can easily make adjustments or edits without messing up the entire artwork.
Step 08: Add Details and Effects
After you have drawn your image’s basic shape and colors, you can add details, textures, and effects to enhance it. You can experiment with different techniques like dithering or selective color palettes.
Dithering is a method of creating gradients or transitions between colors by mixing pixels of different colors. Selective color palettes are limited sets of colors that create contrast and harmony in your image.
Step 09: Save and Export
The final step is to save and export your pixel image. You should save your work in the native format of your software or tool so that you can edit it later if needed.
You should also export your image as a common file format like PNG or GIF for sharing or use in other applications. PNG and GIF are lossless formats that preserve the quality and transparency of your raster data image.
How Do You Create a Vector Image?
Creating a vector image typically involves using specialized software like Adobe Illustrator. Here is a general process for creating a vector image:
Step 01: Choose a Vector Graphics Editor:
The first thing you need is software that can create and edit a vector graphic. Many options are available, such as Adobe Illustrator, CorelDRAW, or Inkscape. These programs have different features and prices, so choose the one that suits your needs and budget.
Step 02: Start a New Document:
Once your software is installed, open it and start a new document. You can set the dimensions and settings of your document according to your project requirements. For example, you can choose the units, color mode, resolution, and background color.
Step 03: Select the Drawing Tools:
Now you are ready to draw your vector art work. You can use various tools to create lines, curves, and shapes. Some of the most common tools are the Pen tool, Bezier curves, and shape tools.
The Pen tool lets you draw freehand paths with anchor points and handles. Bezier curves let you adjust the direction and curvature of paths. Shape tools let you draw predefined shapes such as rectangles, circles, stars, etc.
Step 04: Draw the Artwork:
Using the drawing tools, create your design on the document. You can zoom in and out to see the details better. You can also use guides and grids to align your elements precisely. You can undo or redo any action if you make a mistake.
Step 05: Apply Colors and Gradients:
You can fill shapes with colors, gradients, or patterns to make your artwork more attractive. Shapes can also be defined better with strokes or outlines.
The color picker or color palette can be used to select colors. You can also use the gradient tool or gradient panel to create smooth transitions of colors.
Step 06: Adjust and Refine the Artwork:
After you have drawn your artwork, you can fine-tune it to make it perfect. You can use tools such as the direct selection tool or the pathfinder tool to edit anchor points, curves, and shapes. You can also use transformation tools such as scale, rotate, or skew to change the size, angle, or perspective of your elements.
Step 07: Add Text and Typography:
If you want to add text to your vector data image, you can use the text or type tools. You can type any text you want and format it with fonts, sizes, styles, colors, etc. You can also use the character or paragraph panels to adjust the spacing, alignment, kerning, etc.
Step 08: Organize Layers:
One of the best features of vector graphics editors is that they allow you to organize your elements into layers. Transparent sheets stack on top of one another to form layers.
You can create different layers for different elements and name them accordingly. This way, you can easily select, hide, lock, or rearrange your elements without affecting others.
Step 09: Save the Vector Image:
Finally, you have created your vector image! Now you need to save it in a vector file format such as SVG (Scalable Vector Graphics), AI (Adobe Illustrator), EPS (Encapsulated PostScript), or PDF (Portable Document Format).
These formats preserve the vector quality of your image and allow you to edit it later if needed.
Final Touch:
When selecting the right format for your design requirements, it is vital to grasp the disparities between raster and vector images. Considering factors like resolution, scalability, and editing capabilities, you can make well-informed choices regarding the suitable image type for various projects.
We are ready to do raster to vector services. So, contact us at info@clippingpathzone.com or Skype: clippingpathzone. You can save your time and money getting your artwork ready to print, embroider, cut and more by hiring us to do Vector Conversion/Vectorization/Raster to Vector services without any hassles.


