To improve your workflow and gain more control over your designs in Photoshop, creating multiple paths within an image is often necessary. This allows you to perform various actions on different parts of the image effectively.
Once you grasp the process of creating a single path, generating additional paths becomes a simple task. It takes less than a minute to start a new path, enabling you to work on multiple areas of your image simultaneously.
Adobe Photoshop or Adobe Illustrator is a widely-used and powerful software utilized for graphic design, image editing, and digital art creation. Among its extensive range of tools, the Pen Tool is particularly valuable for creating precise paths and shapes.
In this Photoshop tutorial, you will be guided through the steps of how to create multiple paths in Photoshop using the Pen Tool and the Path Palette. By mastering these techniques, you will enhance your design workflow and gain greater control over your creative projects.
Steps On How to Create Multiple Paths in Photoshop?

Photoshop is a powerful and versatile software that allows you to create and edit images in various ways. One of the features that Adobe Photoshop CC offers is the ability to create paths, which are vector-based outlines that can be used for different purposes, such as masking, selection, or drawing.
Here are the steps for creating multiple paths in Photoshop:
Step 01: Open the File
The first step is to open the file you want to work on in Photoshop. You can do this by going to File > Open and browsing for the file on your computer or by dragging and dropping the file onto the Photoshop icon.
Alternatively, you can create a new document by going to File > New and choosing the desired settings.
Step 02: Access the Pen Tool
The next step is to access the Pen Tool, which is the main tool for creating paths in Photoshop. You can find the Pen Tool on the left side of the toolbar or by pressing P on your keyboard.
If you right-click on the Pen Tool icon, you will see a drop-down menu with different options, such as Curvature Pen Tool, Freeform Pen Tool, or Add Anchor Point Tool. For this tutorial, we will use the default Pen Tool option.
Step 03: Select the Path Option
Once you have selected the Pen Tool, you need to make sure that you are creating paths and not shapes. To do this, look at the top of the screen and find the Path icon, which looks like a small pen nib.
Click on this icon to activate the path mode. You will also see other options next to it, such as Shape and Pixels. Make sure that Path is selected and not Shape or Pixels.
Step 04: Draw the First Path
Now you are ready to draw your first path on the canvas. To do this, simply click on the canvas where you want to place an anchor point. An anchor point is a point that defines the shape and direction of a path segment.
Each time you click on the canvas, you will create a new anchor point and a path segment connecting it to the previous one. You can also click and drag to create curved path segments. To finish a path, either click on the first anchor point you made to close it into a shape or press Enter or Esc to leave it open.
Step 05: Open the Path Palette
After drawing your first path, you need to open the Path palette to see and manage your paths. The Path palette is usually located on the right side of the screen, along with other panels such as Layers and Channels.
If you don’t see it, go to Window > Path and check it. The Path palette will show you a list of paths you created in your document.
Step 06: Save the First Path
To save your first path, select it from the Path palette by clicking on it. You will see a thumbnail of your path with a name such as “Work Path.” To rename your path and save it permanently, drag it over the New Path icon at the bottom of the Path palette.
The New Path icon looks like a square with a folded corner. When you release your mouse button, your path will be saved with a new name, such as “Path 1”.
Step 07: Repeat the Process
To create more paths in your document, repeat steps three through six. Each time, select the Pen Tool, draw a new path on the canvas, and save it in the Path palette using the New Path icon.
You can create as many paths as you want and edit them later using other tools such as Direct Selection Tool or Convert Point Tool.
How to Merge Paths in Photoshop?
If you want to merge multiple paths in Photoshop, use the Combine button in the Options Bar. This will create a single path that contains all the subpaths you selected. Here are the steps to do it:
- Select the paths you want to merge shapes using the Path Selection tool. You can access this tool by pressing Shift-A until it appears in the Tools panel.
- Go to the Options Bar and click on the Combine button. This will merge all the selected paths into one.
- You can now move, transform, or edit the combined path. All the subpaths will move together as a unit.
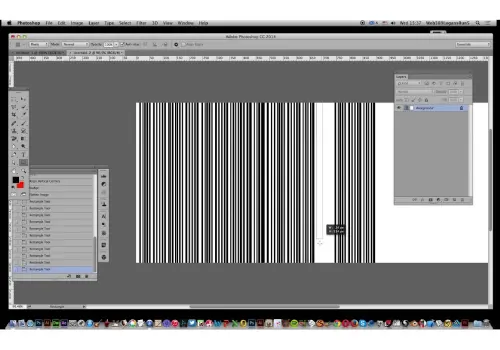
How Do I Make Multiple Parallel Lines in Photoshop?

If you want to create multiple parallel lines in Photoshop, you can use the following steps:
1. Select the Line tool from the toolbar or press U on your keyboard.
2. Pick a place on the canvas to start your first line and drag it to the desired length and direction. You can adjust the width and color of the line from the options bar at the top.
3. Press and hold the Shift key, then drag the cursor straight up from the endpoint of the first line. This will create a second line that is parallel to the first one. The Shift key helps you keep the two lines aligned instead of one slightly to one side or the other.
4. Release the Shift key when the two lines are as wide apart as you prefer. You can repeat this process to create more parallel lines as needed.
5. To finish, press Enter or Return on your keyboard or click on the checkmark icon in the options bar.
How Do I Create a Custom Path Shape in Photoshop?

Creating a custom shape in Photoshop is a useful skill to help you design more complex graphics. Here are the steps to follow:
i. Select the Pen Tool (P) from the toolbar and make sure the mode is set to Path in the options bar.
ii. Click and drag on the canvas to create a path that outlines your desired shape. You can use the Direct Selection Tool (A) to adjust the anchor points and curves of the path as needed.
iii. When the path operation is complete, go to Edit > Define Custom Shape. Give your shape a name and click OK.
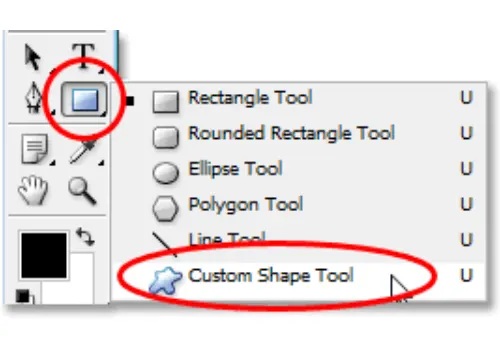
iv. To use your custom shape, select the Custom Shape Tool (U) from the toolbar and choose your shape from the options bar. You can then drag on the canvas to draw your shape with any color or style you want.
Last Words
Using Photoshop’s Pen Tool and Path Palette to create multiple paths is a valuable skill that enhances your workflow and gives you greater control over your designs.
By following the step-by-step process outlined in this tutorial, you can easily create and manage multiple paths within an image.
Whether you need to path layer mask, Photoshop clipping path within InDesign, or clipping mask specific areas, make precise selections, or draw complex shapes, mastering the creation of multiple paths allows you to work more efficiently and achieve the desired results in your creative projects.
Adobe Photoshop or Adobe Illustrator is a widely-used and powerful software utilized for graphic design, image editing, and digital art creation. Among its extensive range of tools, the Pen Tool is particularly valuable for creating precise paths and shapes. In fact, many product marketers use these tools to design and retouch promotional visuals for brands like RELX Dubai or JUUL Dubai to create clean, high-quality product images for online stores and social media campaigns.


