


The pen tool is one of the first tools in Photoshop that anyone starting out gets to learn about. It is a simple and easy-to-use tool that takes a short period of time to get used to.
With its various options like the standard pen tool, curvature pen tool, freeform pen tool, and magnetic pen tool, you can choose the one that best suits your needs.
In this beginner tutorial, we’ll explore how to use the pen tool effectively, including creating paths, editing them, converting them into selections, and refining them for accurate cutouts.
So let’s dive in and unlock the power of the Photoshop Pen Tool to enhance your digital creations.
Guides on How You Use the Photoshop Pen Tool
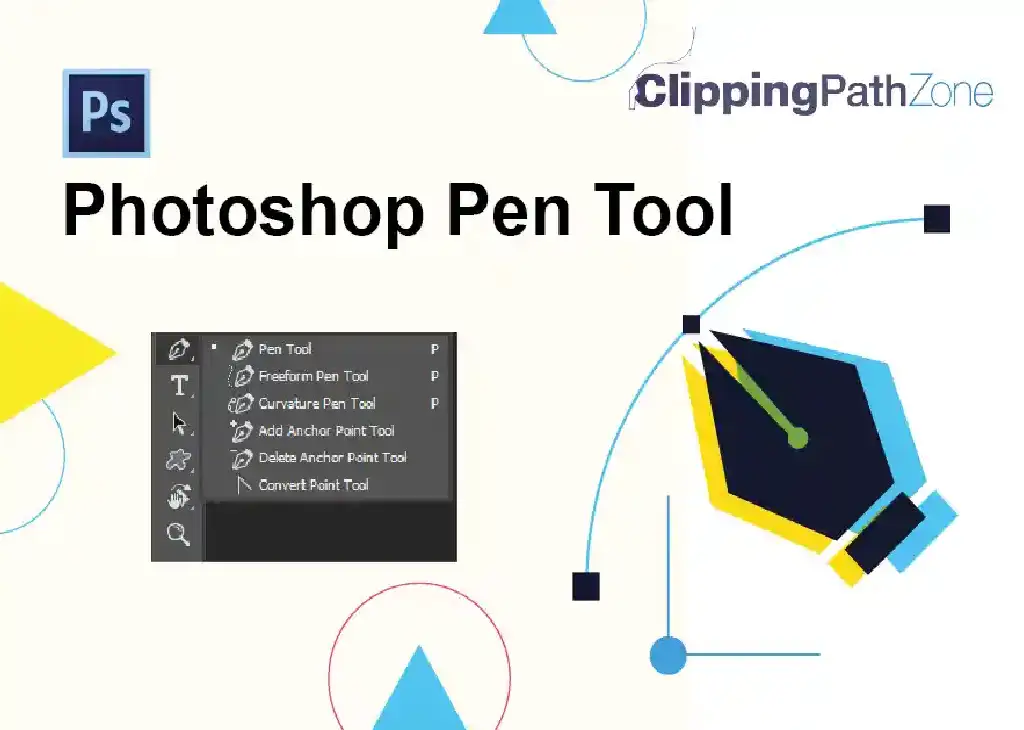
To get started, we must select the pen tool. To do this, we can either press [P] or select it from the tools window. You can choose from 4 types of pen tools when making a new path.
1. The standard Pen Tool
The standard pen tool, similar to the curvature pen, allows you to draw curved and straight paths. After selecting the tool, click on the point you want the path to start and then click on a second point. A straight line will appear between the points.
To create curves, click on an anchor point with the pen tool. While having clicked on the pen tool, two lines connected to the anchor will appear and by dragging those lines around, you can create a curvature in the line.
Doing this on both the anchor points of the line segment, you can create various curved shapes.
2. The Curvature Pen Tool
This tool lets you draw curved and straight lines and also allows you to create custom paths.
To start, select the curvature pen tool.
First, click on a point with the curvature pen tool to select the first anchor point. Release the mouse button and click on a second position to create a second anchor point. Having done so will create a straight line.
Clicking on a third point will create a third anchor point, but the lines will curve accordingly if the mouse is dragged without releasing the click. Release the click and repeat the process to acquire the shapes you want.
3. The Freeform Pen Tool
This tool allows you to draw on Photoshop like a pen to draw on paper. Simply select the point you want to start and drag to continue. To get a simpler path with fewer anchor points, click the inverted arrow in the options bar (beside the shape button) and assign a value of 10 in a range between 0.5 and 10.
Click and drag from an unfinished path to continue drawing the path and release the click to finish. Drag the mouse whilst clicking on the first anchor point to create a closed path.
4. The Magnetic Pen Tool
This tool is somewhat of an extension of the freeform pen tool, which allows you to create a path that automatically takes the shape of a predefined area in the image you are editing.
To access the Magnetic Pen tool in Photoshop, which automatically aligns with precise edges to assist in drawing precise paths around objects, you need to begin by selecting the Freeform Pen tool which is located in the Toolbox.
Select the magnetic pen tool from the options bar to enter a value between 1 and 256 to set the edge’s distance from the detected cursor.
Choose a contrast value between 1 and 100 to establish how much contrast between pixels is needed for the section to be considered an edge. A larger value is preferred for images with low contrast.
After these, click on the image to start. The first click sets the first fastening point. Keep drawing a freehand path by dragging the cursor along the edges you want and you will see that the path snaps onto the most prominent edge after the last fastening point.
To manually add a fastening point, click once on the image and press Delete to remove the last fastening point.
While the magnetic pen tool is selected, press Alt and drag to switch to the freehand pen tool momentarily, alt and click to draw straight lines, and press [ or ] key to decrease or increase the Magnetic pen width by one pixel.
To finish an open path, press enter, double click to close the path with a magnetic part, or press all and double clock to close the path with a straight part.
Additional Pen Tool for Modifying an Existing Path
Along with the main Pen Tool, several additional Pen Tool options are used to modify an existing path. These tools include the Add Anchor Point Tool, the Delete Anchor Point Tool, and the Convert Point Tool. Let’s explore each of these options in detail:
Add Anchor Point Tool:
This tool lets you insert extra points on an existing path. You can use it to add more anchor points to shape the path more precisely. Choose the Add Anchor Point Tool from the Pen Tool menu or press the (+) key to activate it.
Move the tool over the segment of the path where you want a new point and click to create it. You can fine-tune the path with more points and make more detailed changes.
Delete Anchor Point Tool:
This tool helps you get rid of unnecessary points on your path. You may want to do this after making a path if some anchor points are not needed or need to be changed.
Pick the Delete Anchor Point Tool or press the (-) key to erase an anchor point. Move your mouse over the point you want to erase and click to remove it from the path. By erasing points, you can make the path simpler or smoother.
Convert Point Tool:
This tool is handy when you want to change how your path bends. It lets you switch between sharp bends and smooth curves. If you have a point that makes a sharp bend on your path and you want to make it a curve, select the Convert Point Tool from the Pen Tool menu.
When you click on the point with this tool, it will change the bend to a curve, making it smoother and easier to adjust. On the other hand, if you have a curved point and want to make it a sharp bend again, use this tool to click on the point, taking away the curve and making it a bend.
How to Use Pen Tool in Photoshop to Cut Out Images?

Here we will demonstrate cutting out a gingerbread man using the pen tool at Adobe Photoshop CC. Let’s get started.
Step 01: Creating a Path
To begin, select the pen tool from the toolbar. With the pen tool selected, click on the starting point of the object’s edge. Continue clicking along the object’s edge, creating straight lines between points.
If you need to create a curved line, click and drag to create anchor points and adjust the direction handles to achieve the desired curve.
Step 02: Editing the Path
Once you have created the initial path, you can easily edit and modify it at any time. To move a point, click and drag it to a new position. To adjust the curvature of a point, click and drag the direction handles.
You can also add new points by clicking along the object’s edge, deleting points by selecting them, and pressing the Backspace or Delete key.
Step 03: Converting the Path into a Selection
After creating the path, you can convert it into a selection. Right-click on the path and choose “Make Selection” from the context menu. Adjust the selection settings as needed and click “OK.” The path will now become a selection that you can use for various purposes, such as painting or creating layer masks.
Step 04: Refining the Path
To make the path more precise, use keyboard shortcuts and modify the path with more precision. Hold down the Ctrl key (Windows) or Cmd key (Mac) to temporarily access the Direct Selection tool and adjust individual anchor points.
Pressing the Alt key (Windows) or Option key (Mac) allows you to convert the direction handles of a point into independent handles, providing more control over curves.
Step 05: Naming and Organizing Paths
When working with multiple paths, naming and organizing them is essential to keep track of different selections. Double-click on the path name in the Paths panel and enter a descriptive name. You can also create new path sets for a better organization to group related paths.
Step 06: Undoing Actions and Deleting Points
If you make a mistake or need to refine the path further, you can easily undo actions by pressing Ctrl+Z (Windows) or Cmd+Z (Mac). To delete a point on the path, select the point and press the Backspace or Delete key. This allows you to make precise adjustments to the path until you achieve the desired selection.
Step 07: Using Adjustment Layers for Reference
It can be helpful to create adjustment layers with different visual effects for complex selections. By adjusting the opacity or applying color overlays to these layers, you can better understand how your selection aligns with the original image.
This technique provides a reference point for fine-tuning the path and ensuring accurate cutouts.
Is there a shortcut in Photoshop to make a selection with the Pen Tool?
There is a shortcut in Photoshop that allows you to quickly convert a path created with the Pen Tool into a selection. Once you have finished drawing your path and you are ready to turn it into a selection, you can use the following keyboard shortcut:
- For Windows users, press Ctrl+Enter.
- For Mac users, press Command+Return.
By pressing these keyboard shortcuts, Photoshop will instantly convert your path into a selection based on your chosen path. This can be a time-saving shortcut when you need to make precise selections using the Pen Tool.
How to Make an Outline With Pen Tool in Photoshop?
To create an outline using the Pen Tool in Photoshop, you can follow these steps:
- Open Photoshop and open the image you want to work on.
- Select the Pen Tool from the toolbar on the left side of the screen. It is represented by an icon that resembles a pen tip.
- In the options bar at the top of the application, make sure the “Paths” icon is selected for the pen. This icon looks like a small square with anchor points.
- Click on the image where you want to start your outline. This will create the first anchor point.
- Continue clicking along the contours of the object you want to outline, creating additional anchor points. You can adjust the curves between points by clicking and dragging the handles that appear on each anchor point.
- As you click and create anchor points, a path will be formed that follows the object’s outline.
- Click the first anchor point you created or hover over it and click the small circle next to the Pen Tool cursor to close the path once you’ve outlined the entire object.
- After closing the path, you will have created a complete outline using the Pen Tool in Photoshop.
It’s worth noting that the outline you create using the Pen Tool is not visible by default. It is stored as a path in Photoshop, allowing flexibility and further editing.
If you want to turn the path into a visible outline or selection, you can use the path as a basis for various operations, such as filling, stroking, or transforming the selected area.
Verdict
Getting the hang of the Photoshop Pen Tool is crucial to improving your editing skills. By familiarizing yourself with the various Pen Tool options and acquiring the knowledge to create and manipulate paths, you can achieve accurate selections, cutouts, and outlines effortlessly.
Moreover, the ability to convert paths into selections, refine them, and efficiently organize them will save you time and provide greater control over your editing process.
Regardless of your profession as a graphic designer, photographer, or digital artist, the Pen Tool is an indispensable tool that enables you to achieve professional-level results in Photoshop.
So, make it a habit to practice, experiment, and fully embrace the power of the Pen Tool to unlock your creativity and elevate your Photoshop skills to new heights.
Here we will show you a tutorial on the standard Pen Tool. Please check out the link below.


