
Want to blend images without wrecking your original work? That’s where layer masks in Photoshop step in and trust me, once you get the hang of them, there’s no going back. It’s like learning to ride a bike without training wheels. Scary at first, but incredibly freeing once you figure it out.
Let me walk you through this, step by step, like I’m sitting right next to you.
What is a Layer Mask?
A layer mask lets you hide or reveal parts of a layer without deleting anything. Think of it as an invisible eraser—you control what stays and what goes, but you can always change your mind.
In short, a layer mask gives you full control without the fear of messing up your original image.
Why Layer Masks Are a Game Changer
When I first started using Photoshop, I kept hitting Ctrl+Z like my life depended on it. Every mistake felt permanent. Then I discovered layer masks it was like switching from a pen to a pencil with an eraser.
They’re flexible, forgiving, and perfect for experimenting.
When Should You Use a Layer Mask?
Use layer masks any time you want to hide or blend parts of an image—without deleting them. They’re perfect for:
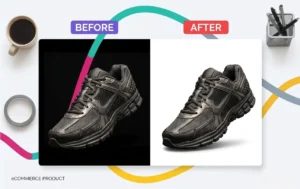
- Changing backgrounds (learn how here) .
- Blending textures.
- Creating double exposure effects.
Short answer? Use them whenever you want control and flexibility.
Real-World Use Cases You’ll Love
Ever wanted to remove a background but keep the natural shadows? Or maybe you wanted to blend two photos like a dreamy collage?
Layer masks make this magic possible and reversible.
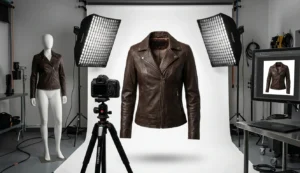
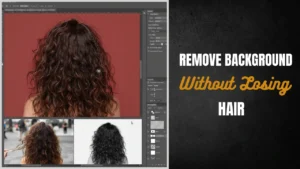
I once had to cut a model out of a noisy background for a fashion catalog. The client loved the hair detail I preserved. That wouldn’t be possible with just the Eraser Tool.
Getting Started What You’ll Need
Let’s keep it simple.
Photoshop Version
Any recent version will do. I use Photoshop 2024, but even older versions like CC 2019 can handle this just fine.
A Practice Image
Choose something easy a person against a plain background is a good start. Avoid complex patterns for your first go.
Step-by-Step: How to Create a Layer Mask in Photoshop
Let’s roll up our sleeves.
Step 1: Open Your Image
Fire up Photoshop and load the image. You’ll see it as the “Background” layer. Right-click that layer and hit “Duplicate Layer” just in case.
Step 2: Add a New Layer
Click the New Layer icon at the bottom of the Layers panel. This gives you a clean slate to play with.
Step 3: Add a Layer Mask
Select the layer you want to mask. Then click the Add Layer Mask icon (it looks like a rectangle with a circle inside).
Boom you’ve just added a mask! Need a refresher? Here’s a quick Photoshop masking tutorial.
Step 4: Select the Brush Tool
Press B or click the Brush Tool. Choose a soft, round brush. Set the foreground color to black.
Remember this rule:
Black hides, white reveals.
Check out our Photoshop Brush Tool for beginners guide if you’re not familiar.
Step 5: Paint Black to Hide, White to Reveal
Now the fun begins. Start brushing over the parts you want to hide. Painted too much? Switch to white and bring it back.
It’s like sculpting with light and shadow.
Step 6: Refine Your Mask for a Natural Look
Zoom in and fine-tune the edges. Use different brush sizes and hardness levels. Want a softer blend? Lower the brush opacity.
Pro tip: Hold Shift and click the mask thumbnail to toggle it off and on. It helps spot mistakes.
Tips from My Own Workflow
Mistakes I Made When I Started
I used to use the Eraser Tool and lose hours of work. Once, I deleted part of a product photo and saved over the file. Gone forever.
Since switching to masks, I feel safer like having an “undo” that never expires.
What I Wish I Knew Earlier
Layer masks are not just for professionals. They’re for anyone who wants clean, flexible edits.
You don’t need to master everything overnight. Start small. Grow fast.
Common Layer Mask Problems (and Fixes)
Mask Not Working? Try This.
If the mask isn’t hiding anything, check:
- Is the mask selected?
- Are you painting with black?
- Is brush opacity set to 100%?
Sometimes it’s the small stuff that trips us up.
Accidentally Deleted the Mask? No Panic.
Just add it again. Click the layer, then hit the Add Layer Mask icon. You’re back in business.
Best Practices for Using Layer Masks Like a Pro
Non-Destructive Editing Is Your Best Friend
Never work on the original. Use layer masks and adjustment layers. Always.
Think of your edits like building blocks, not permanent ink.
Save Your Work in PSD Format
PSD files keep all your layers and masks intact. JPEG? Not so much.
So if you ever need to re-edit, PSD is your safety net.
Advanced Tricks to Level Up Your Skills
Using Gradients in Layer Masks
Instead of a brush, use the Gradient Tool to create smooth fades between images. This is how pros blend skies, lights, and textures seamlessly.
It’s like turning your brush into a magic wand. Try this gradient blending effect.
Masking with Selections and Channels
Want more precision? Use Selections (Ctrl+Click) or even Channels for intricate masking.
This is next-level stuff but incredibly powerful once you get comfortable.
Wrapping It All Up
Layer masks changed how I edit photos—period. They’re not just tools; they’re superpowers.
So don’t be afraid to try, fail, and try again. Every pro started as a newbie clicking around Photoshop late at night. If I can learn it, so can you.
FAQs
- What’s the shortcut to add a layer mask in Photoshop?
Click the layer, then press Alt + Click the Layer Mask icon to add a black mask instantly. - Can I use layer masks on text layers?
Yep! Just rasterize the text first. But keep a copy in case you want to edit the words later. - How do I disable a layer mask temporarily?
Shift + Click on the layer mask thumbnail. Easy on, easy off. - Can I have multiple masks on one layer?
You can have one layer mask and one vector mask per layer. Combine them for more control. - Are layer masks better than the Eraser Tool?
Absolutely. Masks are non-destructive. You can fix mistakes without starting over.