Learn the Photoshop Image Swap and Blend Technique in Just 14 Easy Steps

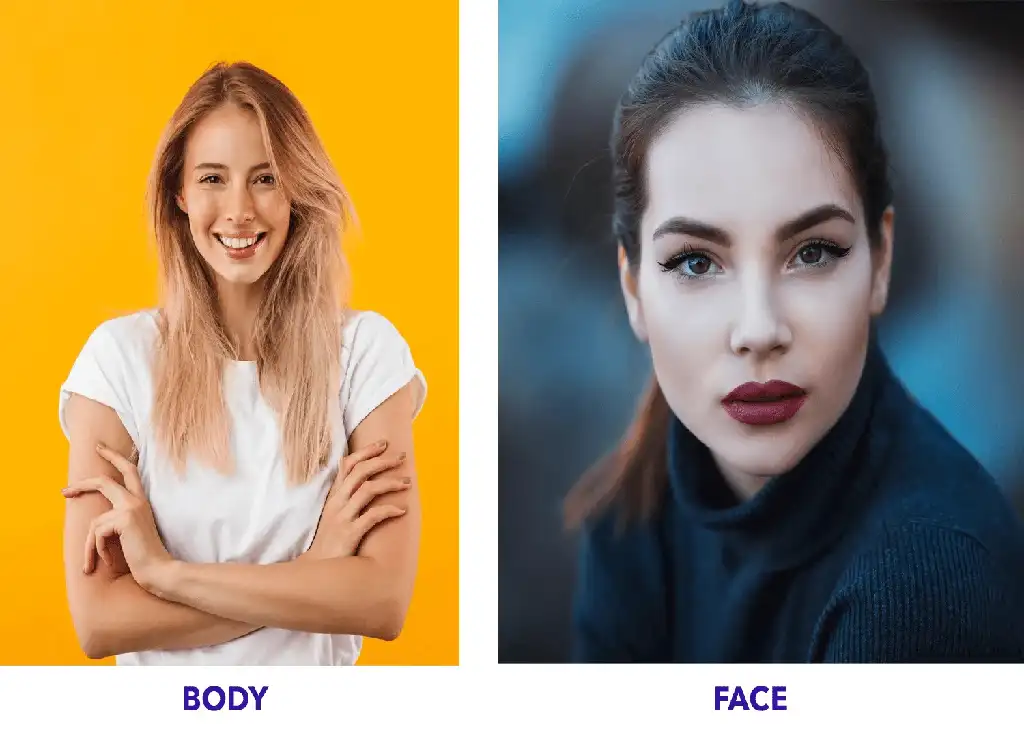
- Find two images to be swapped. E.g. – a face swapped to another photo. Try to get the angles of the faces in similar positions in Adobe Photoshop ( as much as possible).
- Select the Lasso Tool by selecting L or Lasso Tool in the toolbar 1
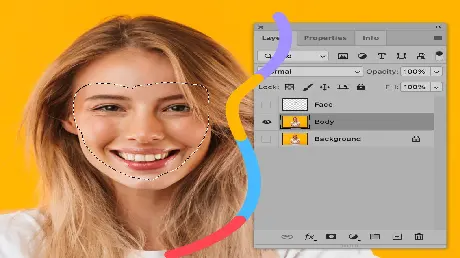
- Make a selection around the face to be used for swapping on another image

- In case of modifications, use the Alt and work the mouse to zoom in or the spacebar and mouse click to adjust the image according to convenience.
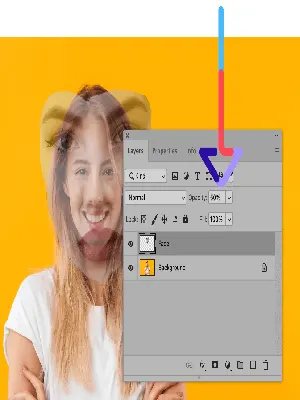
- It’s a wise step to name the cutout face e.g. FACE. Then press option V, which activates the Move Tool Click on the FACE drag it onto the Photo 2 document tab, and then release it on this layer. 2
- To size down the faces to a compatible level, the command Ctrl + T is used to click and drag the face to move the opacity level 3 to a reduced value where we are able to distinguish the layer below from the FACE.

- Try to take one particular point e.g. the inner corner of the eye, as a reference and use it as the pivot point. Hold Alt and click to move the pivot point. Now hold Shift Alt and the scaling is done accordingly to match the ratios of the photos. You can scale down, line up, drag, or tilt using the pivot option
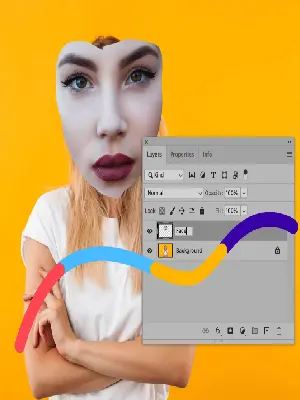
- Once the FACE is imported successfully on the second layer, increase the opacity to 100% and press enter.
- Next up is the command Ctrl + J for duplicating the second layer as the BODY (not the FACE).
- Face swap demands a similar skin tone, similar color, similar textures, and so on. Hold Ctrl and click on the second layer to make a selection around the face and then click IMAGE from the menu bar, followed by ADJUSTMENT LAYER, MATCH COLORS, SOURCE ( in this case, the second layer picture on the layers’ thumbnail), then Background as LAYER option. Use Ctrl D to deselect.
- There you go! Now, use the transparency option followed by Filter and Blur to enhance the liveliness of your photograph further.
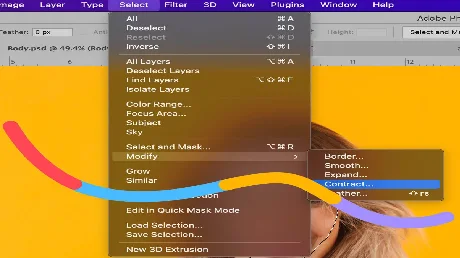
- Unlock the transparency pixels. Click on the thumbnails for the selection of FACE then select the duplicated BODY and then go to SELECT from the menu bar, followed by MODIFY, CONTRACT, and then select 5 or 10 pixels according to suitability on the contract selection and press ok.
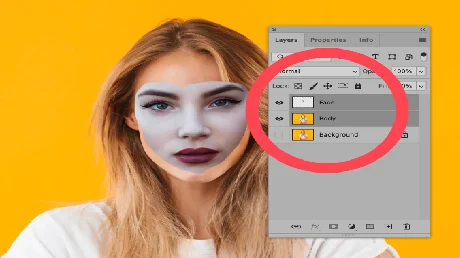

- Click the body layer to remove the face from the duplicated BODY using backspace. Put the FACE layer on top of the BODY layer and increase the opacity to 100%
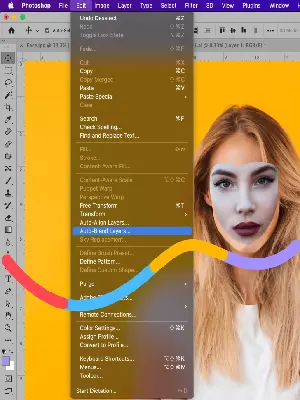
- Now choose EDIT in your Photoshop CC, then AUTO-BLEND LAYERS, which gives a panel for choosing the Blend Method. Choose PANORAMA, tick ‘Seamless tones and colors’, and click OK.
- 1 Notice every tool as keyboard shortcuts written beside them
- 2 The cutout face must be larger than the background layer photo to enable and enhance better editing possibilities. This helps to avoid distortions and pixelation problems
- 3 Quick trick: For quick changes, use the keyboard numbers to adjust (e.g. 1 =10%, 2=20%, 2 & 5 quickly pressed= 25%, 0 and 0 =0%, and so on…)