


Save the Planet Photoshop Tutorial: Easy Compositing Effect
Want to create a striking “Save the Planet” design in Photoshop? In this quick guide, I’ll show you how to combine two images, add textures, apply layer styles, and finish with glowing text. The steps are simple, beginner-friendly, and perfect for anyone learning photo manipulation.
Step 1: Create a New Document
-
Open Photoshop CS6 or CC.
-
Go to File > New and set the canvas size to 500×500 pixels.
-
Fill the background layer with solid black.
Step 2: Make the Base Shape
-
Select the Elliptical Marquee Tool.
-
Draw a circle on a new layer.
-
Fill the selection with white. This will act as your base planet shape.
Step 3: Add Grass and Ground Textures
Find free grass and ground textures online, or use your own images.
-
Copy the grass texture into your document.
-
Duplicate and rotate it until the circle looks covered.
-
Add the ground texture on top.
-
Use Select > Load Selection on the white circle layer. Invert it (Ctrl+Shift+I) and press Delete on each texture layer to trim edges.
Now both textures fit inside the circle.
Step 4: Apply the Spherize Effect
With your selection still active:
-
Go to Filter > Distort > Spherize.
-
Apply it to both textures for a 3D globe effect.
Use the Eraser Tool at 50% opacity to blend the textures together.
Step 5: Enhance with Burn Tool
Select the Burn Tool (Shadows, 30% exposure).
Gently darken areas of the grass layer to add depth.
Step 6: Add Layer Styles
-
Merge the textures with the white base.
-
Duplicate the merged layer (Ctrl+J).
-
Hide one copy for backup.
-
On the visible copy, set Fill = 0%.
-
Apply these styles:
-
Inner Shadow
-
Outer Glow
-
Inner Glow
-
This adds a glowing rim around the planet.
Step 7: Create the Glow
-
Merge styled layers into one.
-
Use the Lasso Tool with 20px feather to make a soft selection.
-
Go to Image > Adjustments > Hue/Saturation to change glow color.
Step 8: Add Shadow
-
Reveal the hidden duplicate layer.
-
Ctrl+Click its thumbnail to select.
-
Fill with black, deselect, then apply Gaussian Blur.
-
Use Free Transform to reshape the shadow.
Now you’ve got a realistic planet with lighting.
Step 9: Add the Text
-
Select the Type Tool.
-
Write “Save the Planet!”
-
Use a bold font like Arial Black (or Futura if you have it).
-
Apply Gradient Overlay for a modern look.
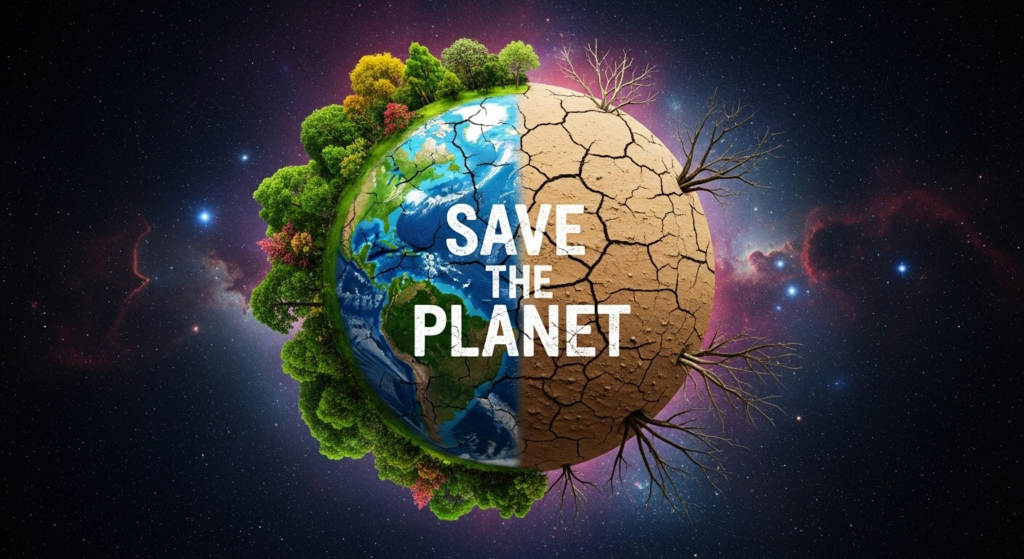
Final Result
You now have a glowing “Save the Planet” globe design in Photoshop.
If you want to take your editing skills further, try:
-
Clipping Path Services for precise cutouts.
-
Background Removal Services for eCommerce product photos.
-
Photo Retouching Services to polish your final designs.
Need professional help? Check out our Ecommerce Image Editing Services or request a Free Trial.


