


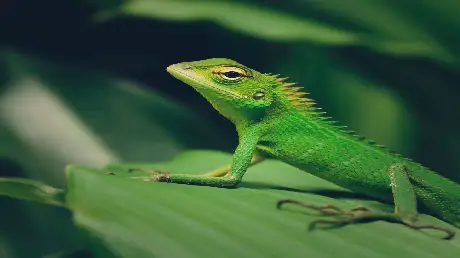
There is something fascinating about macro photography as it allows us to see the intricate details of our surroundings. It allows us to capture tiny subjects up close, revealing a whole new perspective that often goes unnoticed.
While it may seem challenging at first, with the right macro photography tips, beginners can dive into the world of macro photography ideas and capture stunning images.
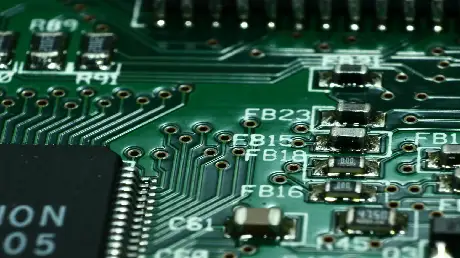
Engage macro photo mode on a digicam and the system adjusts the lens elements to re-arrange them into an array that best suits close focusing. Quite a feat, as even simple camera lenses have a surprising number of lens elements to juggle.
Unfortunately, by engaging macro mode with most cameras, you lose control of both the lens aperture (f-stop) and shutter speed.
Being curious about how digital cameras can capture macro so easily, we investigated the subject. Here are our tips for macro photography beginners, gained by chatting with the tech specialist at a major camera manufacturer.
Why is Macro Photography So Important?
To gain optimum image sharpness and depth of field, you need to use the smallest lens aperture regardless of the camera. Using a small lens aperture means you need more light, so you must extend the exposure time to make a correctly exposed photograph.
So you can’t reduce the lens aperture to a smaller, more favorable setting, nor can you slow the shutter speed to permit a smaller lens aperture.
For the keen macro makers, we’ve discovered a few digicams that allow the use of macro mode and lens and shutter speed customization.
i) With DSLR cameras, the macro operation is somewhat different. Select a macro and you initiate a different series of events. With any lens fixed to the camera, engaging macro mode on the camera commands the lens aperture to close to its minimum, extending the depth of field and allowing you to take a closer look at the subject.
ii) Shooting macro with a compact digicam is easy. Still, you have to forgo a fair bit of control and you need to understand that the demands of an amateur as far as resolution and color quality are less stringent than the pros.
iii) The pro approach would be to use a purpose-built macro lens on a DSLR. A dedicated macro lens is costly, but they are optimized to operate closer to normal distances.
iv) With macro lenses, you are unlikely to experience problems such as color fringing and optical distortion. Many macro lenses also compensate for the additional exposure necessary when racking out the lens to distances very different from those used in normal photography.
What Are the Most Important Steps for Taking Good Macro Photos?
![]()
To capture stunning macro photos, there are several essential steps you should consider:
Step 01: Familiarize Yourself with Macro Photography Terminology
To master macro photography, you need to grasp the essential terms and concepts that define this genre. Learn about magnification, working distance, focal length, and aperture, as they affect the quality and outcome of your macro shots.
Step 02: Select the Appropriate Camera and Lens Equipment
To take great macro photos, select a suitable camera and lens pair. A camera with manual settings and a high-quality camera sensor will help you capture fine details. Moreover, a macro lens or extension tube will let you get closer to your subject and preserve image quality.
Step 03: Aim for Sufficient Depth of Field
For close-up subjects, the focus is very important. You want your subject to be clear and the background to be soft. To do this, use a higher f-number to make the depth of field larger. Try different f-numbers to see how they affect the sharpness and the bokeh of your image.
Step 04: Adjust Camera and Flash Settings for Optimal Lighting
For close up photography, lighting is essential. You can use natural light to create stunning effects, but sometimes you must add some artificial light sources.
A macro ring flash, diffuser, or reflector can help you manipulate and improve the lighting on your subject. Try different flash power and camera settings to get a well-lit photo with accurate colors.
Step 05: Prioritize Focus on the Key Subject
To capture the finest details in macro photography, you need to focus precisely. Choose the most essential part of your subject, such as the insect’s eyes or the flower’s stamen, and make sure it is crystal clear. Use manual focus or focus stacking methods to achieve optimal focus throughout the subject.
Step 06: Study the Behaviors of Your Subjects
A good way to improve your macro photography skills is to study the subjects you want to capture, especially insects or food photography. By knowing their behaviors, movements, and habitats, you can predict their actions and be ready for the best shots.
Step 07: Experiment and Practice
To become an expert macro photographer, you must experiment and practice a lot to improve your macro photography skills. You can create stunning and original photos by trying different lighting setups, angles, and compositions.
Challenge yourself to see things from new perspectives, use unconventional compositions, and polish your techniques through frequent practice.
What Size Lens Is Suitable for Macro Photography?
For typical macro shots, a 50mm lens is often a popular choice. These lenses, commonly called “nifty fifty,” offer a versatile focal length that can be used for a wide range of photography genres, including macro.
They provide a moderate level of magnification and are suitable for capturing subjects such as flowers, small objects, or details.
But please note that 50mm macro lenses have certain limitations. They usually feature a 1:2 magnification ratio, which means the subject appears half its life size on the camera’s sensor.
There may need to be more than this level of magnification for capturing extremely small details or subjects requiring a higher magnification level.
How Many Megapixels Are Good for Macro Photography?
For macro photography, it is advisable to use a camera with at least 20 MP, as this will give you enough resolution to show the fine textures and patterns of your subjects. But, megapixels are not the only factor that affects the quality of your macro photos.
You also need a good macro lens, a sturdy tripod, adequate lighting, and a proper technique to get the best results.
Tips for Macro Photography Beginners: Final Words
As a beginner in macro photography, it’s essential to familiarize yourself with the terminology and concepts specific to this genre. Choosing the appropriate camera and lens equipment, understanding the depth of field, mastering lighting techniques, and prioritizing precise focus are key factors to consider.
Also, studying the behaviors of your subjects and continuously experimenting and practicing will help you improve your skills over time.
Remember, macro photography is a journey of exploration and discovery, where every image captures a world within a world. Embrace this macro photography tutorial, stay curious, and let your creativity flourish as you embark on your macro photography adventure.


