


Whether it’s photographing insects, flowers, or everyday objects, true macro photography offers endless creative possibilities to explore and showcase the beauty of the miniature world.
A macro photographer can achieve stunning results by employing specific equipment, composition techniques, and camera settings and unveiling the extraordinary in the ordinary.
The purpose of this article is to teach you more about macro photography. Stay focused on improving your photography skills.
What is Macro Photography: The Basic
To begin, a note of explanation for those with a basic understanding of photo history and technology. The term macro refers to the capture of an insect or whatever resulted in an image on the 35mm film frame (24x36mm) ranging from 1:10 to 1:1 the size of the original subject.
For its part, the term micro referred to a film image larger than 1:1 life size; micro photography could easily give you a 35mm film image of an ant larger than the original ant.
A CCD or CMOS sensor can be as tiny as 3x4mm, so any definition term applied in the film days is now obsolete. Macro photography can still be achieved successfully and satisfactorily if you follow the rules.
Normal photography uses a camera to record a sharp image by adjusting the lens-to-sensor distance to attain precise focus. Like people, the lens-to-sensor distance must be increased for distant subjects at infinity, such as landscapes, to capture sharp images of closer subjects.
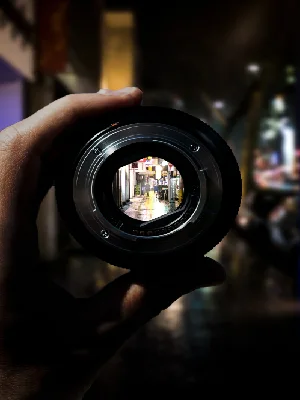
Macro photography involves positioning the lens significantly closer still, further out than normal photography, to capture a sharp image of a tiny object.
As far as my investigations go, almost all compact digicams and most dSLRs have a selectable macro mode. In some cameras, you can select macro mode via external control, while in others, you must access the viewfinder menu.
Think about it: no extra lenses, macro tubes, bellows, or special lenses. There are so many wonderful places to shoot macro in this world!
Guidelines for Taking Macro Photography
Macro photography is a fascinating genre of photography that allows you to capture the details and beauty of small subjects.
Whether you are interested in photographing insects, plants, nature, portraits, food, or products, macro photography can offer you endless creative possibilities.
Here are some photography tips for taking stunning macro photos:
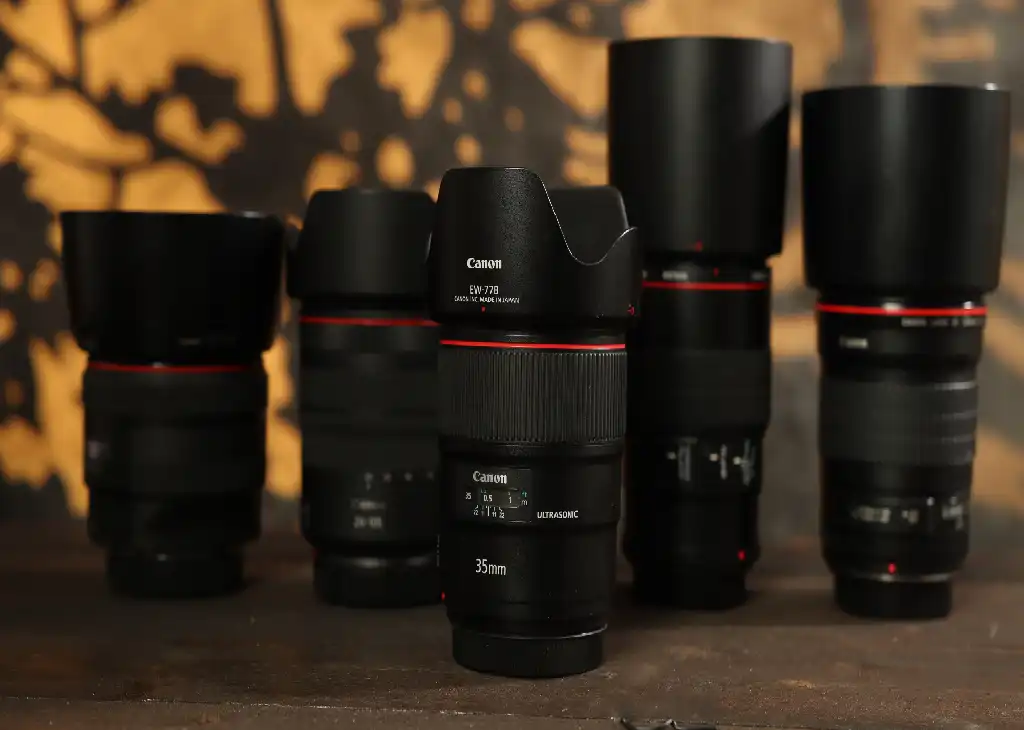
No 01: Equipment
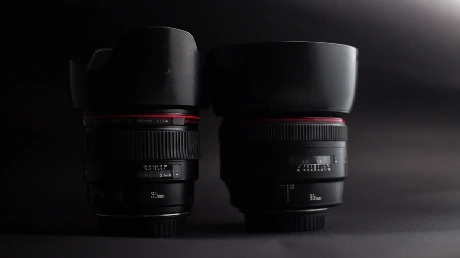
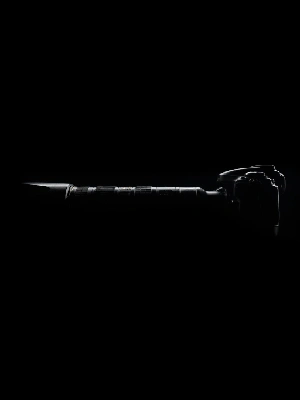
The most important piece of equipment for macro photography is a macro lens, which can provide super-sharp focus and flexibility. But, if you don’t have a macro lens, you can also use extension tubes or diopters as affordable alternatives. They can attach to your regular lens and increase their magnification power.
Using a tripod or stable support can also help you avoid camera shakes and achieve steady images when taking a macro photograph.
No 02: Composition and Lighting
When composing your macro shot, you should plan ahead and pay attention to details. You should experiment with different angles and backgrounds to enhance the image. You can also customize the background by adding colors, textures, or patterns to add depth and interest.
Lighting is also crucial for a macro photo, as it can affect the mood and quality of your image. You should control the lighting conditions to create better results. Natural or artificial light can be used. You can also consider using flash to compensate for restricted light.
No 03: Depth of Field and Focus
One of the challenges of macro photography is the depth of field, which refers to how much of your image is in focus. In macro photography, depth of field is usually very shallow, meaning that only a small part of your subject is in focus.
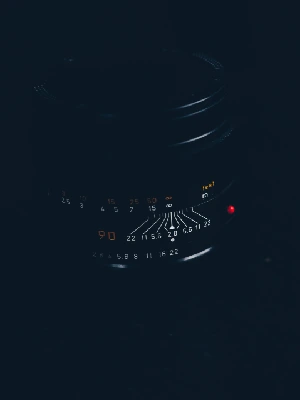
You can adjust the depth of field by changing the aperture settings on your camera. The aperture is measured in f-stops, and it controls how much light enters your lens. Generally, smaller aperture settings (such as f/16) increase the depth of field, while larger aperture settings (such as f/2.8) decrease it.
But smaller aperture settings also require more light, so you may need to use flash or longer shutter speeds. Focus is another important aspect of macro photography, as it determines what part of your subject is sharp and clear.
In macro photography, manual focus is often preferred over autofocus, giving you more control and precision. You can use manual focus to select your subject’s most interesting or important part and make it stand out.
You can also utilize focus bracketing if your camera has this feature. Focus bracketing allows you to take multiple shots with different focus points and combine them into one image with a larger depth of field.
No 04: Subject Selection and Environment
The choice of subject is up to you and your personal preference, but some common subjects work well for macro photography. For example, insects are popular subjects for macro photography, as they have intricate details and patterns that are not visible to the naked eye.
Plants are also great macro subjects because they have various shapes, colors, and textures that can create interesting images. In general, nature offers many opportunities for macro photography, such as water droplets, feathers, snowflakes, or shells.
Macro photography can also enhance artistic portraits, as you can capture the details of the eyes, lips, or skin. Food and products are also suitable subjects for macro photography, as they can showcase their quality and appeal.
When choosing your subject, you should consider the environment and creative angles to enhance the image. You should pay attention to your subject’s background, foreground, and surroundings and how they affect the composition and lighting of your image.
You should also try different perspectives and viewpoints to capture your subject from a new angle.
No 05: Practice and Creativity
Practicing and experimenting with different techniques is the best way to improve your macro photography skills. You should shoot a lot and try different settings, equipment, subjects, compositions, lighting conditions, etc.
You should also learn from other photographers by studying their work and getting feedback on yours. When taking macro photos, you should also explore your creativity and think outside the box. You can capture everyday objects from a new perspective and reveal their hidden beauty and details.
How to Take Macro Photos?
Macro photography is a fascinating genre that allows you to explore the hidden details of small subjects. Whether you want to capture the beauty of a flower, the intricacy of an insect, or the texture of a coin, you will need some basic equipment and techniques to achieve stunning results. Here are some steps to guide you on how to take macro photos.
Set Up the Equipment
i) Attach a macro lens or use extension tubes or diopters. A macro lens is a specialized lens that can focus very close to the subject and produce high magnification ratios.
Extension tubes are hollow tubes that fit between your camera and lens, increasing the distance between them and allowing you to focus closer. Diopters are magnifying filters that screw onto the front of your lens, enlarging the subject.
ii) Mount the camera on a stable tripod or support. Macro photography requires a steady camera to avoid blurry images due to camera shake or subject movement.
A tripod is ideal for keeping your camera stable and allowing you to adjust the composition and focus. You can also use other supports, such as bean bags, clamps, or gorilla pods.
Select the Subject
i) Look for small objects or subjects that can be captured up close. Macro photography can reveal amazing details of everyday objects or living things normally overlooked. You can find interesting subjects in your backyard, kitchen, or local park. Some common macro subjects are flowers, insects, leaves, feathers, water droplets, jewelry, etc.
ii) Consider factors like size, shape, color, and texture. When choosing a subject for macro photography, think about what makes it appealing and how you can emphasize its features.
For example, you can look for subjects with contrasting colors, interesting shapes, or intricate patterns. You can also look for subjects with different textures, such as smooth, rough, shiny, or fuzzy.
Compose the Shot
i) Plan the composition and consider the background and lighting conditions. Macro photography is not just about getting close to the subject. It is also about creating a pleasing composition that draws attention to the subject and eliminates distractions.
You can use some basic composition rules such as the rule of thirds, leading lines, or negative space, to create balance and harmony in your image. You should also pay attention to the background and lighting of your shot.
The background should be simple and uncluttered, preferably with a contrasting color or tone to the subject. The lighting should be soft and even, avoiding harsh shadows or highlights. You can use natural light, artificial light, or a combination of both to illuminate your subject.
ii) Experiment with different angles and perspectives to add interest. One of the advantages of macro photography is that you can explore different viewpoints and angles that are impossible with normal photography.
Try shooting from above, below, behind, or in front of your subject to create different effects and moods. You can also try shooting from different distances and zoom levels to change the magnification and depth of field.
Adjust Camera Settings
i) Set the camera to manual mode for better control. Macro photography requires precise control over the exposure and focus of your image. Manual mode allows you to adjust the aperture, shutter speed, and ISO independently according to your needs and preferences.
ii) Adjust the aperture to control the depth of field. Depth of field is the area of sharpness in front of and behind your subject. In macro photography, the depth of field is very shallow due to the high magnification and close focusing distance.
This means only part of your subject will be in focus while the rest will be blurred. You can use this creatively to isolate your subject from the background or to highlight a specific feature.
To increase the depth of field, use a smaller aperture (higher f-number), such as f/11 or f/16. To decrease the depth of field, use a larger aperture (lower f-number), such as f/2.8 or f/4.
iii) Select an appropriate ISO value for the lighting conditions. ISO is the sensitivity of your camera sensor to light. In macro photography, you may need to use a higher ISO value (such as 800 or 1600) if you shoot in low light conditions or want to use a faster shutter speed to freeze motion.
But, higher ISO values also introduce more noise (graininess) in your image, reducing image quality and detail. To avoid noise, use a lower ISO value (such as 100 or 200) if you have enough light or use a tripod.
iv) Use manual focus for precise control. Autofocus may not work well in macro photography due to the shallow depth of field and the small size of the subject. Manual focus allows you to adjust the focus manually by turning the focus ring on your lens or by using the focus peaking or magnification features on your camera.
You can also use focus stacking, which involves taking several shots with different focus points and combining them in post-processing to create an enlarged image.
Focus and Capture
i) Take test shots to fine-tune the focus and composition. Before you take the final shot, taking some test shots is a good idea to check your image’s exposure, focus, and composition.
You can use the histogram, highlight alert, or zoom function on your camera to evaluate your image and make any necessary adjustments.
ii) Use the camera’s autofocus or manual focus to achieve desired sharpness. Depending on your preference and situation, you can use either autofocus or manual focus to capture your subject. If you are using autofocus, select the right mode and point to your subject.
You can use single-point autofocus, which allows you to choose one focus point on your subject, or continuous autofocus, which tracks your subject as it moves. If you are using manual focus, turn off the autofocus function on your lens or camera and use the focus ring or the focus peaking or magnification features to achieve sharp focus.
iii) Take multiple shots with slight variations to increase the chances of capturing the perfect image. Macro photography can be challenging and unpredictable due to subject movement, camera shake, wind, or changing light.
To increase your chances of getting a sharp and well-exposed image, taking multiple shots with slight variations in focus, exposure, or composition is recommended.
You can also use bracketing, which involves taking several shots with different settings (such as aperture, shutter speed, or exposure compensation) and then choosing the best one or blending them in post-processing.
How to Edit Macro Photography Images?
A challenge of macro photography is to edit the images to bring out the best details and colors. Here are some steps you can follow to edit your macro photos effectively.
1. Import and Organize
The first step is to transfer the macro photos to your computer or editing software. You can use a card reader or a USB cable to connect your camera to your computer. Then, create a folder or catalog to organize your images. You can use a naming system or a rating system to sort your images by date, subject, or quality.
2. Adjust Exposure and White Balance
The next step is to fine-tune the exposure to optimize the brightness and contrast of your image. You can use the histogram or the exposure slider to adjust the exposure level.
You can also use the highlights, shadows, whites, and black sliders to adjust the tonal range of your image. Then, adjust the white balance to correct any color casts affecting your image. You can use the eyedropper tool or the temperature and tint sliders to adjust the white balance.
3. Enhance Sharpness and Details
The third step is to use sharpening tools or filters to enhance the overall sharpness of your image. You can use the sharpening slider or the detail panel to adjust the amount, radius, detail, and masking of sharpening.
You can also apply selective sharpening to emphasize important details in your image. You can use the adjustment brush or the radial filter to sharpen specific areas of your image.
4. Adjust Colors and Saturation
The fourth step is to use color correction tools to adjust the overall color balance of your image. You can use the hue, saturation, and luminance (HSL) panel or the color mixer panel to adjust the colors individually or globally.
You can also enhance the saturation to make the colors more vibrant if desired. You can use the saturation slider or the vibrance slider to adjust the saturation level.
5. Remove Imperfections
The fifth step is to use spot healing or cloning tools to remove any distracting elements from your image. You can use the spot healing brush or the healing brush tool to remove small blemishes or imperfections.
You can also use the clone stamp tool or the content-aware fill tool to remove larger objects or areas. Additionally, you can clean up any dust or sensor spots using the appropriate tools.
6. Apply Creative Effects
The final step is experimenting with different filters or presets to add creative effects to your image. You can use the filter gallery or the effects panel to apply filters such as blur, noise, artistic, sketch, etc.
You can also use presets such as black and white, sepia, vintage, etc to change the mood of your image.
Conclusion
Macro photography offers a unique perspective on the world around us, unveiling the extraordinary in the ordinary. Through the careful selection of subjects, attention to composition, and precise control over camera settings, photographers can capture intricate details and create visually captivating images.
Whether you’re using a dedicated macro lens or affordable alternatives like extension tubes or diopters, the key is to experiment, practice, and let your creativity flourish.
So grab your camera, venture into the realm of macro photography, and unlock the beauty of the small and often overlooked aspects of our world.


