


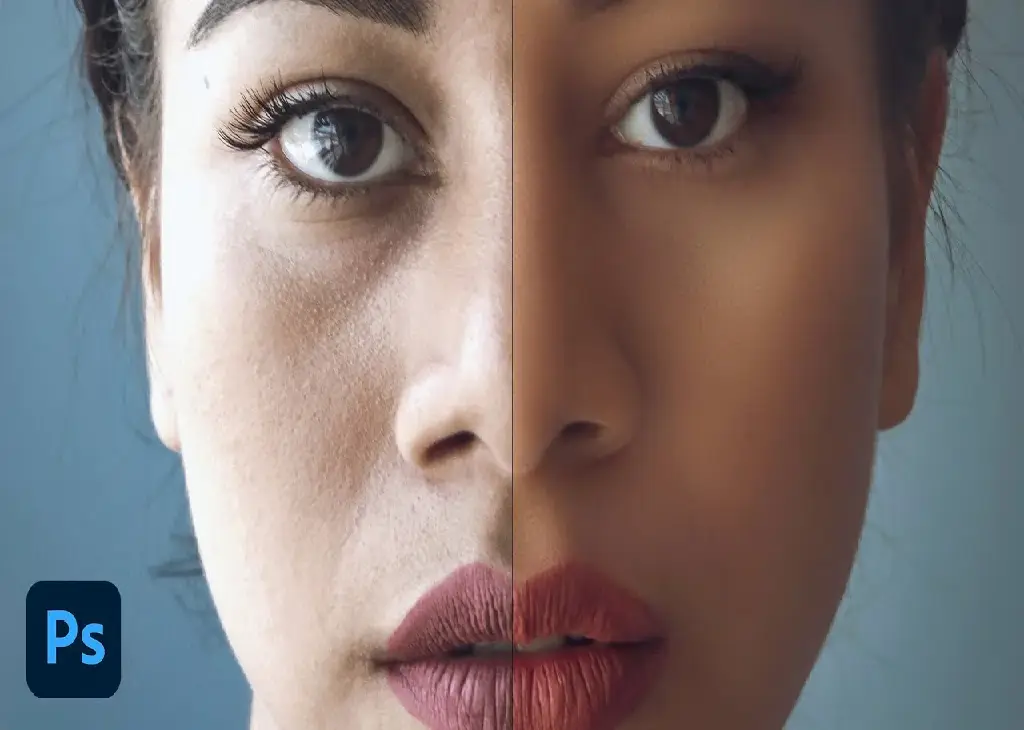
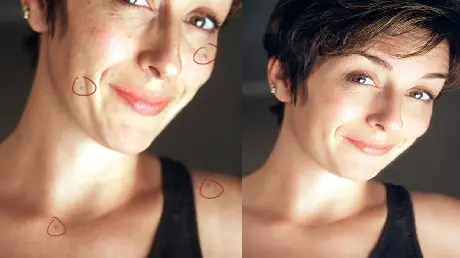
In portrait photography and image editing, achieving a flawless and natural look is paramount. While retaining the unique features and essence of a subject is important, a touch of retouching can make a world of difference in the final result.
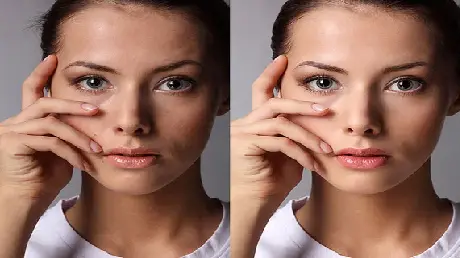
In this tutorial, we’ll walk you through a super fast and easy facial retouching technique that can greatly enhance the quality of your portrait images. By following these steps, you’ll be able to reduce artifacts, balance colors, and achieve a smooth and polished look while keeping your original image intact. Let’s get started.
Here’s the Step-By-Step Tutorial for Super Fast and Easy Facial Retouching
If you’re looking for a rapid yet effective method to enhance facial features, reduce imperfections, and achieve an overall polished appearance, you’re in the right place. Now, let’s take a look at the step-by-step Photoshop tutorial.
Step 1: Fixing Blue Channel Artifacts
Duplicate the Background Layer:
- Open your image in Adobe Photoshop or your preferred photo editing software.
- Duplicate the background layer by right-clicking on it and selecting “Duplicate Layer” in Photoshop Cs6 to create a new layer.
Apply Gaussian Blur to the Duplicate Layer:
- Go to Filter > Blur > Gaussian Blur with the duplicated layer selected.
- Enter a radius of 10 pixels and click OK.
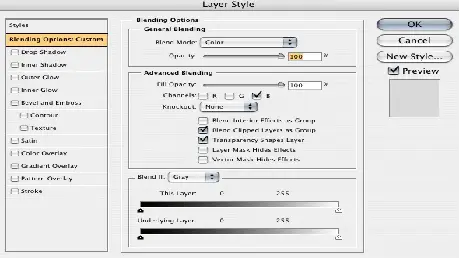
Adjust Blending Mode and Channel Isolation:
- Change the blending mode of the duplicated layer to “Color.”
- Double-click on the layer to access blending options.
- Under Advanced Blending, uncheck the R (red) and G (green) channels, focusing only on the blue channel.
Step 2: Balancing Colors with Curves
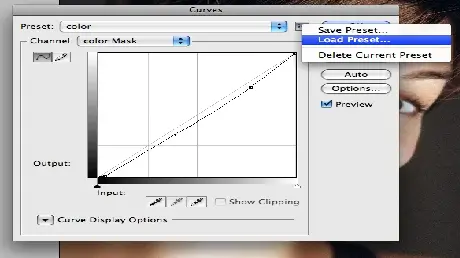
Download the Curve Preset:
- Download the provided curve preset to your computer.
Apply Curves Adjustment Layer:
- The topmost layer on the layers palette should be Curves Adjustment.
- Click the preset control and select “Load Preset,” then load the downloaded file.
Step 3: Spot Healing and Blemish Removal
Use the Healing Brush Tool:
- The background copy should be placed on a new blank layer.
- Select the Spot Healing Brush Tool (J) and ensure “Sample All Layers” is checked.
- Paint over major freckles or skin blemishes to remove them.
Step 4: Smooth Skin Tone
Duplicate and Merge Layers:
- Select the three face layers below the Curve layer and duplicate them.
- Merge the duplicate layers by pressing Command+E (Ctrl+E on Windows).
Create a Skin Selection:
- Use the Polygonal Lasso Tool to roughly select the skin texture area.
- De-select non-skin areas by holding Alt (Option on Mac) while clicking to deselect.
Delete Selected Pixels:
- Invert the selection by pressing Shift+Command+I (Shift+Ctrl+I on Windows).
- Press Delete to delete the selected pixels on the duplicated layer.
Step 5: Applying Gaussian Blur and Clipping Mask
Apply Gaussian Blur:
- Go to Filter > Blur > Gaussian Blur and enter a radius of 20 pixels.
- Set the opacity of the blurred layer to 75%.
Duplicate and Merge Layers Again:
- Select and duplicate the same bottom three layers as before.
- Merge the duplicate layers using Command+E (Ctrl+E on Windows).
Create a Clipping Mask:
- Place the merged layer above the blurred layer.
- Select the merged layer and press Command+Alt+G (Ctrl+Alt+G on Windows) to create a clipping mask.
Step 6: Enhancing Details with High Pass Filter
Apply High Pass Filter:
- You can create a high pass filter by selecting the clipped layer and choosing Filter > Other > High Pass.
- Enter a radius of 4 pixels.
Adjust Blending Mode and Opacity:
- Change the blending mode of the clipped layer to “Linear Light.”
- Set the opacity of the clipped layer to 40%.
Conclusion
By following these six easy steps, you’ve significantly improved your image retouching. You’ve corrected blue channel artifacts, balanced colors, smoothed the skin, and enhanced important details.
Remember to always work on duplicate layers and utilize non-destructive techniques for easy adjustments. With this technique, you can quickly achieve a professional photo retouching look without compromising the integrity of your original image.


